August 18, 2023
Back to Reports
August 18, 2023
Service History Report
In this report, you can find details of all Sites performed, pieces of equipment, consumables used, operators, etc.
In this report, you are able to
- Find your records by using the search text or filter
- Export your data
- Set your PDF field configuration
- Exception Report
- Organize your columns to view them in your preferred order
- View your log
- Create a manual record
- Edit record
- Identify the time zone on the Service History Report
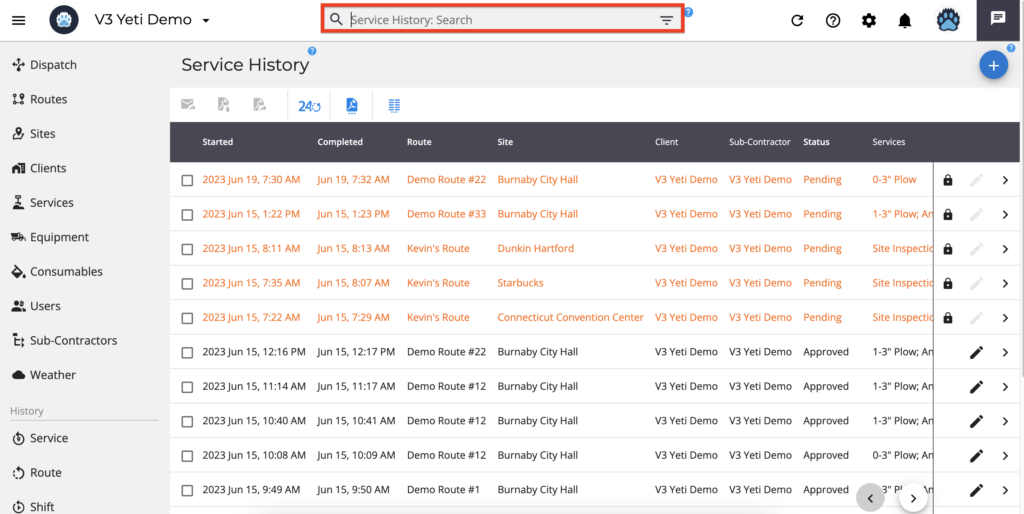
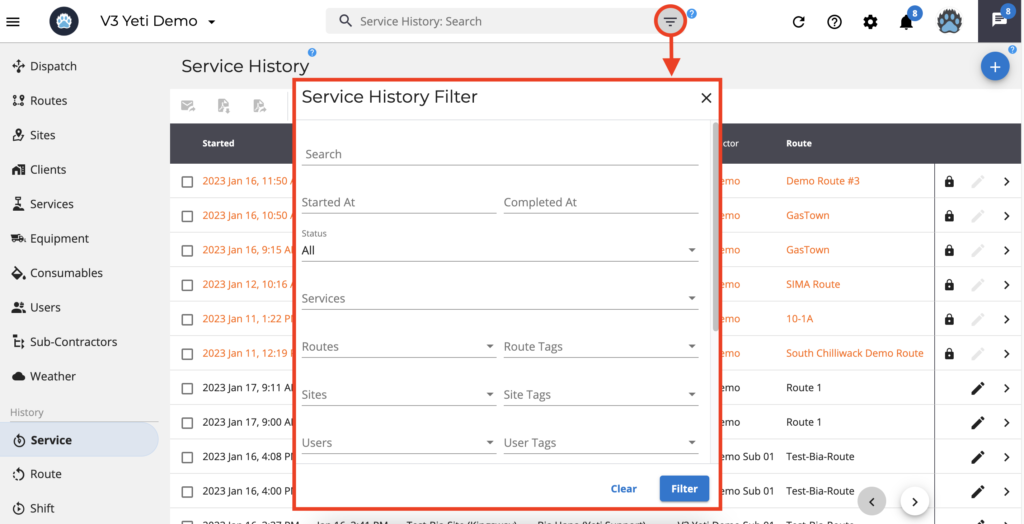
Find your records by using the search text or filter
You can search for your records by typing in the search box or by clicking the filter button and selecting the data you want.
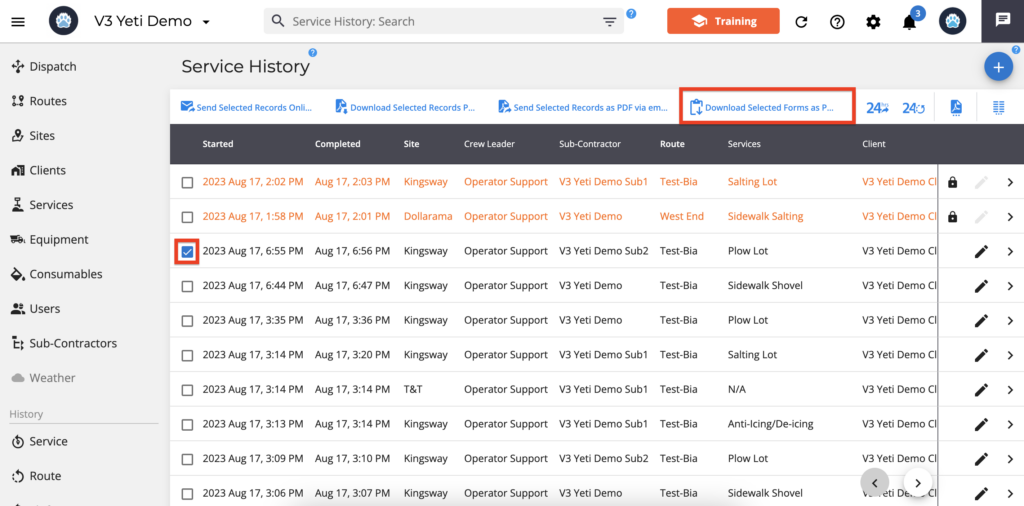
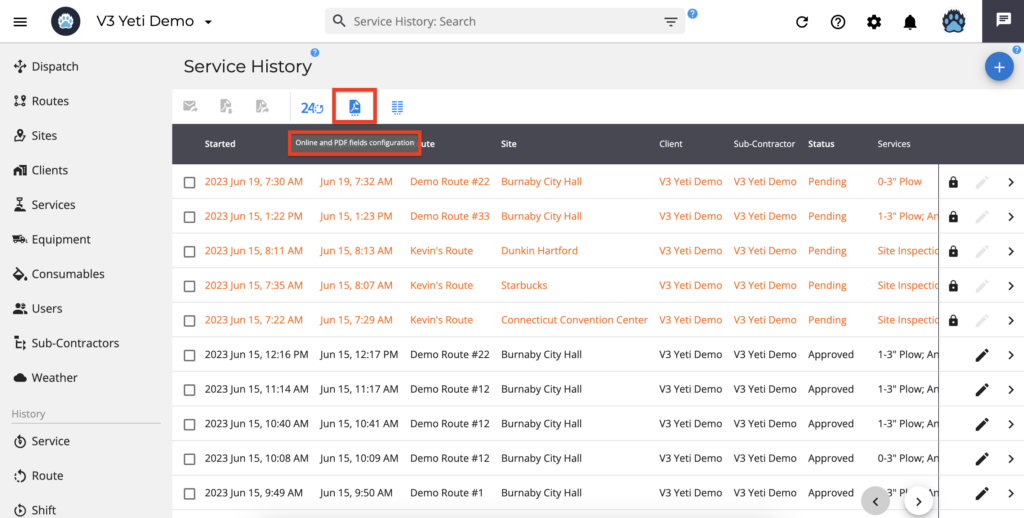
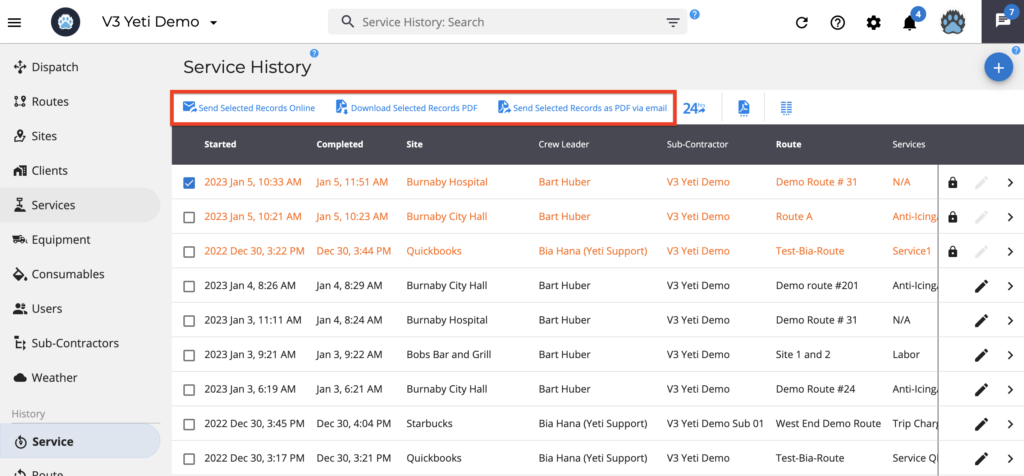
Export your data
Exporting records can result in three types of outputs: Online Report (which sends a link via email), Download the PDF and send PDF via email (which sends a PDF download link).
Select the records you want to export. You can, however, export multiple records using the filter, as explained above. Using it, you can export your data based on specific information, such as site, route, or user.
- Online Report – This option will generate a link that anyone can access. All records requested in the export will be displayed on this page. You can order directly from the browser if you want to print or generate a pdf. Unlike other methods, Online Report is the only way to export maps and their elements such as geofences and breadcrumbs operators.
- Download PDF – Choosing this option will download a PDF version of the report to your device. One PDF file will be provided for each record in a compressed file that you can open. In this system, PDF files are downloaded in two different ways: synchronously and asynchronously. When selecting up to 10 records, the system uses synchronously, otherwise, it uses asynchronously.
- Send PDF via email – The process is the same as above, but instead of downloading, a link will be emailed. The recipient will receive a link to download the PDF file or a compressed file that contains all PDFs.
- Pre-Season Inspection PDF – Choosing this option will download a PDF version of the report to your device. One PDF file will be provided for each record in a compressed file that you can open. In this system, PDF files are downloaded in two different ways: synchronously and asynchronously. When selecting up to 10 records, the system uses synchronously, otherwise, it uses asynchronously.
The synchronous export means that you will be asked to wait for the export and then a popup window will appear with a button to click and download.
The asynchronous process allows the system to process multiple files simultaneously without affecting the application’s performance. In this case, you can browse between applications without waiting. No matter where you are in the application, once the export is ready, a pop-up will appear with a download button, and you will also receive a notification if you had to leave and return later.

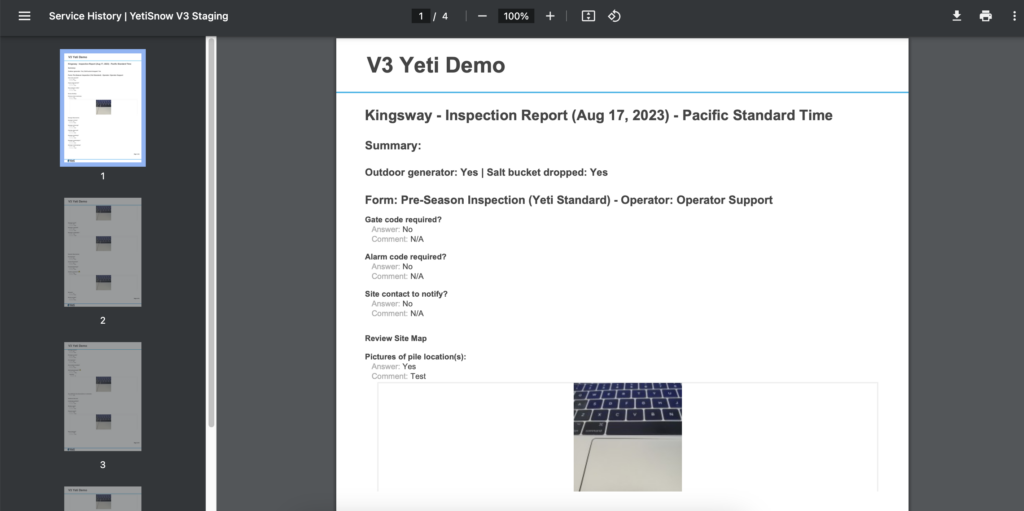
The “Pre-Season Inspection Form” can be downloaded by selecting a record or using the filter.
The PDF will show “No inspection forms found” if the record does not have any “Pre-Season Inspection Form”.
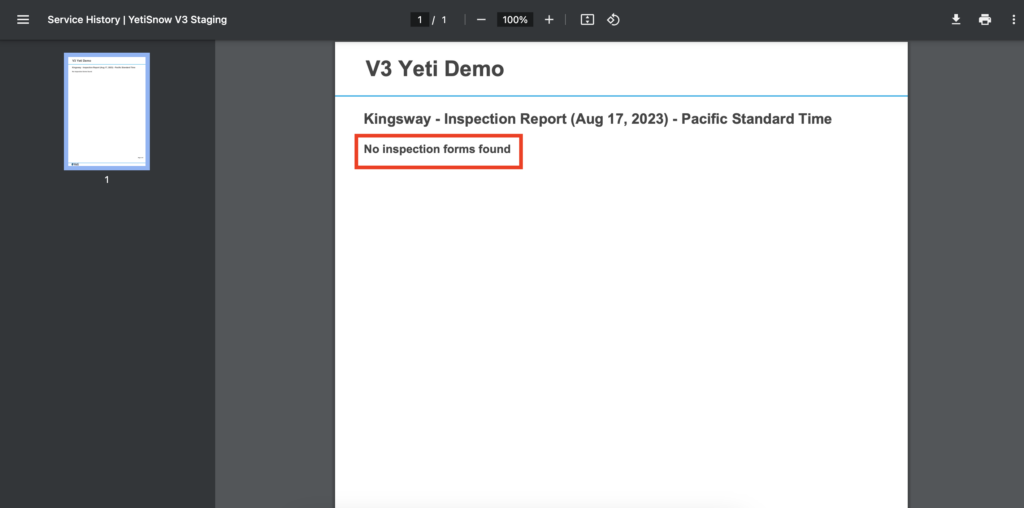
If the record contains the Inspection Form, you will be able to see the details of the Inspection Form filled out by the Operator.
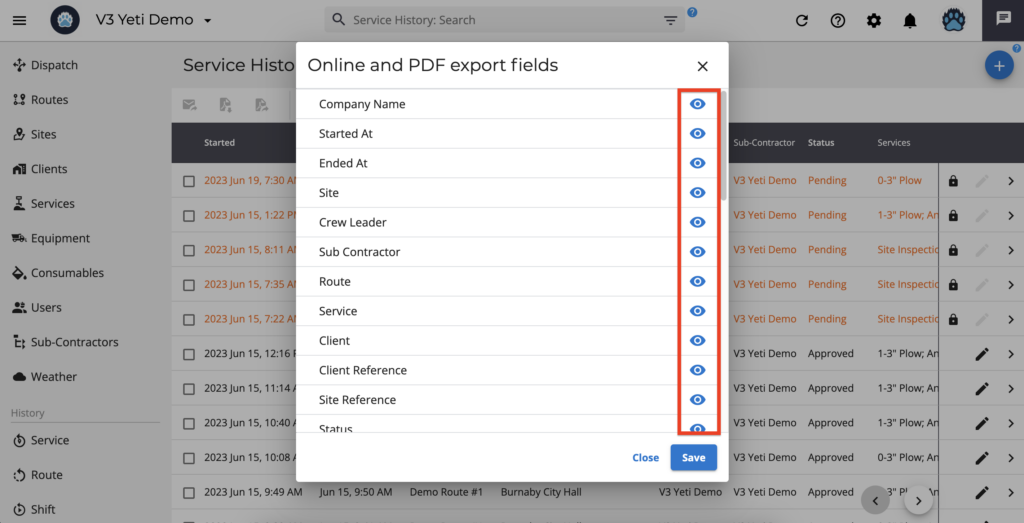
Set your PDF field configuration
The fields you wish to display in your PDF report can be enabled or disabled. Using these options also works if you have set your Site to receive the report based on the Service History Report Template or a Batch report.
Exception Report
The exception report shows all Sites that have not been performed in the last 24 hours. Using this report, you can manage your Sites and the team who was responsible for performing the Site.
An automatic method of sending the same report is to use the option “Daily Exception Report”. A daily report of sites not visited will be sent to you at the time you inform.
Click on the option “Daily Exception report” and type one or more emails.
To stop sending the report, set the time to “empty” or remove the email address.

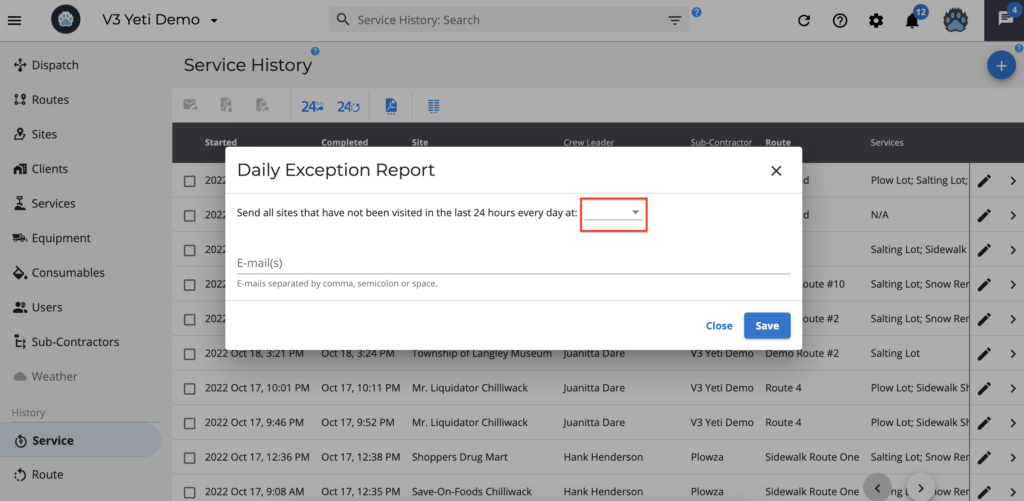
Important information about the Daily Exception Report:
- When the company does not have an address, the report cannot be delivered because the system cannot find the time zone.
- This report cannot be sent to companies without sites.
- The report will no longer be sent out if you archive all Sites.
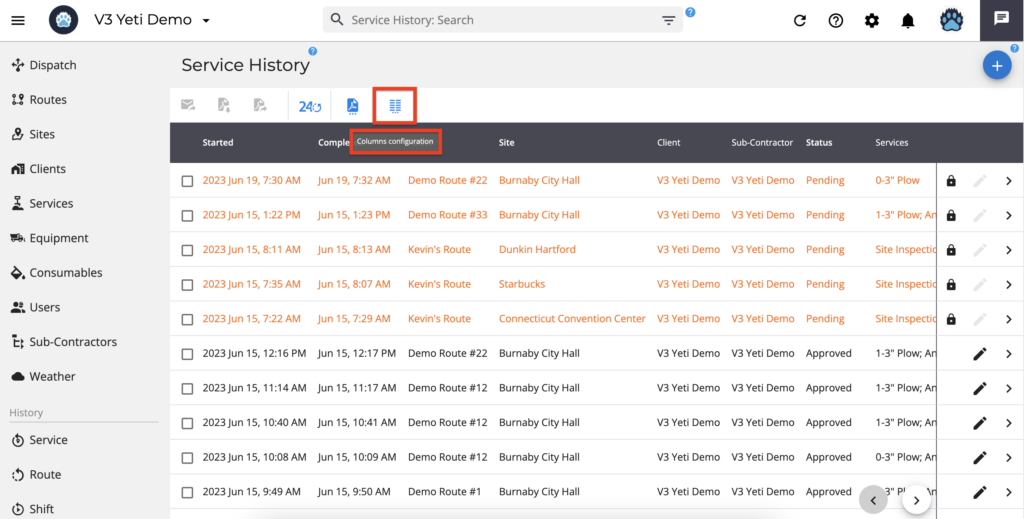
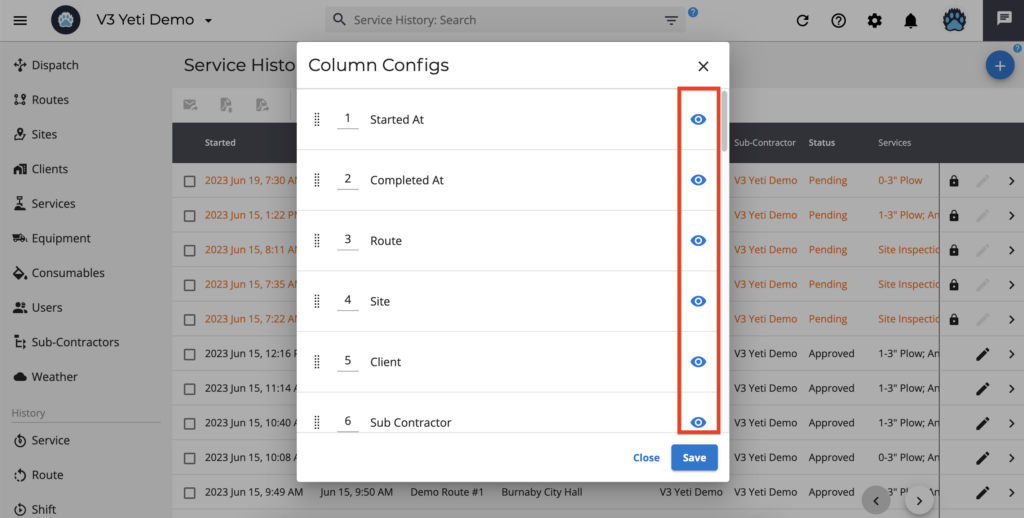
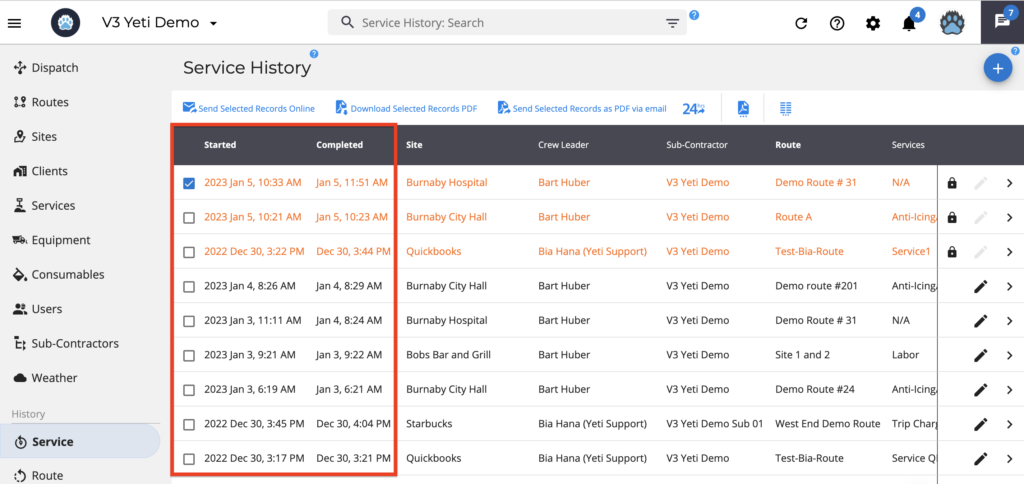
Organize your columns to view in your preferred order
Columns can be arranged in any order by typing the number of the column. For example, if you type the number ‘2’ in ‘Route’, you will see ‘Started At’ in the first column and ‘Route’ in the second column.
When you disable a field by clicking on the ‘eye icon’, it will not appear on your view page.
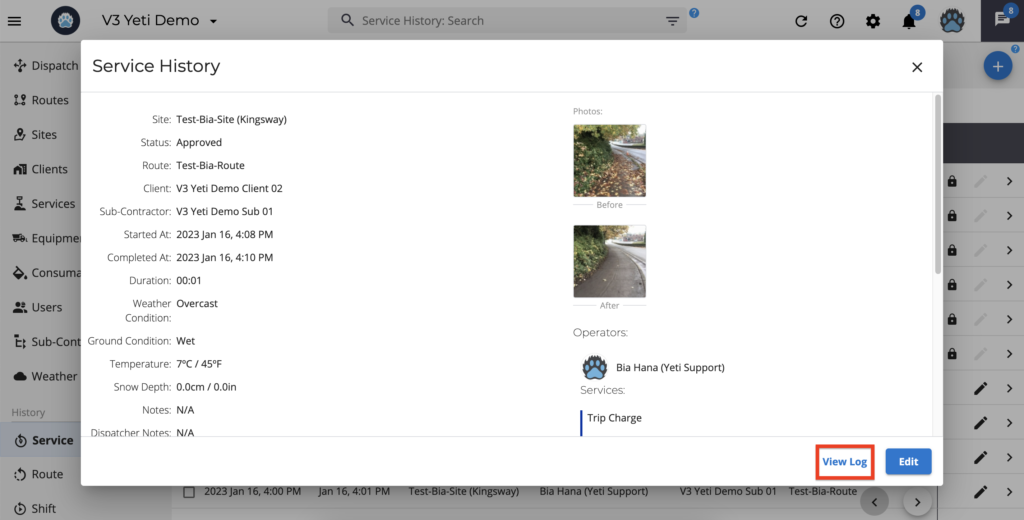
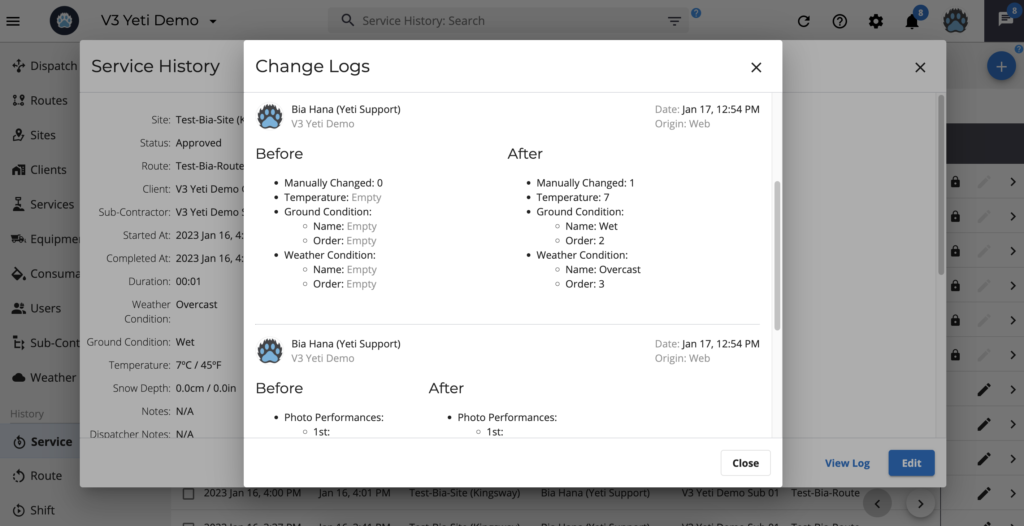
Viewing your log
Click on the record and then ‘View Log’.
By using the ‘view log’ option, you can see who changed the information, when it was changed, and what information was changed.
Create a manual record
This is an option if the Shift was not registered with the mobile app by the operators, so you can manually create the record.
Click on the ‘add button’, and a pop-up window will show. Select the Site, date, time, and other information about your shift and click ‘save’.
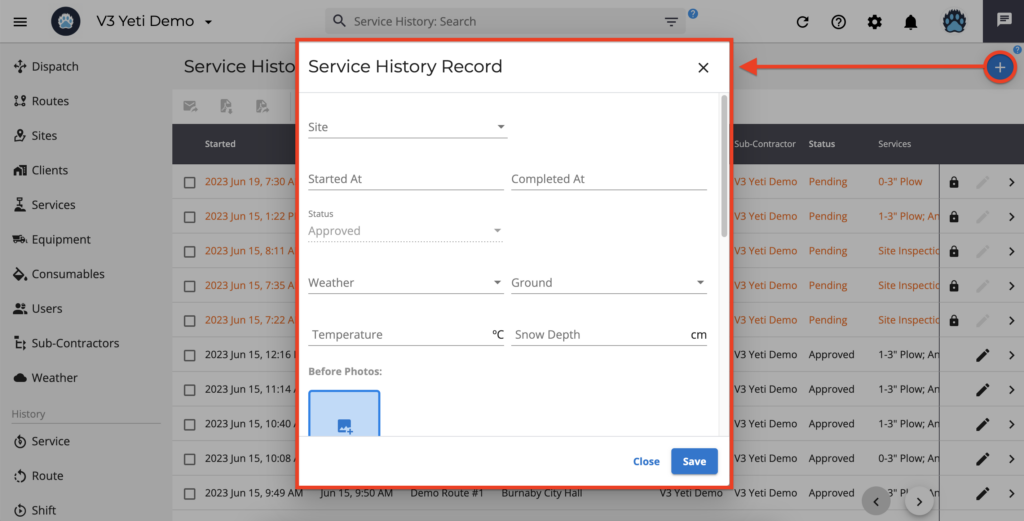
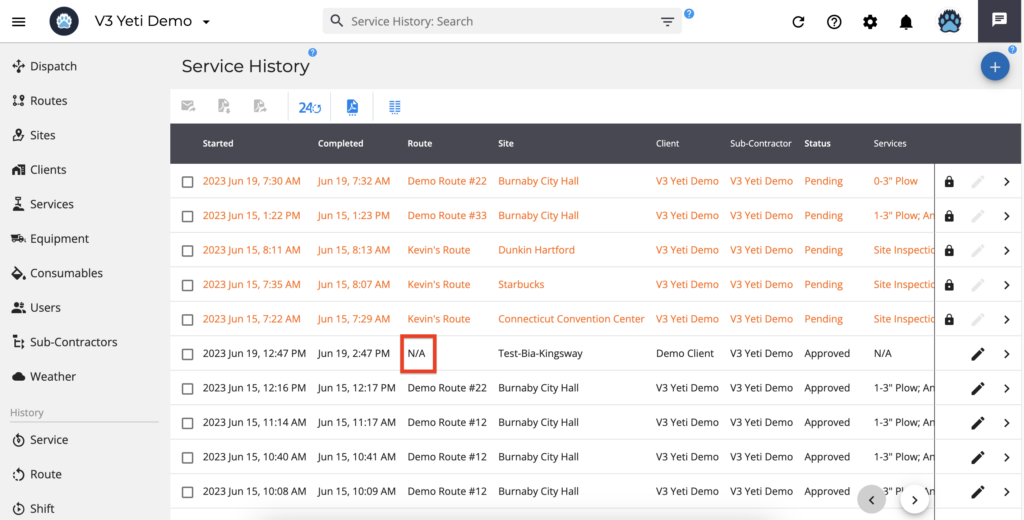
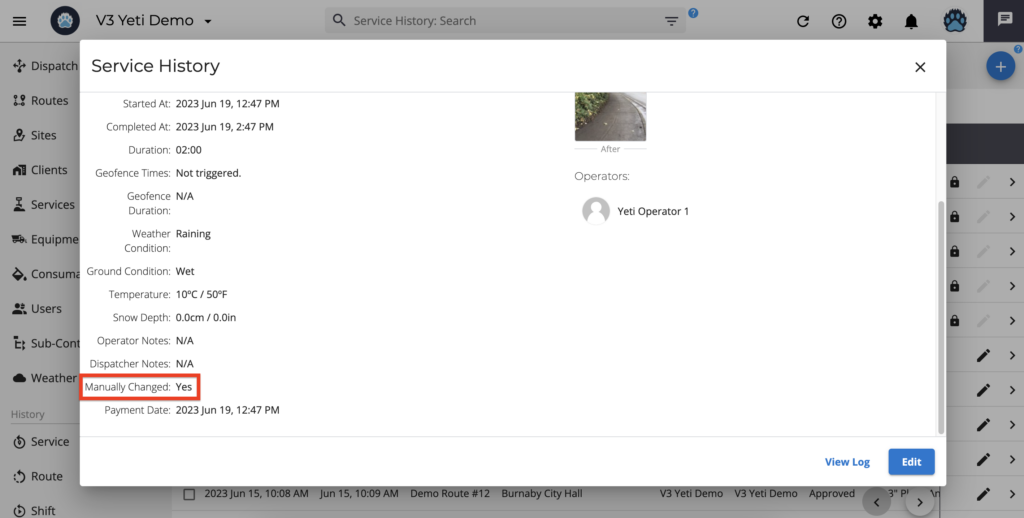
When you manually create a record on this report, it will show Route as ‘N/A’, and when you click on the record, ‘Manually Changed’ will be set to ‘Yes’.
Editing records
Click on the pencil icon to edit your record.

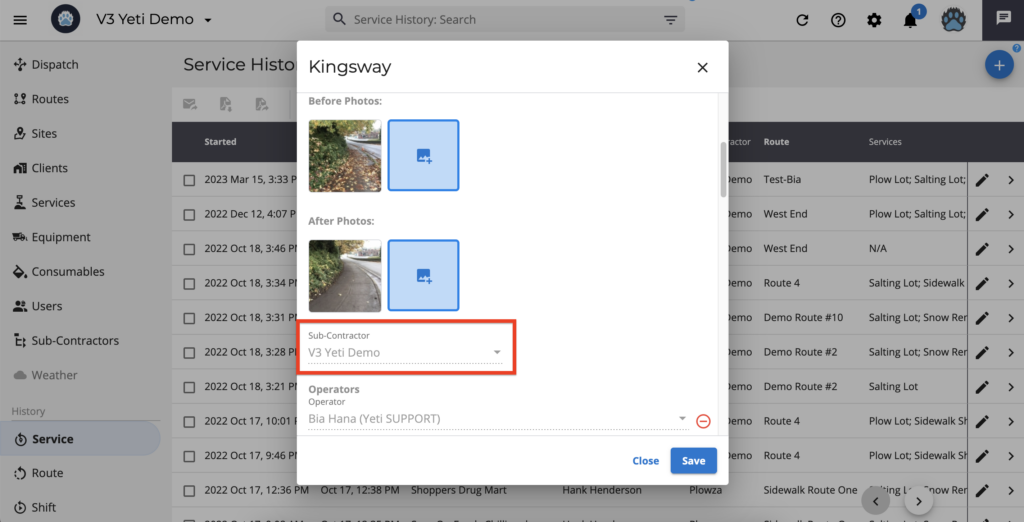
Here you can change information such as Site, date, weather, photos, operator, etc.
In order to edit a record, you must follow some rules.
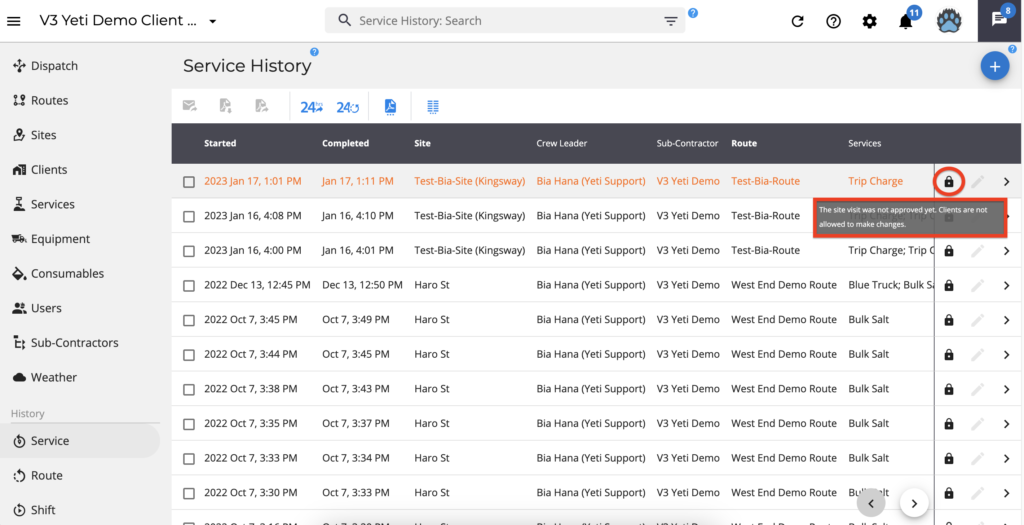
- Pending reports cannot be edited.
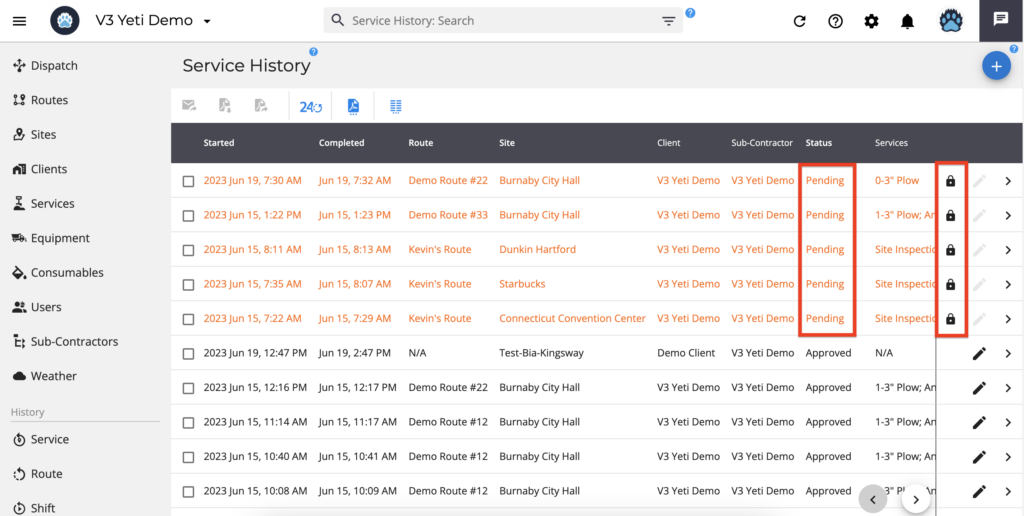
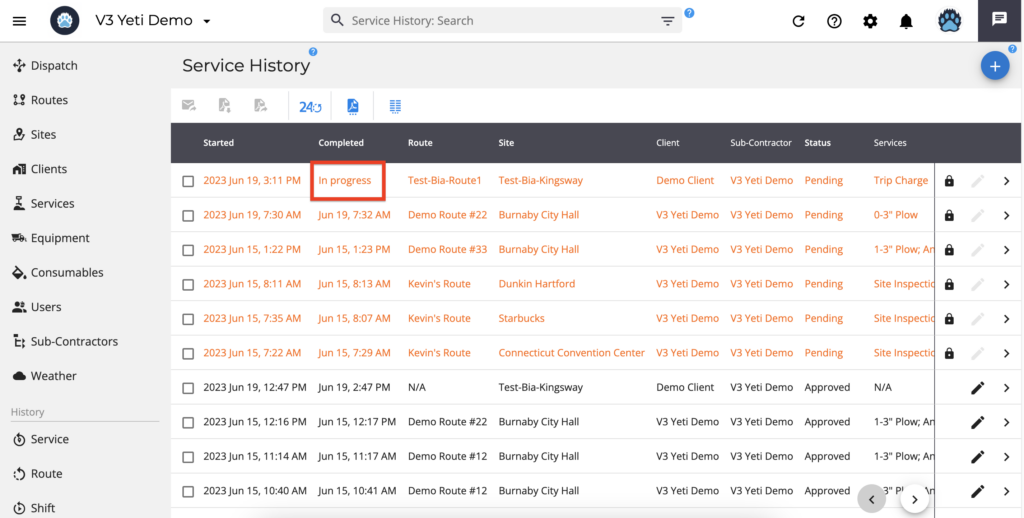
- Sites that have the status ‘In progress’ cannot be edited.
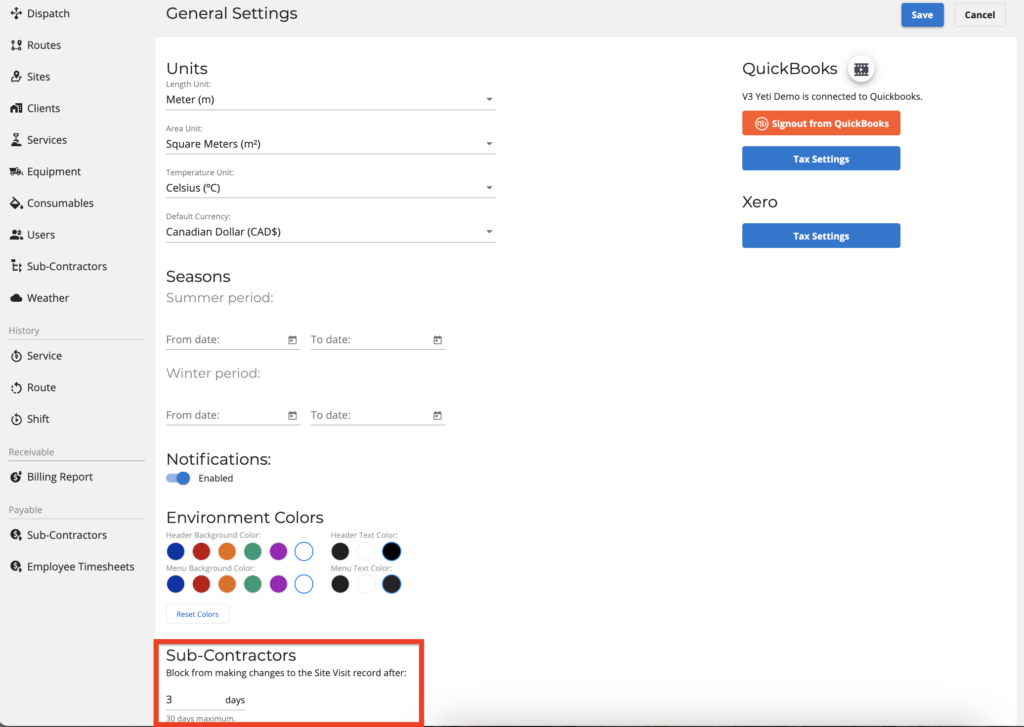
- If your contractor has set a specific number of days for making changes to the record, you cannot edit it.
Subcontractors’ number of days block not only the days they can edit the record but also the day they can change the date. As an example, suppose your Sub-Contractor performs the Site on March 4th and you set three days. The Sub-Contractor has until March 7th to edit this record. The Sub-Contractor cannot change the ‘started at’ and ‘completed at’ dates before March 1st when editing the record. The rule applies to records created manually or via the Yeti mobile app.
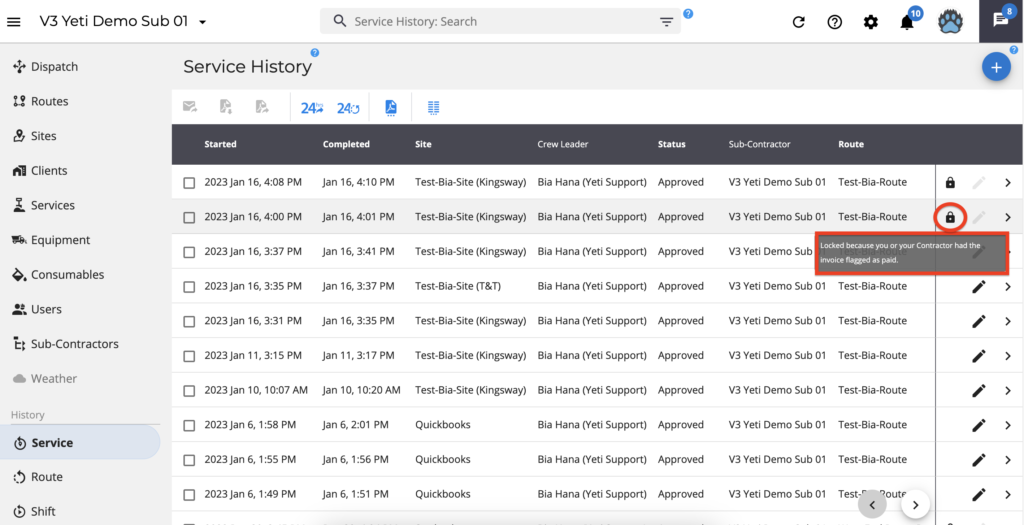
- Sub-contractors cannot edit invoices that have been paid.
Go to the Billing Report and check the ‘Paid’ column to see if the invoice has been paid.
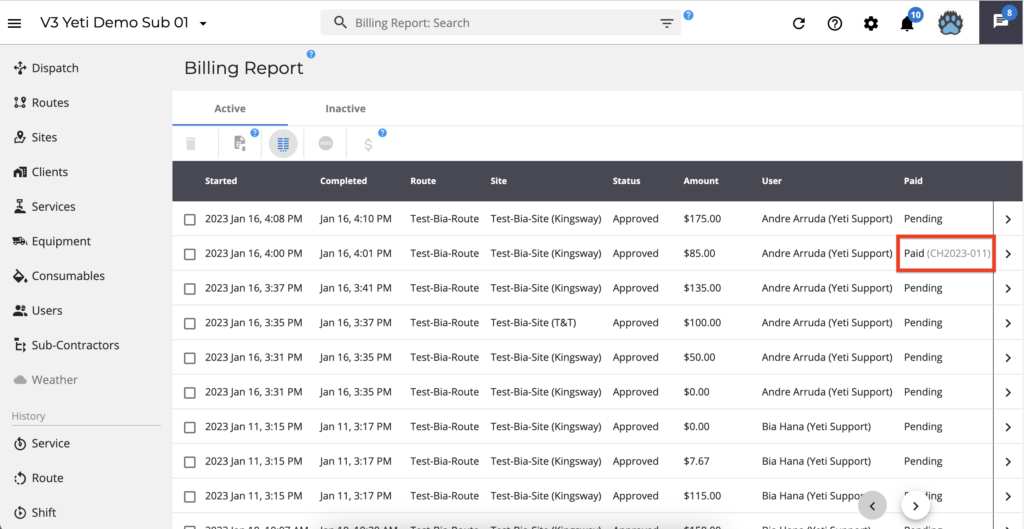
By checking the Service History Report and clicking on the padlock icon, you can see that this record was paid.
- End Clients are not able to edit Service History reports.
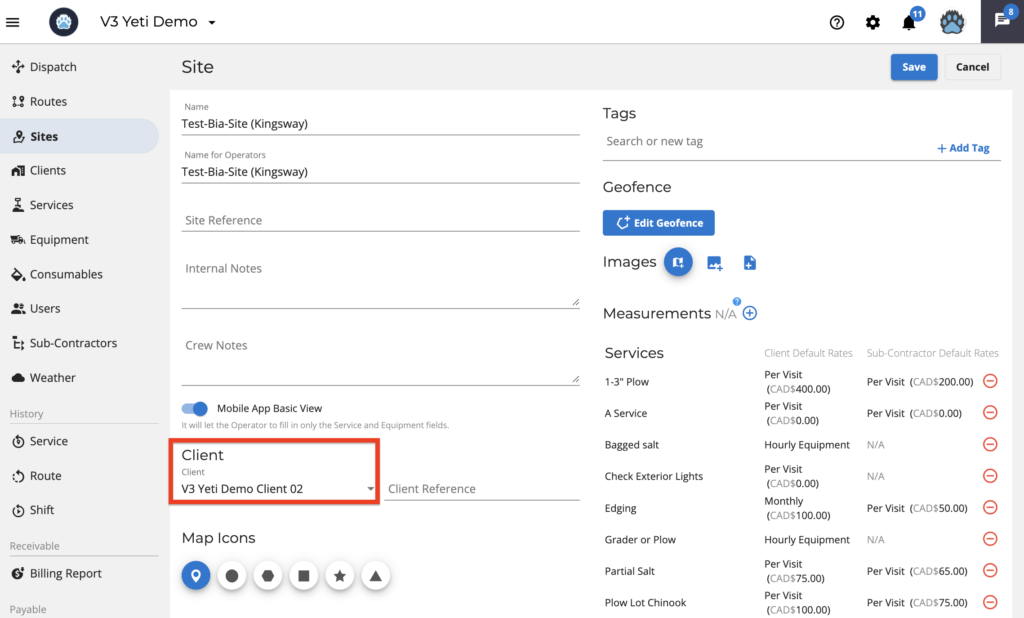
Who is the End Client? End clients are the ones you set up on your site.
- A site owner has the right to make changes to the site at any time, even if the invoice has already been paid.
Once the record is editable, check the other rules
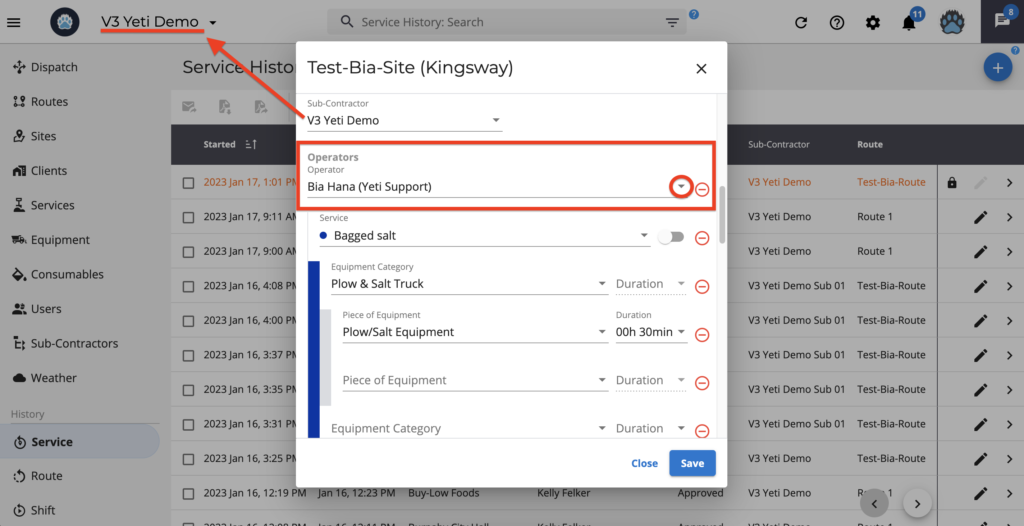
- The Operator field can be edited if your company is listed as the Sub-contractor.
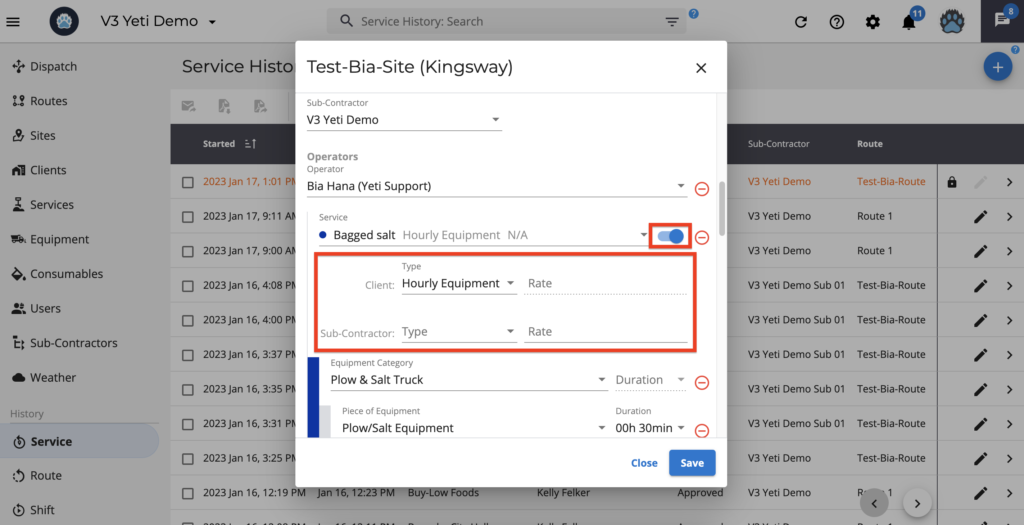
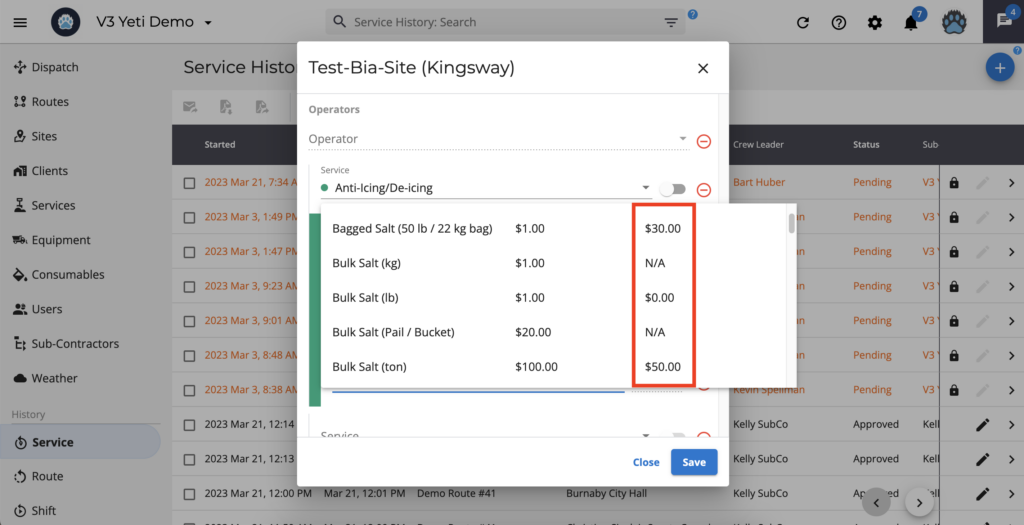
- The Service field has a toggle where you can edit the charge type and rate for Clients and Subcontractors. Note: Changes to the rates here won’t affect the contract between your Client and Subcontractor.
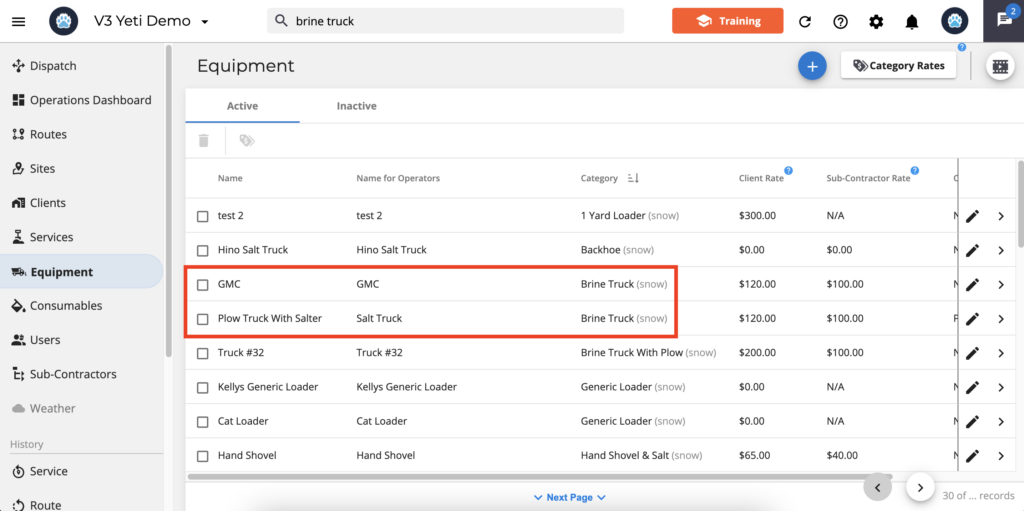
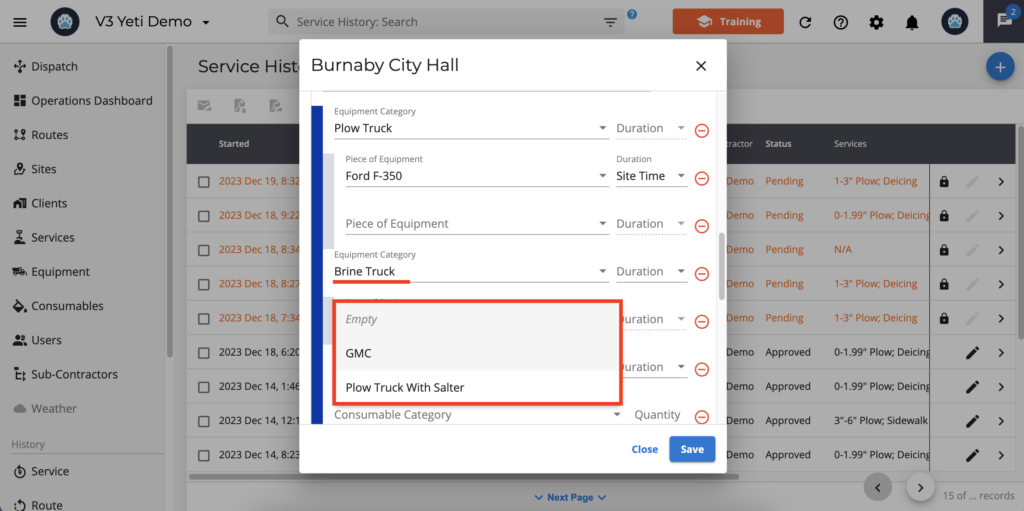
- A piece of equipment will be displayed according to its category. On the Equipment page, for example, the category “Brine Truck” is associated with two pieces of equipment: “GMC” and “Plow Truck with Salter”. That’s why there are only two options to select equipment when you edit SHR and select category “Brine Truck”
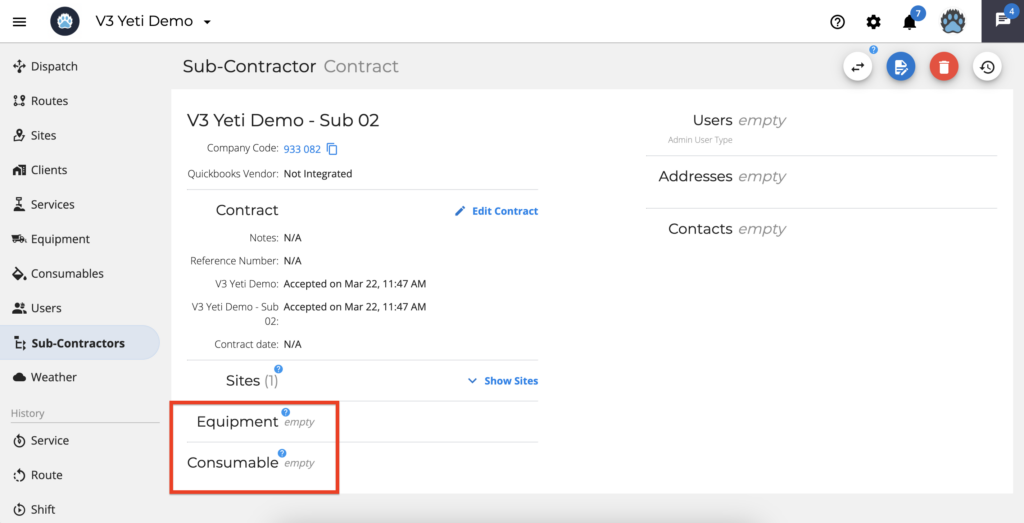
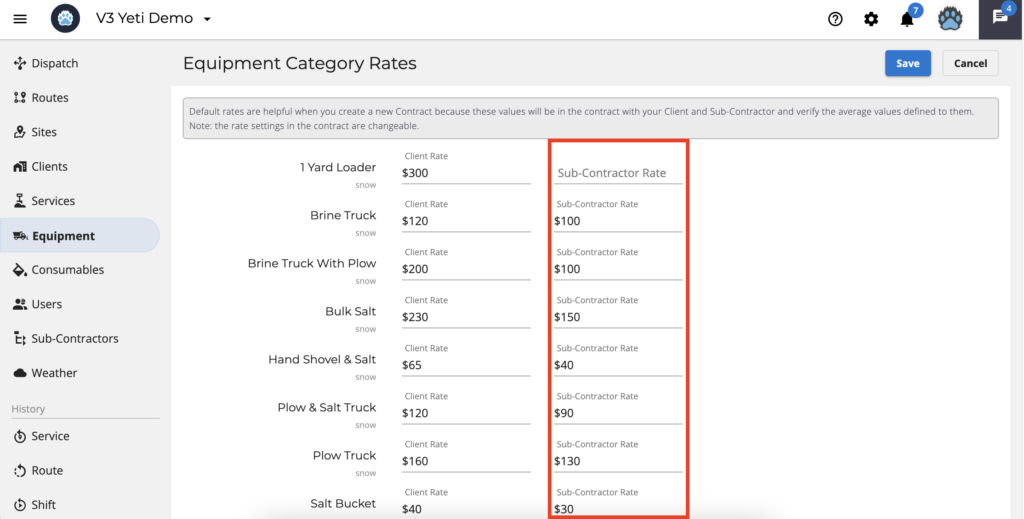
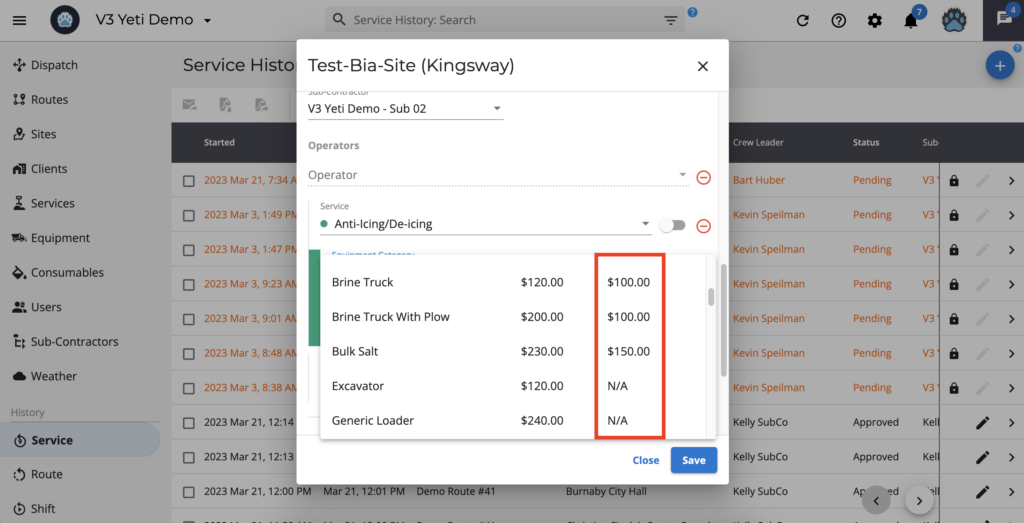
- Category and Consumables rates will appear based on the contract. If the contract does not have a rate, the system will show the rates registered on the Equipment category and Consumables page. For example, the Sub-Contractor contract below does not have a rate.
When you edit the record on the Service History Report, you will see the rate according to the Equipment category and Consumables page.
This is the Equipment Category page.
This is the Service History Report when you edit the Equipment category field.
This is the Consumables page.
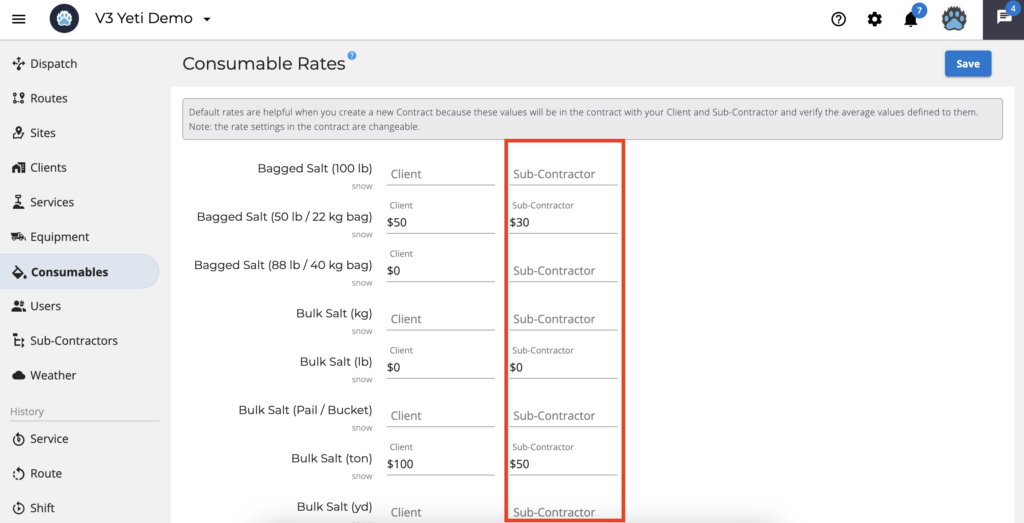
This is the Service History Report when you edit the Equipment category field.
- The Sub-Contractor field cannot be edited in two conditions:
1. When the Site was performed by the subcontractor of your subcontractor. In this case, only the contractor of the sub-contractor that performed can make the change. For example, You are the primary contract and you have a Sub-Contractor ‘A’. The Sub-Contractor ‘A’ has a Sub-Contractor ‘B’. If Sub-Contractor ‘B’ performed the Site, you as a primary contract cannot edit the field ‘Sub-Contractor’, only Sub-Contractor ‘A’ can edit the field by switching to another Sub-Contractor or putting its own company.
2. When the record was performed on the Yeti app. In other words, it was not created manually.
Identify the time zone on the Service History Report
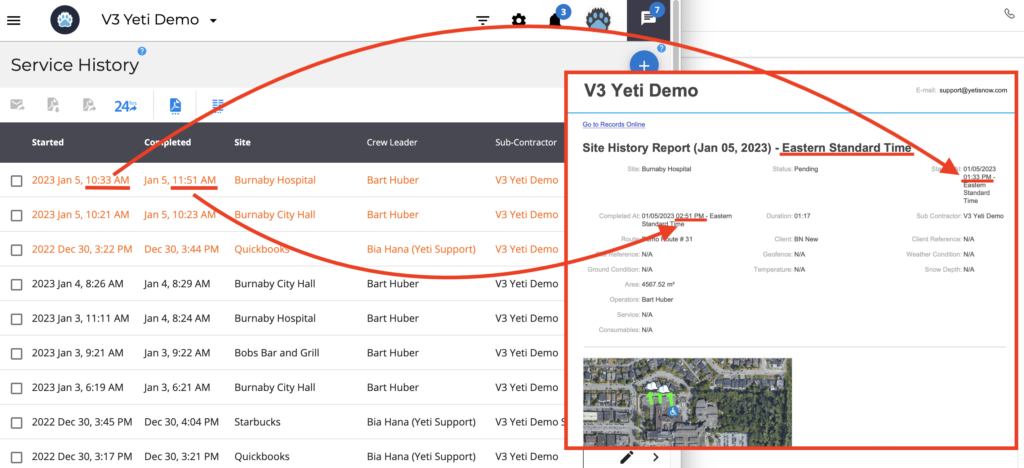
In the Service History Report, you’ll see the ‘Started’ and ‘Completed’ times according to your time zone, which is the user’s time zone.
However, the online report and PDF report are based on the Site time zone.
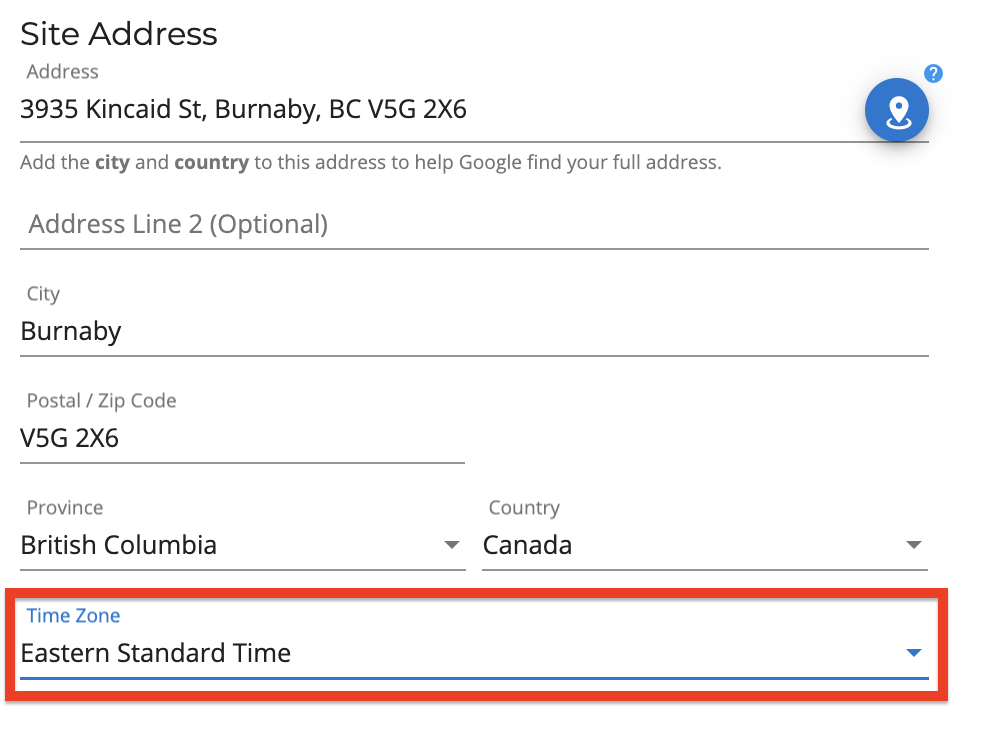
On the Sites page, you have the field ‘Time Zone’ when editing or creating a Site. When you enter the Site address, the Time Zone will be automatically filled in, but you can manually change it. In the example below, the Site is located in ‘British Columbia – Canada’ which is in the Pacific time zone. If you manually change to the Eastern time zone, you will see Eastern time in both reports.
Click on the record and select the option for an online report or a PDF report.
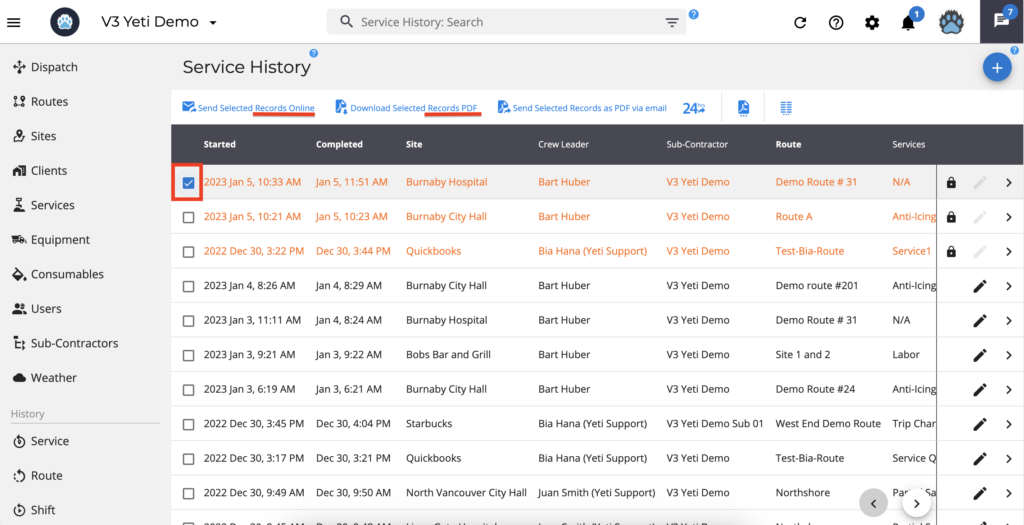
This is the Service History Report – Online report
After clicking on “Send Selected Records Online,” you will receive an email to access the report.
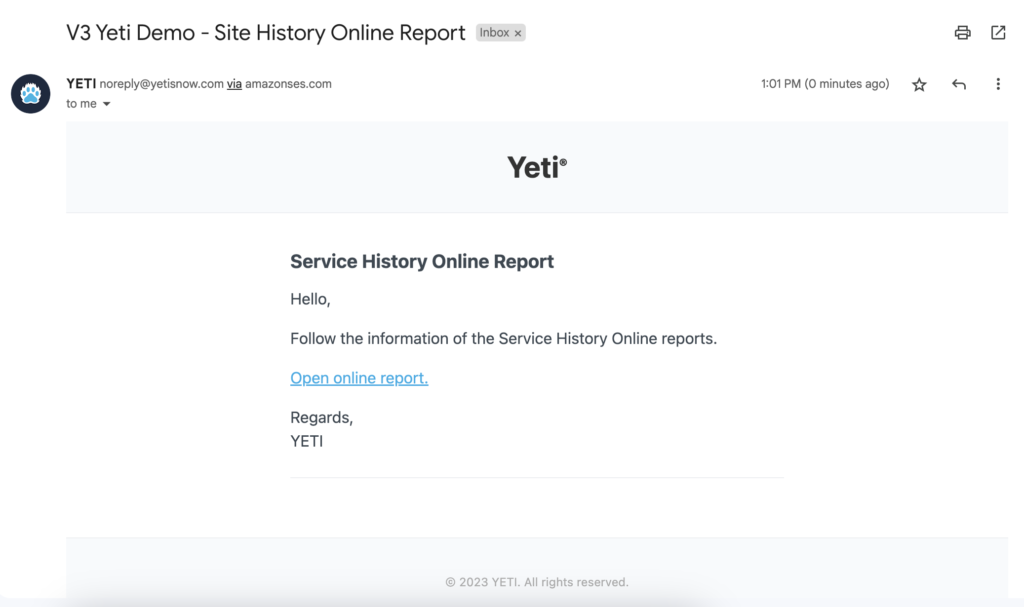
Click on the link received by email to see the report.

This is the Service History Report – PDF report
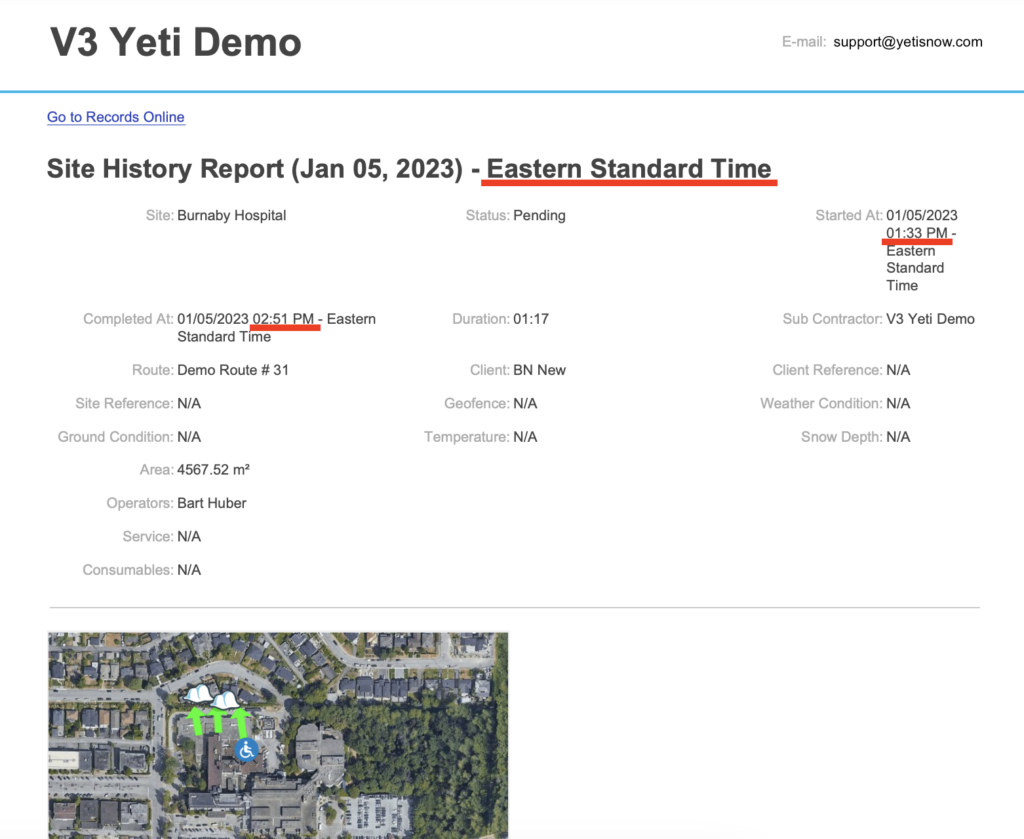
It is important to note that Pacific and Eastern times differ by three hours. See the comparison below which shows the Pacific time zone on the Service History Report view and the Eastern time zone on the PDF report file.