September 25, 2023
Back to Routes
September 25, 2023
Routes
There are 2 types of Routes
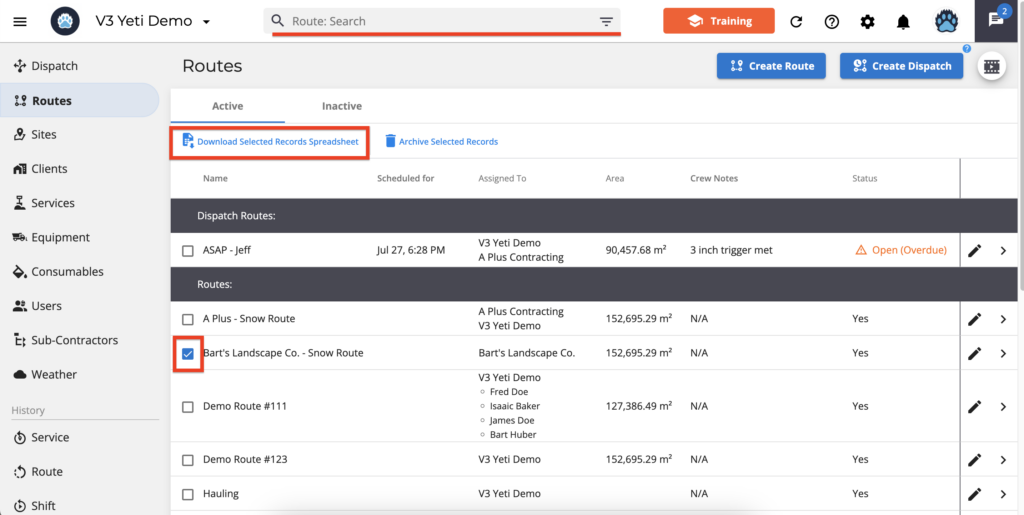
It’s possible to export all types of Routes to a spreadsheet, as shown below.
Standard Route
This Route is usually created during your pre-season planning and is pre-assigned to your crews, to Sub-Contractors, or to both, and can be performed over and over again.
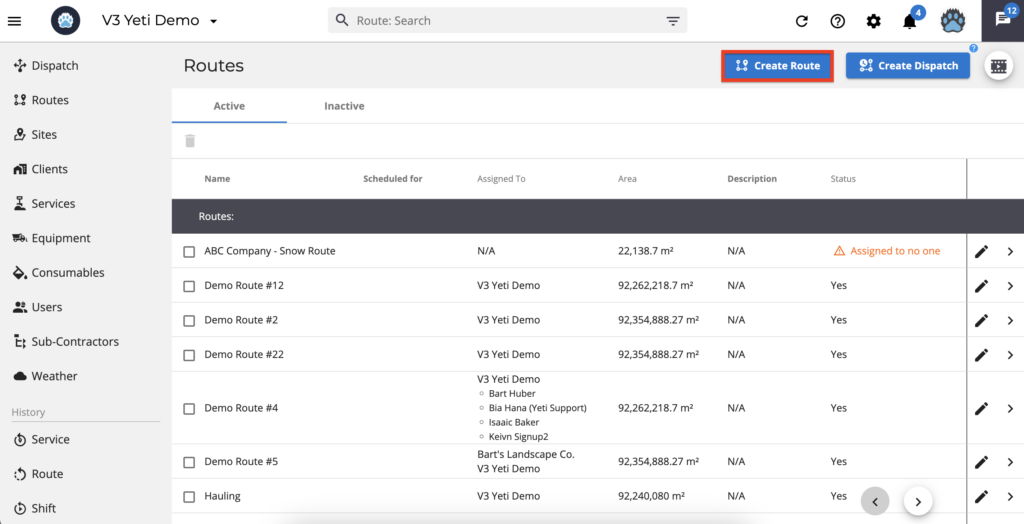
Go to your Routes page and click on ‘Create Route’.
On this page, you are able to
- Make your Route seasonal
- Assign a Route to your Sub-Contractor
- Add Sites to your Route
- Optimize your Route
- Mark your Route with a tag
- Select estimated hours
- Select Services
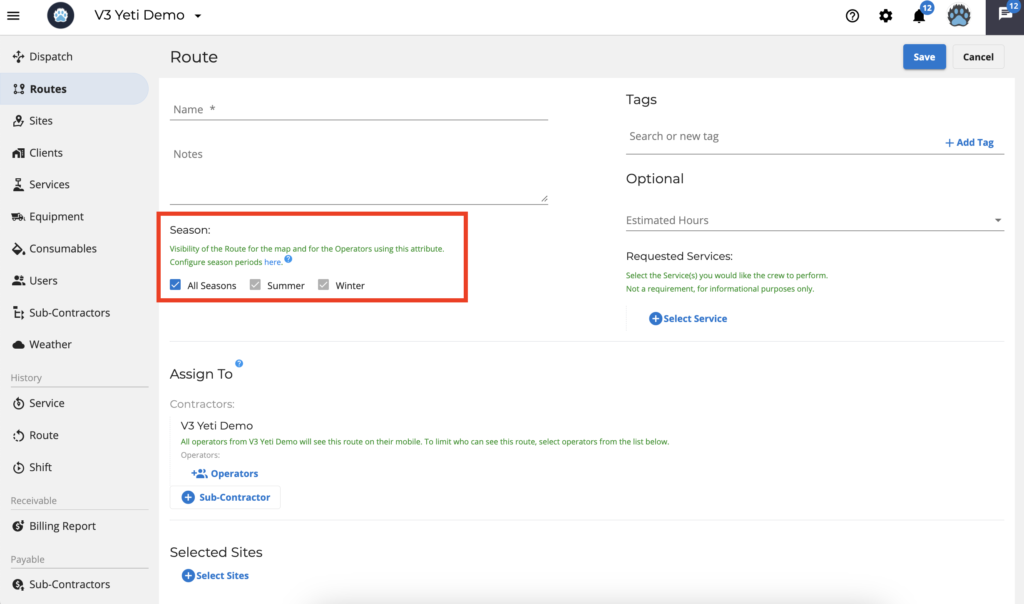
Make your Route seasonal
This option allows you to specify whether a route was used during the summer or winter.
Operators will only see Routes on the mobile app based on the date you specify in settings when you select the option ‘Summer’ or ‘Winter’. Choosing ‘All seasons’ will show the Route throughout the year.
Note: Seasons can only be selected if dates have been specified for each season. If the season dates entered overlap, ALL Routes within that specific time of overlap will appear for selection on the mobile app.
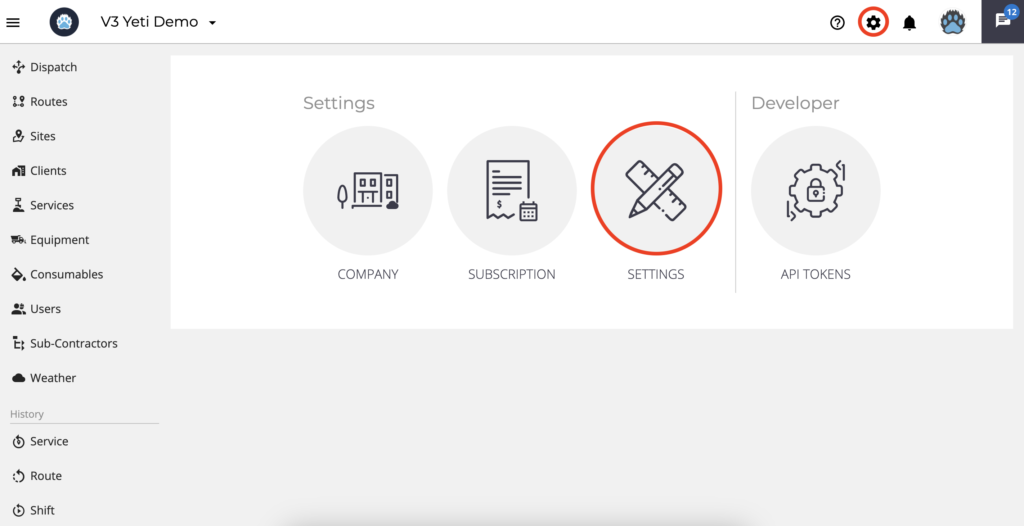
To set the period for your Summer or Winter Route, click on the gear and settings.
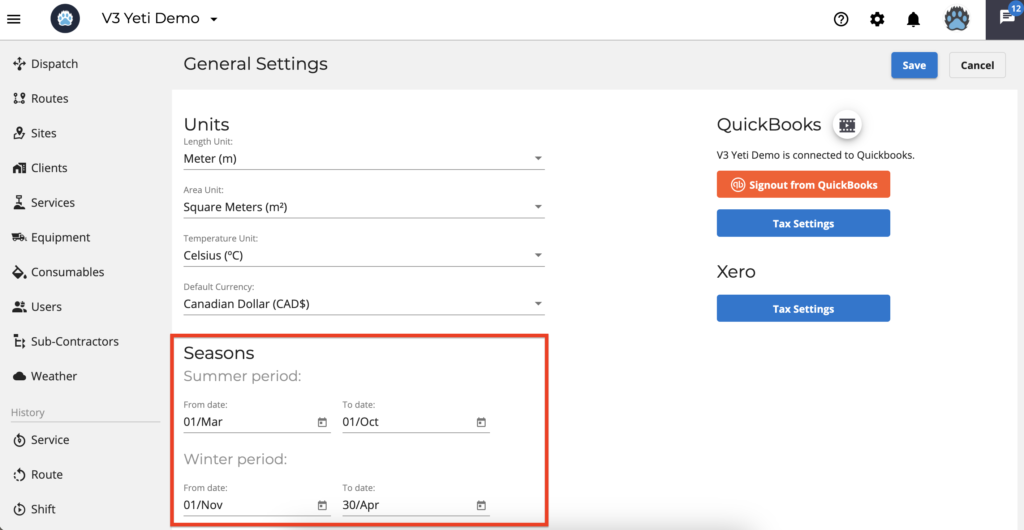
Specify the dates for your Summer and Winter period and click on ‘save’.
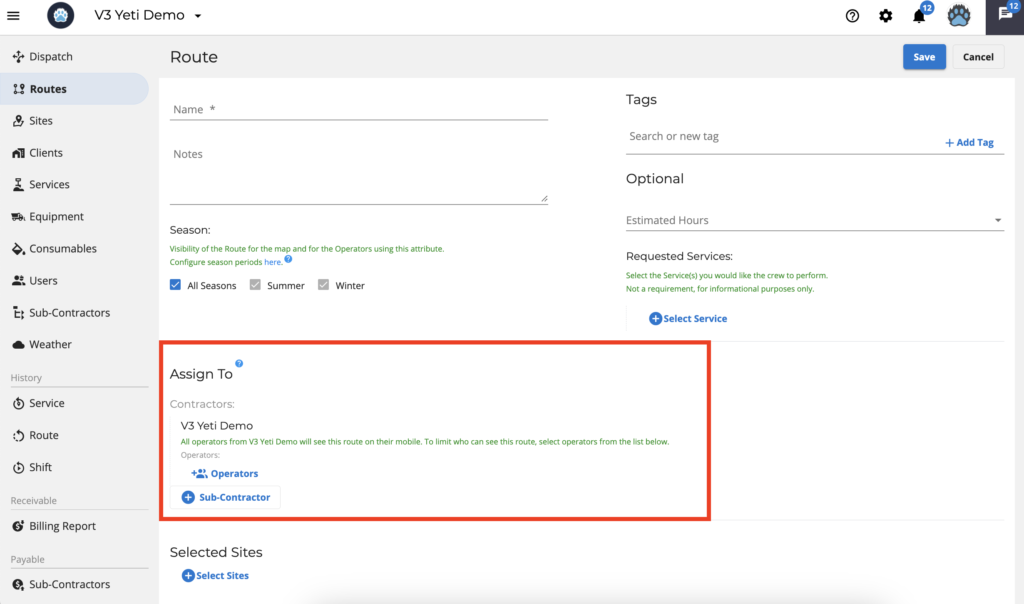
Assign a Route to your sub-contractor
Your routes can be assigned to a Sub-Contractor. If your Sub-Contractor is being sponsored by you, you can choose to assign one of their operator for that route. The feature is not available to you if your sub-contractor own their own Yeti or has multiple clients.
If you don’t select an operator all users in that company will have access to that route in the mobile app.
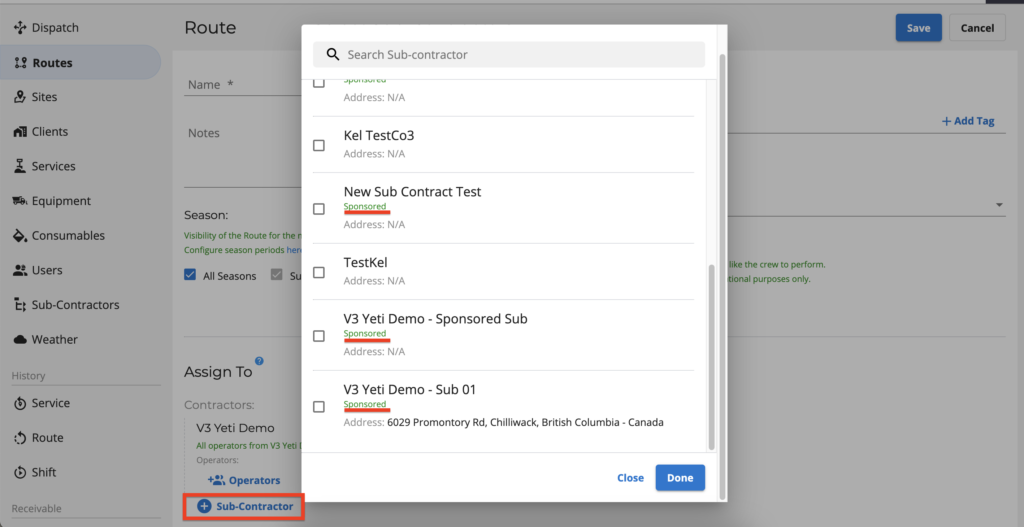
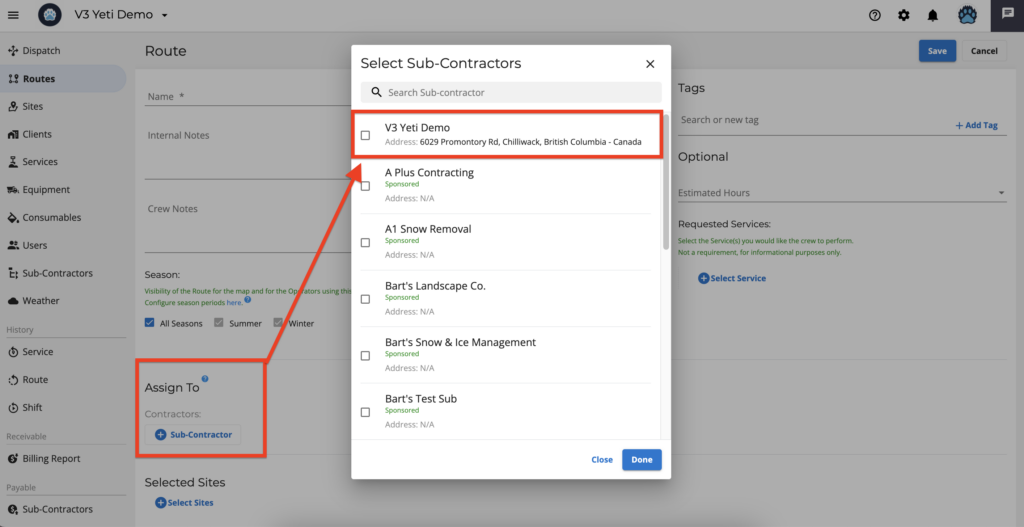
Clicking on the ‘Sub-Contractor’ button will give you information about the companies that are sponsored.
Note: Removing your company is different from removing a subcontractor.
- Remove your company
When you click on the Sub-Contractor button, you can see your company checked.
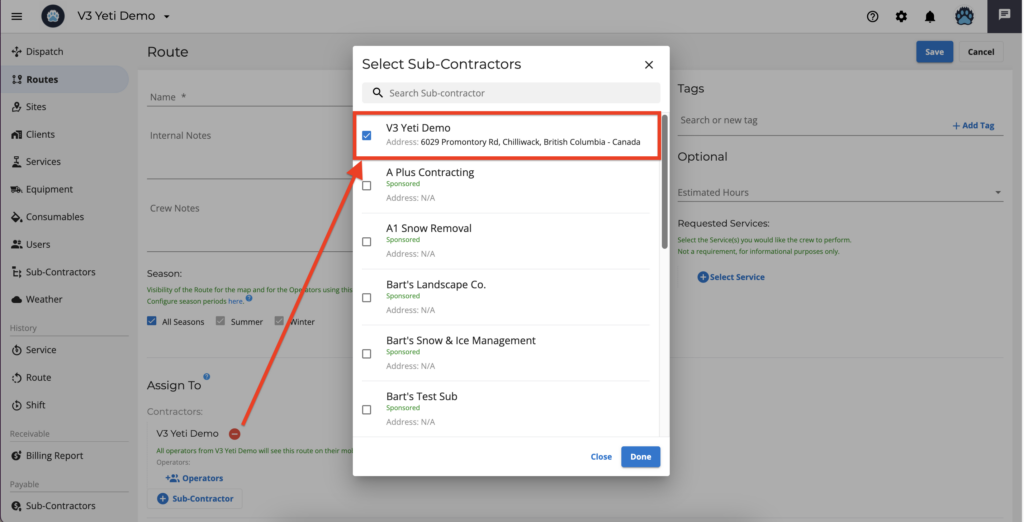
However, when you remove your company, it is still visible on the Sub-Contractor window, but not checked.

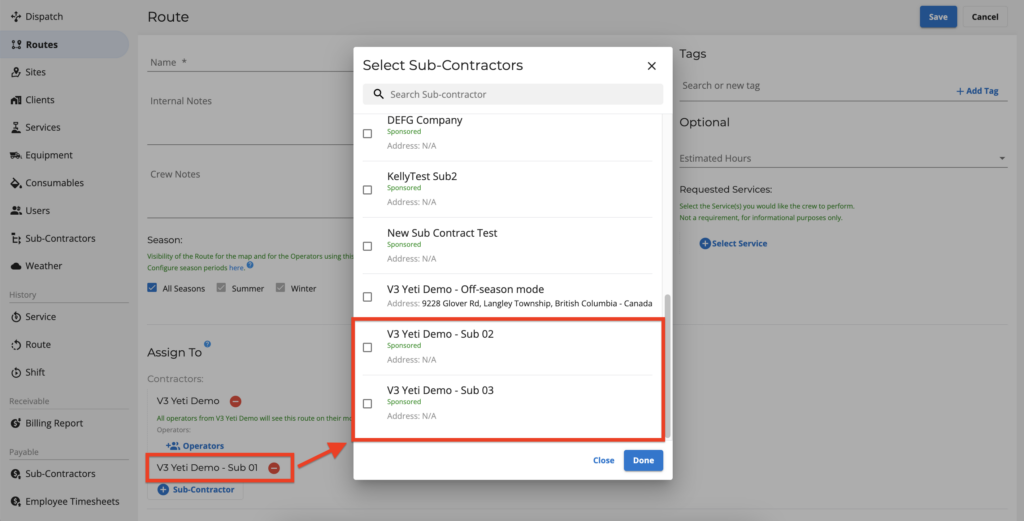
2. Remove your Sub-Contractor
When you click on the Sub-Contractor button, you cannot see the Sub-Contractor in the Sub-Contractor window.
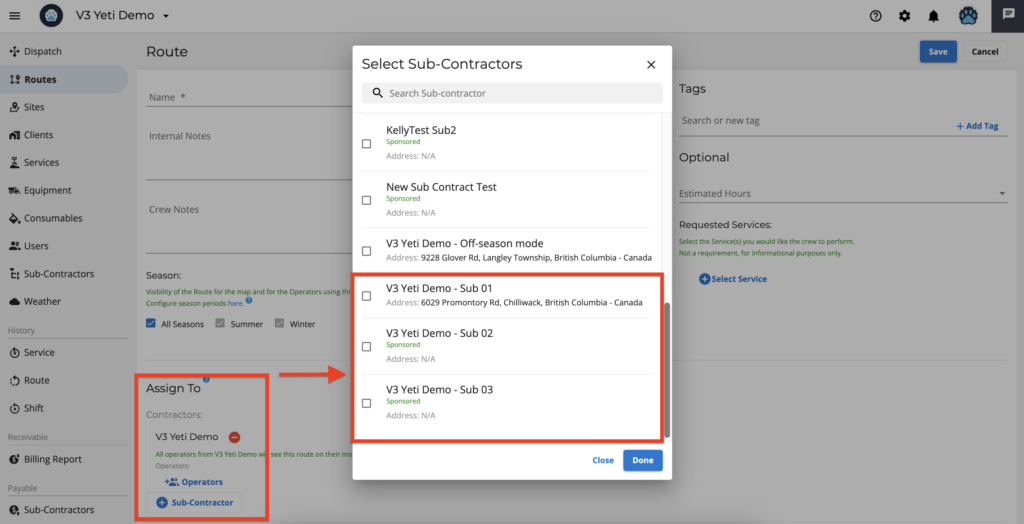
However, when you remove your Sub-Contractor, you can see it on the Sub-Contractor window.
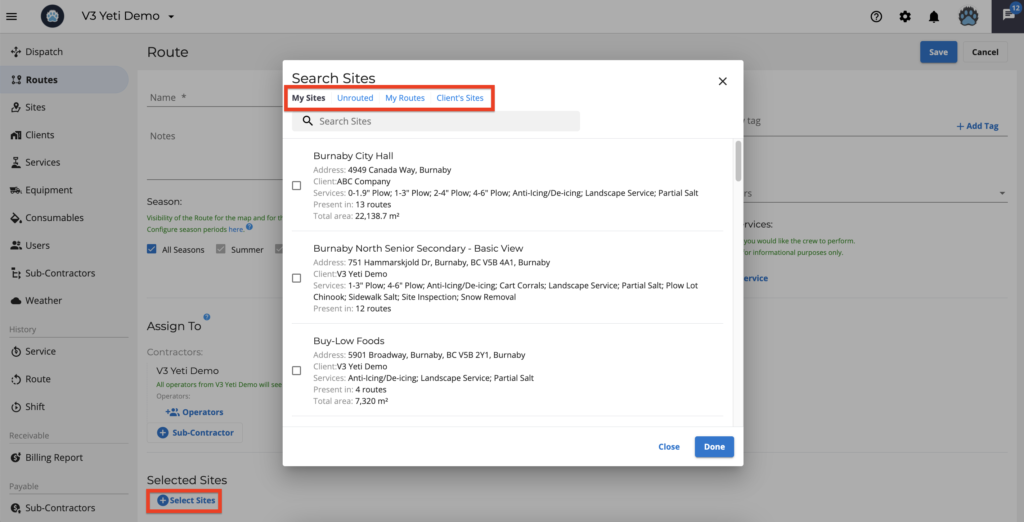
Add Sites to your Route
A Route must have at least one Site when it is created.

The ‘Select Sites’ button opens a pop-up window where you can select the Site(s). The Site can be found in four ways.
- My Sites – Here you will see all the sites of your company.
- Unrouted – These are sites that you created but did not add to any Route.
- My Routes – You can choose a Site from another Route.
- Client’s Sites – In this case, you can select a Site that belongs to your Client. Select the Client to see its Sites.
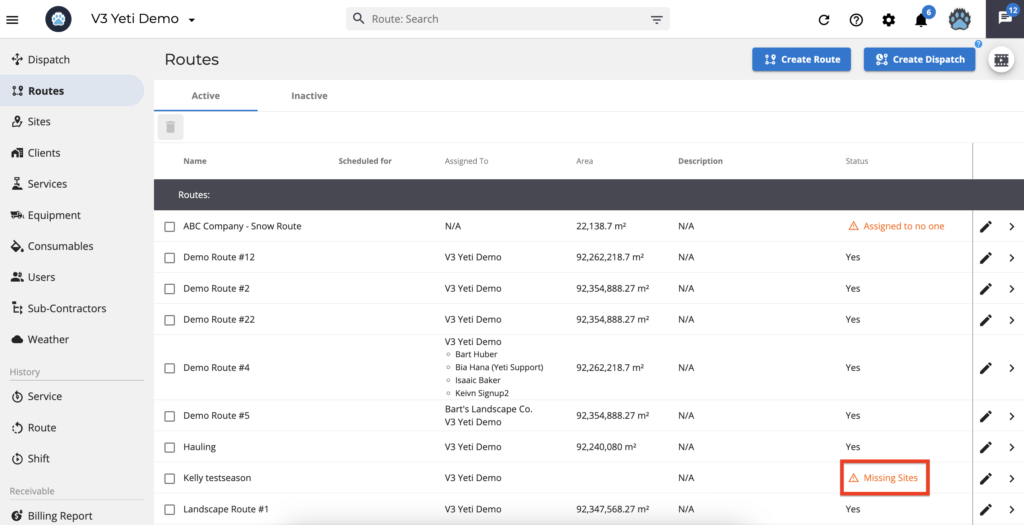
A Route with the warning ‘Missing Sites’ means that the Sites associated with that Route have been archived. So the Route does not have any Site.
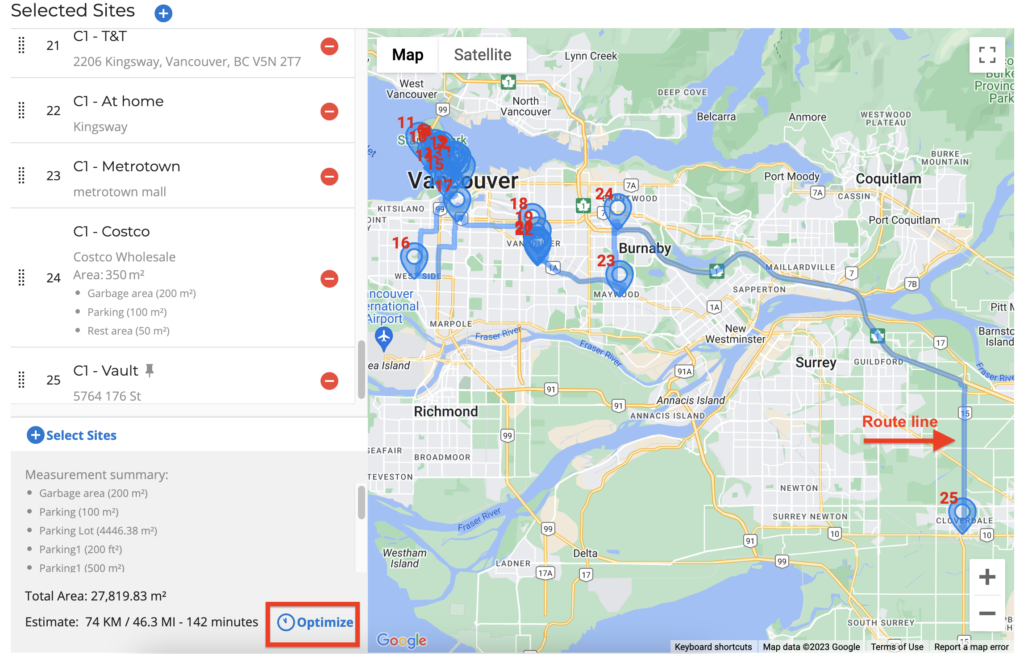
Optimize your Route
Using this feature, you can optimize your route. You can drag the first and last Sites of your Route, so the system will keep these two Sites and optimize the other Sites based on their distances. By working at the closest sites, your operator can optimize driving time.
The Route line displays up to 25 sites, but you can optimize up to 150 sites.
To optimize your Route, all Sites should have the location (address). To set your Site address, click here.
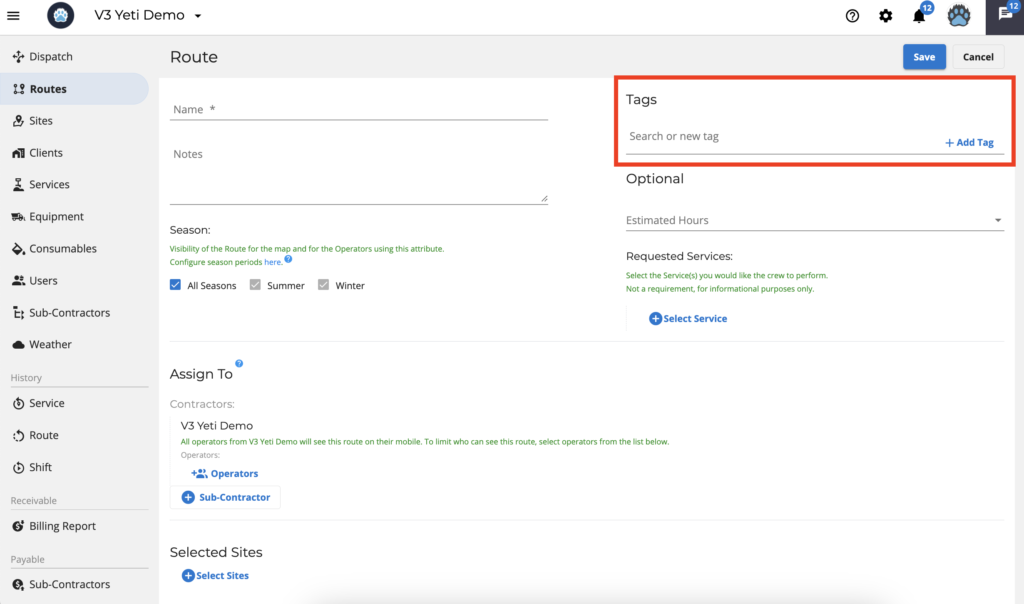
Mark your Route with a tag
Tags can help you find your Route more easily. For example, you could define a tag ‘Vancouver’ for all Routes within the city of Vancouver. As a result, if you search using the tag ‘Vancouver,’ you will see every Route in Vancouver.
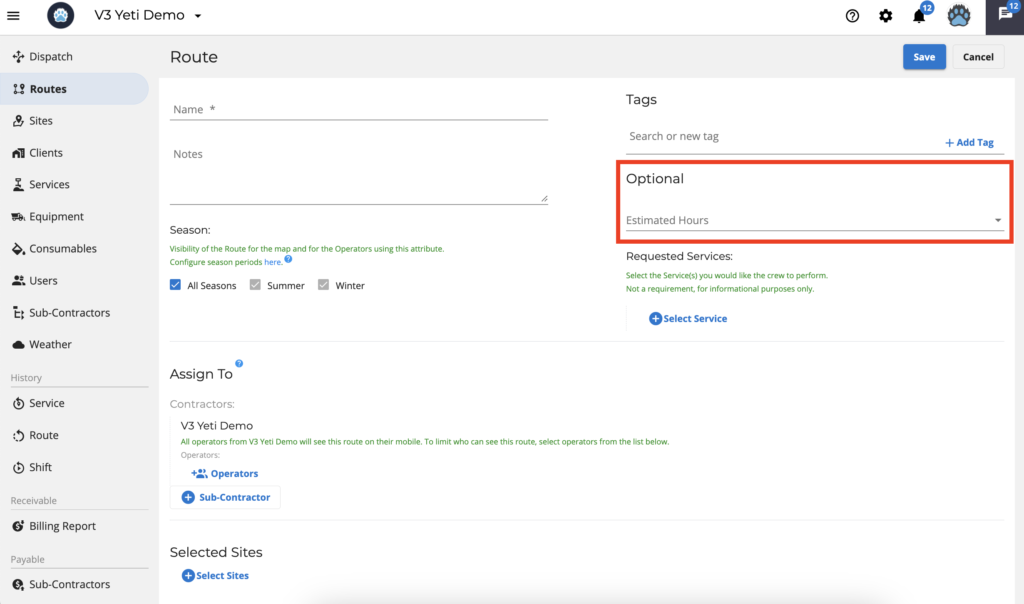
Select estimated hours
Indicating the time is not mandatory, but it will be visible on the mobile app. It will not be a warning if the operator completes the work in less or more time than that estimated in this field.
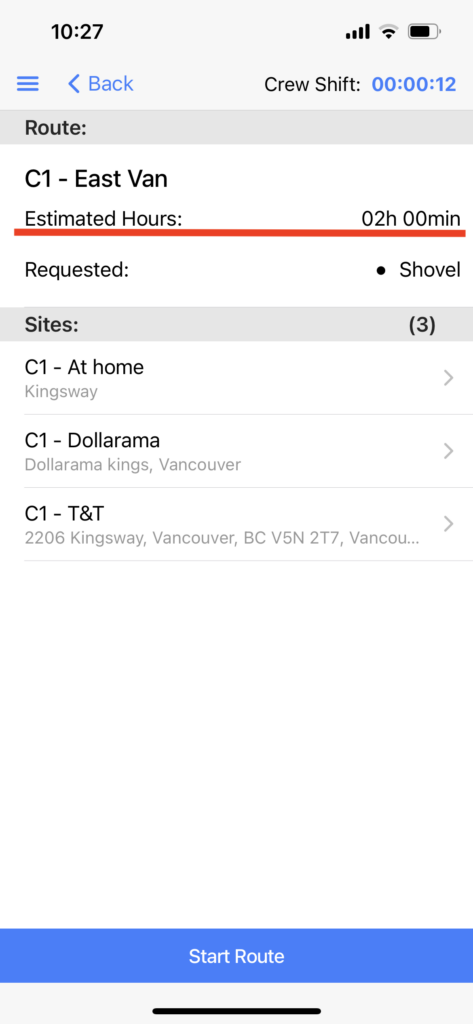
The mobile app will display this to the operator.
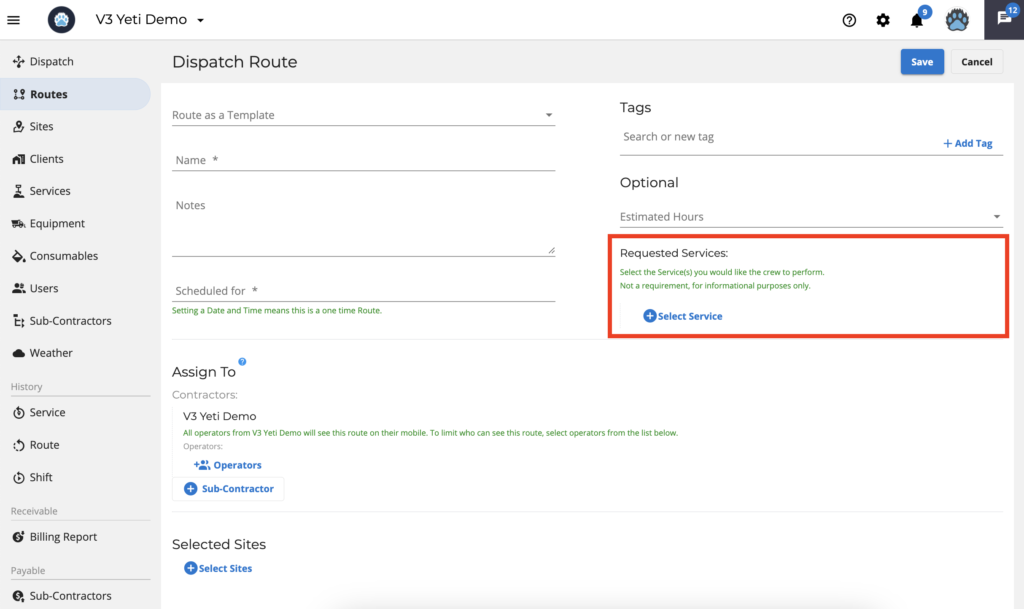
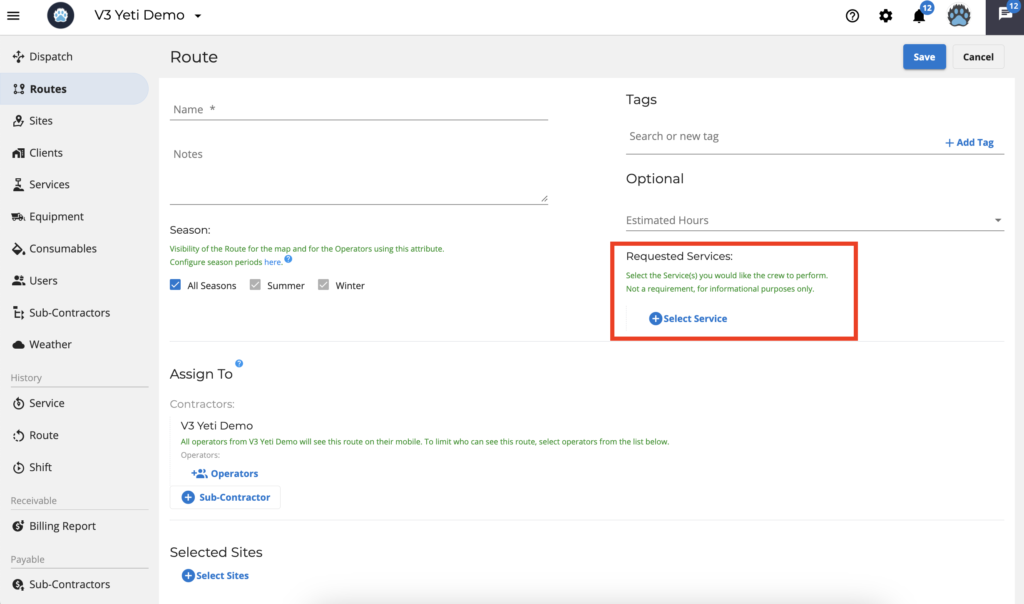
Select Services
There is no requirement for this field, and even if you fill it out, this does not appear on the mobile app as a Requested Service. The mobile app shows the Services that are indicated on the Site page. For more information click here.
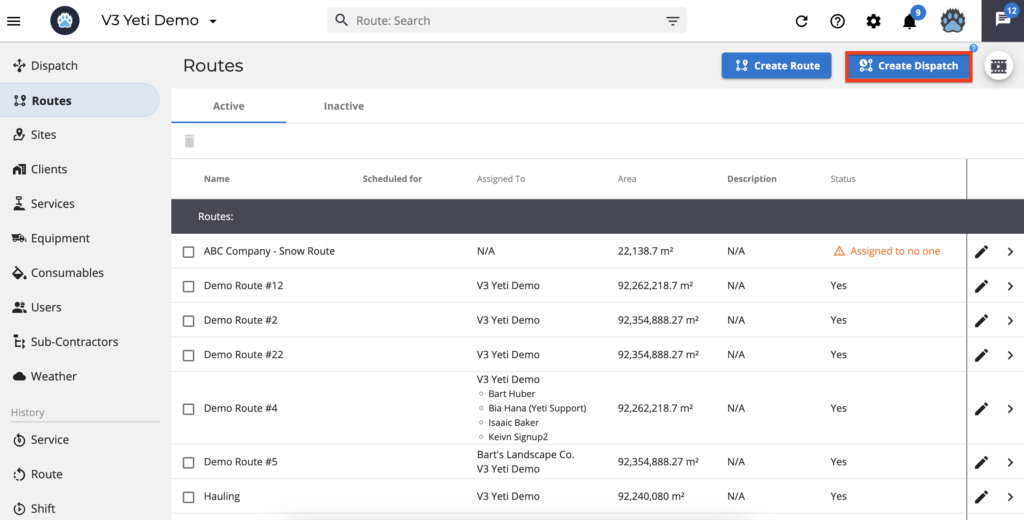
Dispatch Route
This Route is a one-time event with a specific start time and is used for work orders, special service requests, or if you do not pre-assign Routes to crews.
On this page, you are able to
- Select the Route
- Schedule your Route
- Enable the toggle to perform all Sites in the Route
- Assign a route to your Sub-Contractor
- Add or remove Sites to your Route
- Optimize your Route
- Mark your Route with a tag
- Select estimated hours
- Select Services
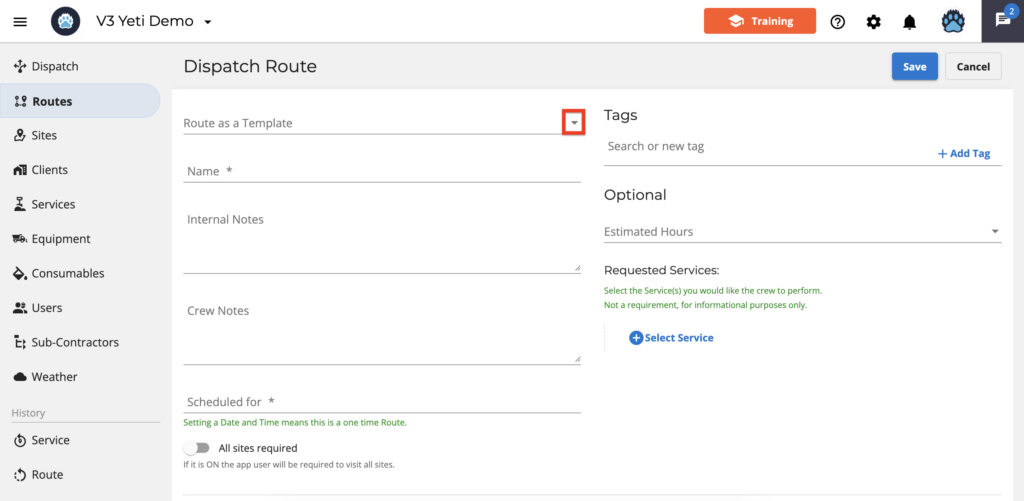
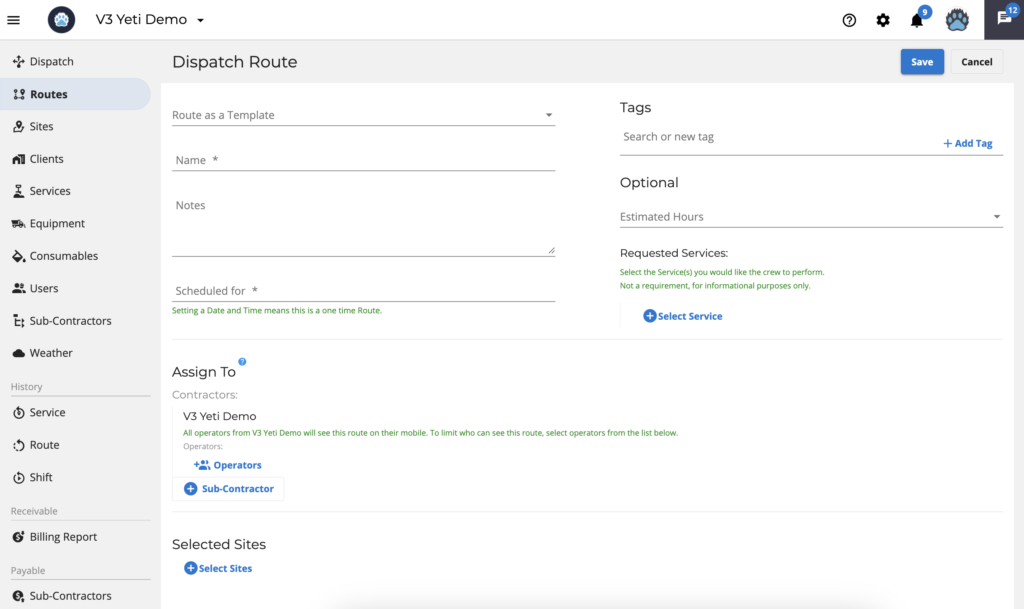
Select the Route
To make a Dispatched Route, click on the arrow to select an existing Standard Route from the dropdown list to use as a template or you can create a unique Route below.
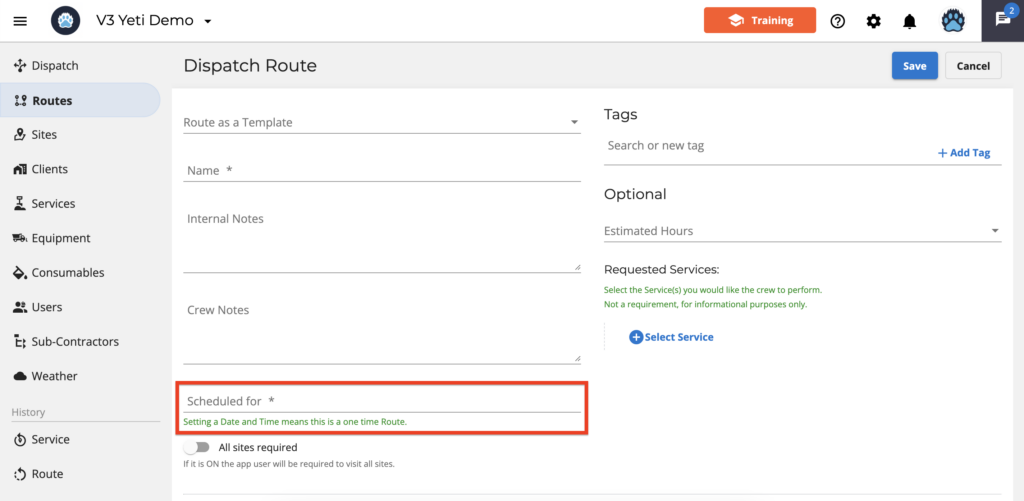
Schedule your Route
Select a date and time for this route by clicking on the field.
Enable the toggle to perform all Sites in the Route
If you enable this option, your operator must complete all Sites in the Route to end it.

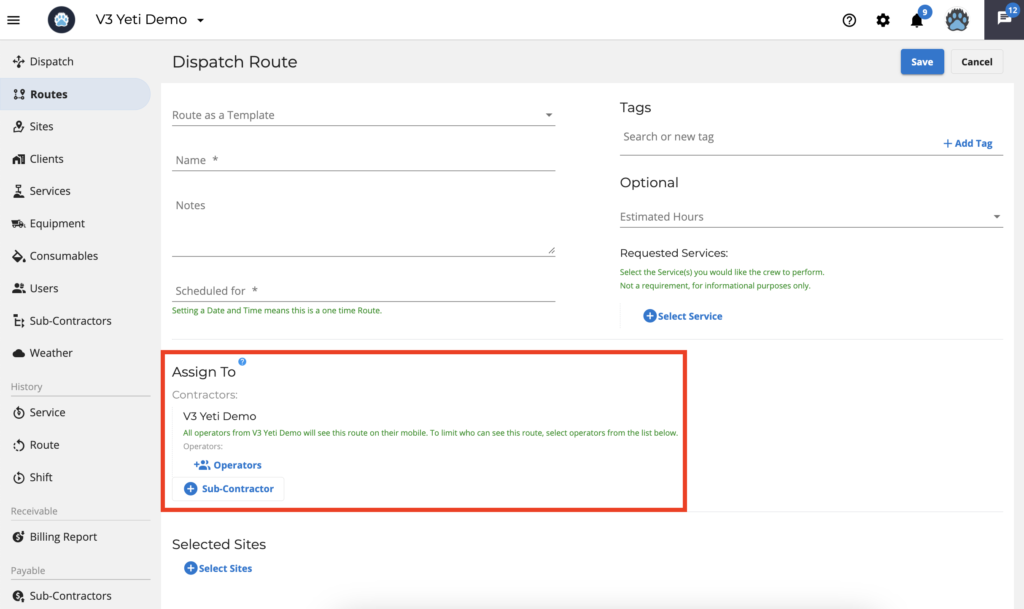
Assign a Route to your Sub-Contractor
Your routes can be assigned to a Sub-Contractor. If your Sub-Contractor is sponsored by you, you can choose the operator for that route, otherwise, you cannot choose users from them.
If you don’t specify any operator that belongs to your company, all users in your company will be able to perform this route on the mobile app.
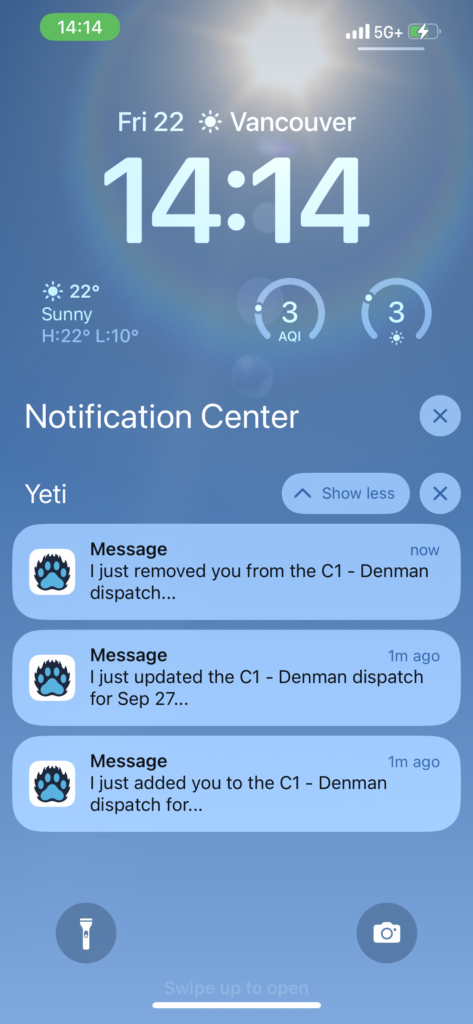
Important Information:
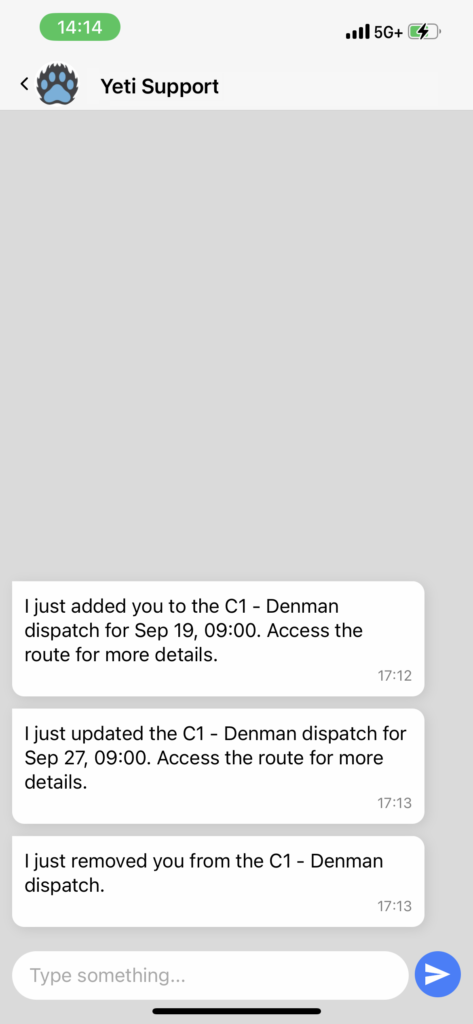
- When you assign a Dispatch Route to a Sub-contractor that is sponsored by you, all of its users will receive a notification when you:
- Add the company to the Dispatch Route
- Change the date and time
- Remove the company from the Dispatch Route
Note: The message that is sent to all users only occurs when a sponsored company is assigned to the Dispatch Route.
Other changes, such as adding sites, creating tags, informing, or changing the estimated hours, will not be notified.
Other rules regarding messages:
- In the case of creating or editing a Dispatch Route for your company without assigning it to a specific user, no message will be sent to any user.
- When creating or editing Dispatch Route and assigning to a subscriber company, no message will be sent to any user.
- When creating or editing a Dispatch Route and assigning it to an Operator, the message will only be sent to that Operator. Messages will also be sent to the Operator if the date/time of the Route has changed or if the user has been removed.
- In the event that a Dispatch Route already has an Operator signed and the Route is archived, that Operator will receive a message that the Operator was removed from the Route.
- When editing a Dispatch Route assigned to a non-subscriber company and assigning it to an Operator, the Operator will not receive the message that was added in the Route, as he has already received the message, but other users of the company will receive a message that they have been removed.
- When editing a Dispatch Route assigned for a non-subscriber company that already has an Operator, when removing this Operator from the Route, he will not receive a message that it has been excluded from the Route as the company remains on the Route, but other users of the company will receive a message that they have been added to the Route.
2. Removing your company is different from removing a subcontractor.
2.1 – Remove your company
When you click on the Sub-Contractor button, you can see your company checked.
However, when you remove your company, it is still visible on the Sub-Contractor window, but not checked.
2.2 – Remove your Sub-Contractor
When you click on the Sub-Contractor button, you cannot see the Sub-Contractor in the Sub-Contractor window.
However, when you remove your Sub-Contractor, you can see it on the Sub-Contractor window.
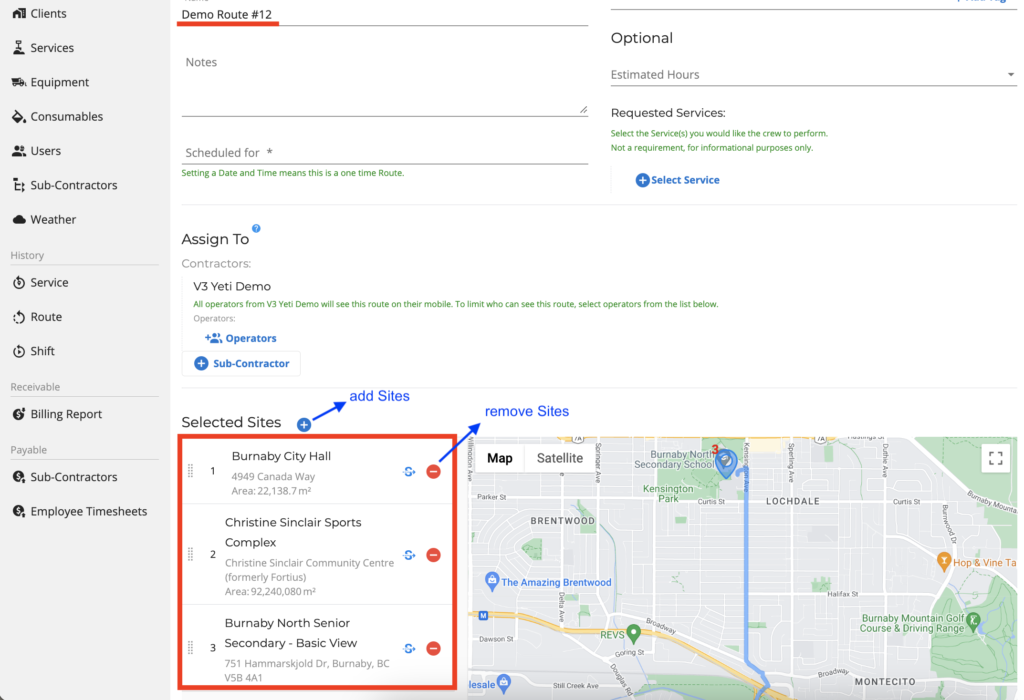
Add or remove Sites to your Route
Selecting a Route using an existing template from the down will automatically populate the Sites that belong to that Standard Route. You can, however, remove or add more sites when creating the Dispatch Route.
Note: A Route must have at least one Site when it is created.
Optimize your Route
Using this feature, you can optimize your route. You can drag the first and last Sites of your Route, so the system will keep these two Sites and optimize the other Sites based on their distances. By working at the closest sites, your operator can optimize driving time.
The Route line displays up to 25 sites, but you can optimize up to 150 sites.
To optimize your Route, all Sites should have the location (address). To set your Site address, click here.

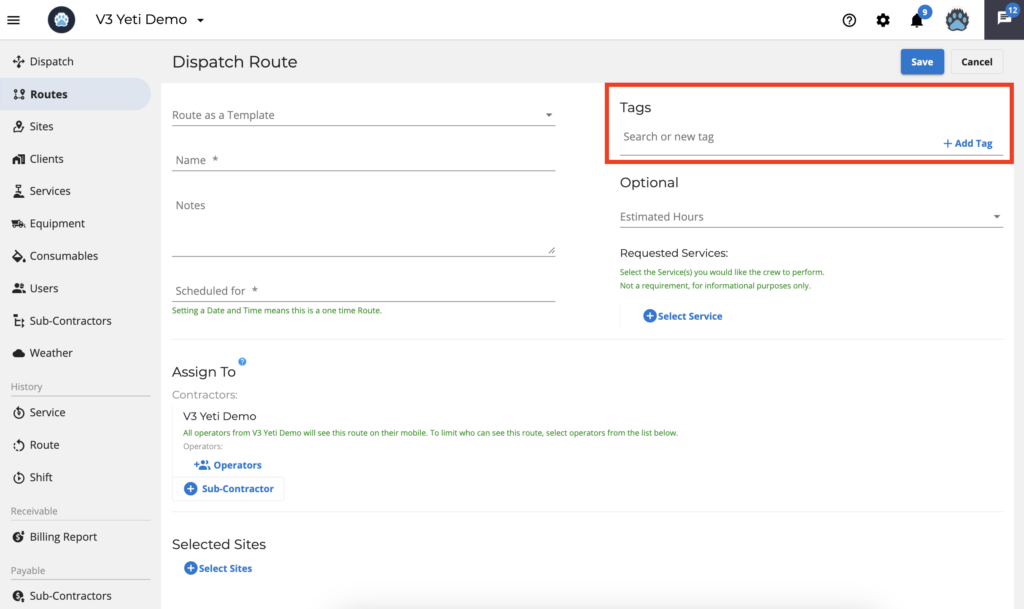
Mark your Route with a tag
Tags can help you find your Route more easily. For example, you could define a tag ‘Vancouver’ for all Routes within the city of Vancouver. As a result, if you search using the tag ‘Vancouver,’ you will see every Route in Vancouver.
Select estimated hours
Indicating the time is not mandatory, but it will be visible on the mobile app. It will not be a warning if the operator completes the work in less or more time than that estimated in this field.
Select Services
There is no requirement for this field, and even if you fill it out, it won’t appear on the mobile app. The mobile app shows the Services that are indicated on the Site page. For more information click here.