May 10, 2023
Back to Best Practices
May 10, 2023
How to use YETI snow software?
Upon subscribing to Yeti, default records for your company are available to help you get acquainted with the system. You can see more details here.
In order to avoid missing any links between your records, we recommend following the order below.
Equipment
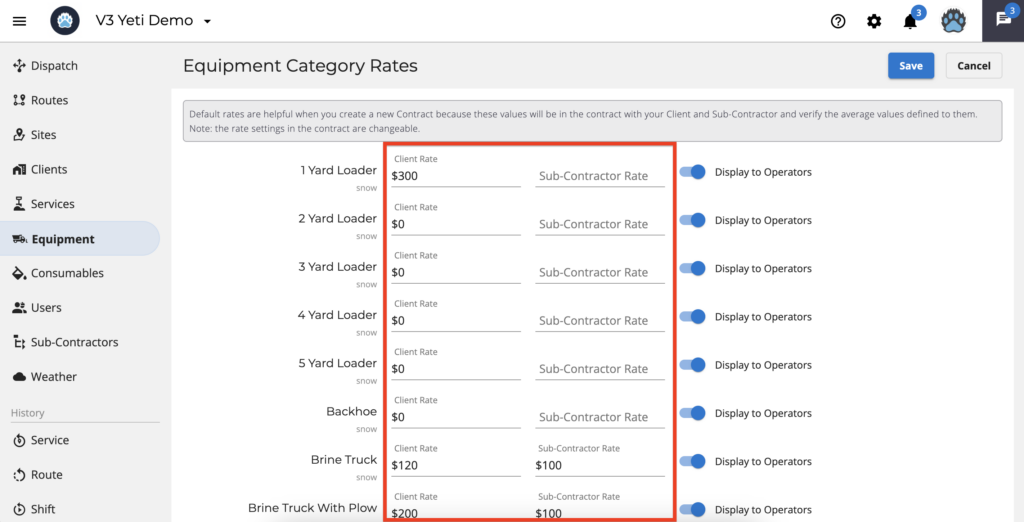
- On the Equipment page, click to edit the category.
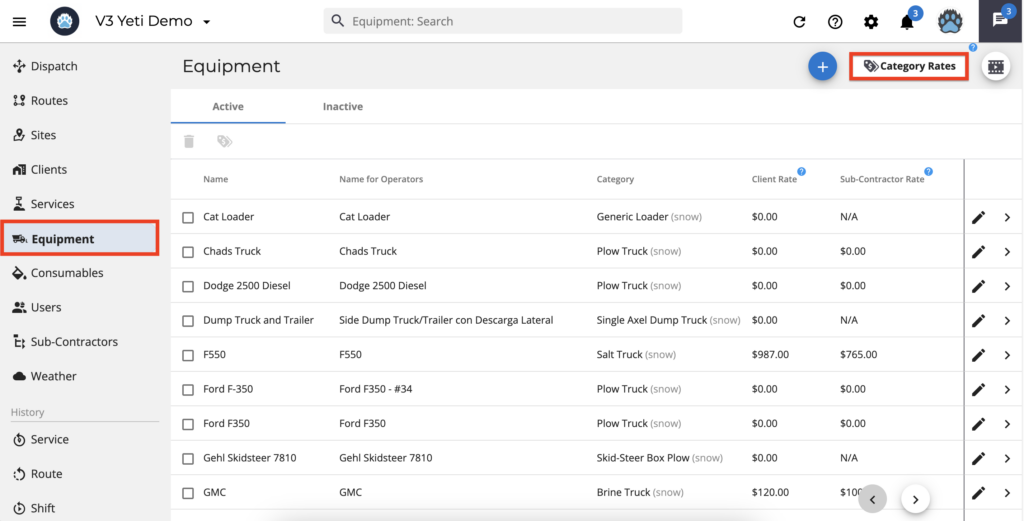
- Insert your Client and Subcontractors’ rates, and the option if you want to display these Equipment on the Yeti app to your Operator.
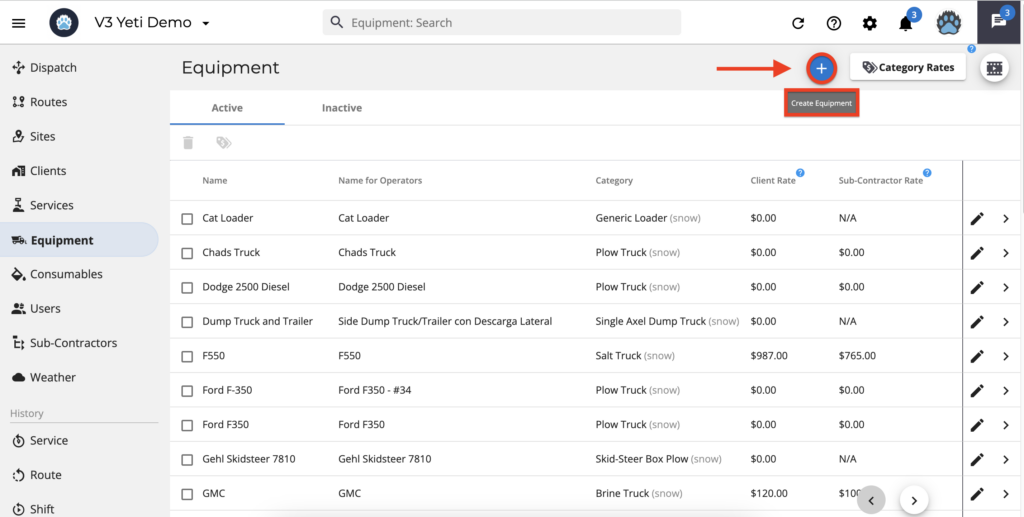
- Click on the button “add” to create a new piece of equipment.
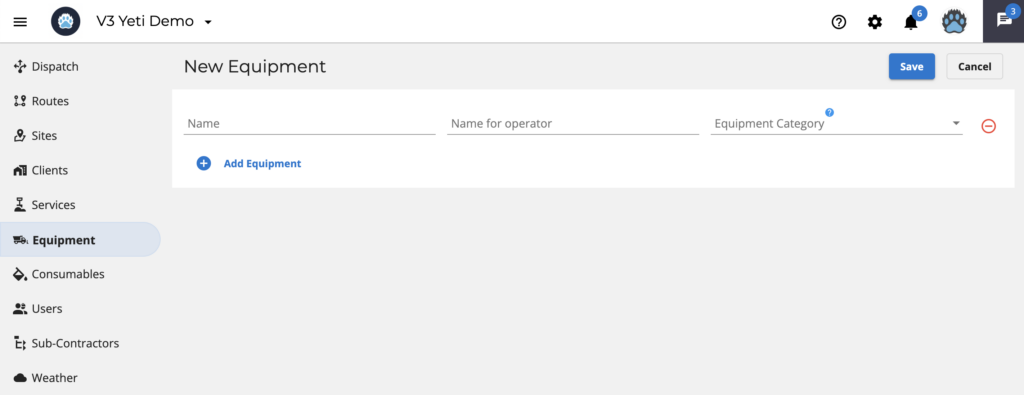
- Name your equipment and link it to a category.
For more information about Equipment, click here.
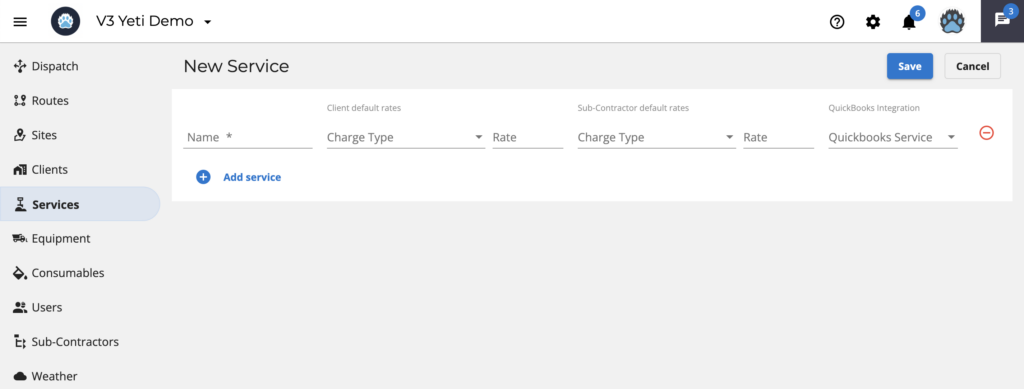
Services
- On the Services page, click to add a Service.
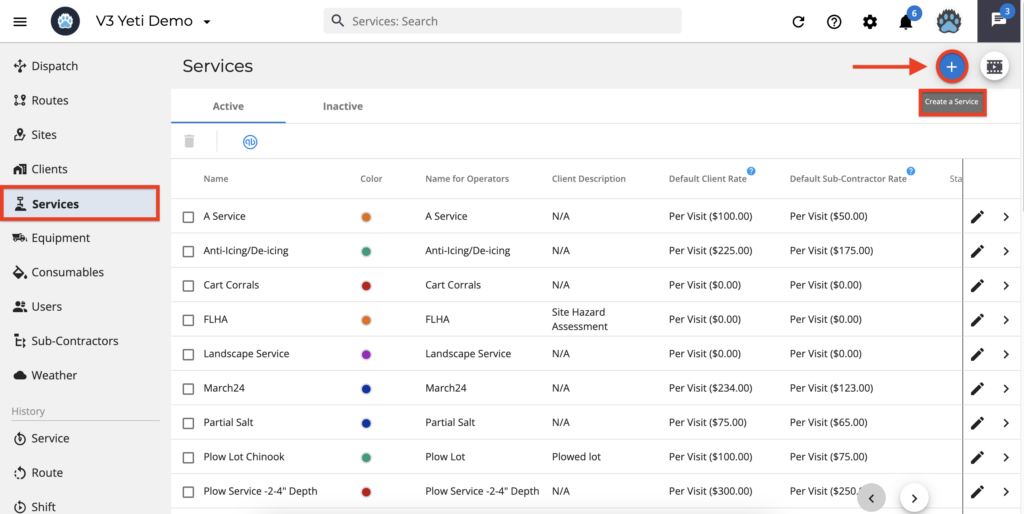
- Name your service and rate for your Client and Sub-Contractor.
For more information about Services, click here.
Consumables
- On the Consumables page, inform your Client and Sub-Contractor rate, and the option if you want to display these Consumables on the Yeti app to your Operator.
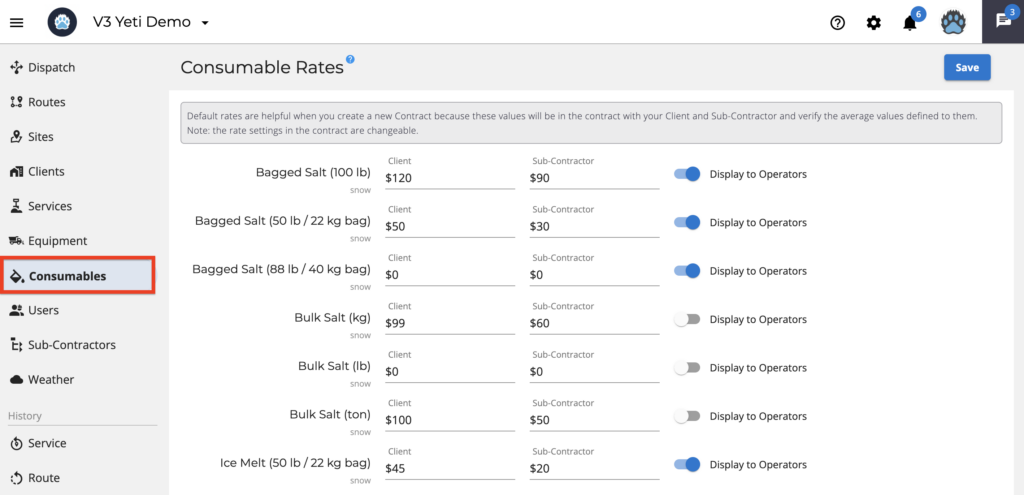
For more information about Consumables, click here.
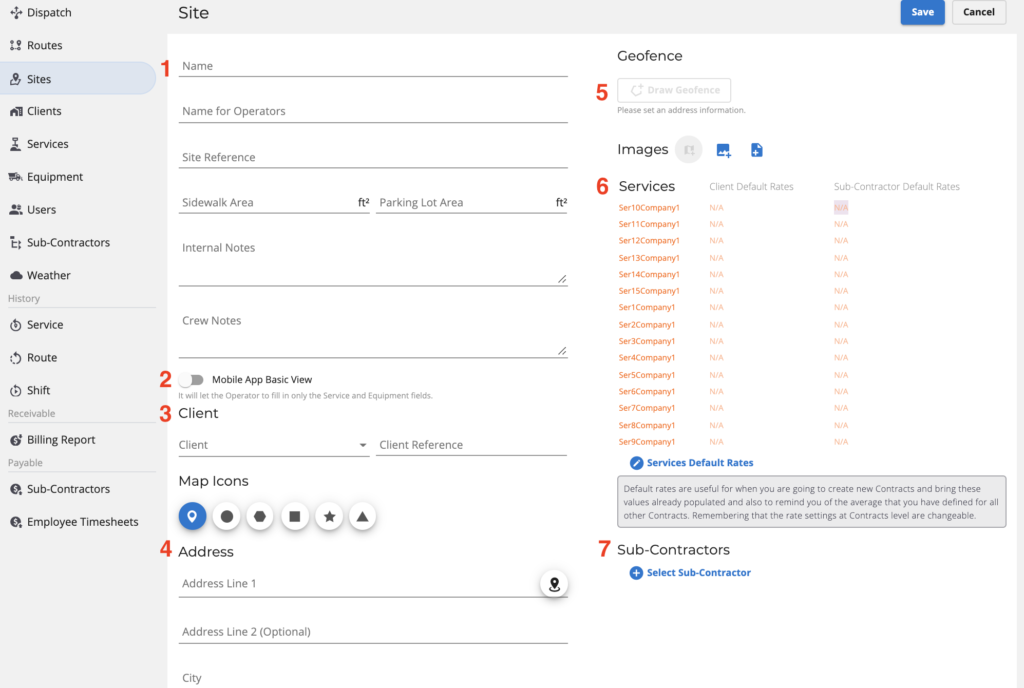
Sites
- On the Sites page, click to add a Site.

- Inform the Site’s name
- “Mobile App Basic View” can be selected if you don’t need the crew to take weather observations or photos.
- Inform your Client or select your company if you don’t have a Client.
- Insert the Site’s address.
- Setting up a geofence by clicking on the map and create a perimeter.
- Select the Services that the crew can perform on this Site.
- Select the Sub-Contractor if you subcontracted someone.
For more information about Sites, click here.
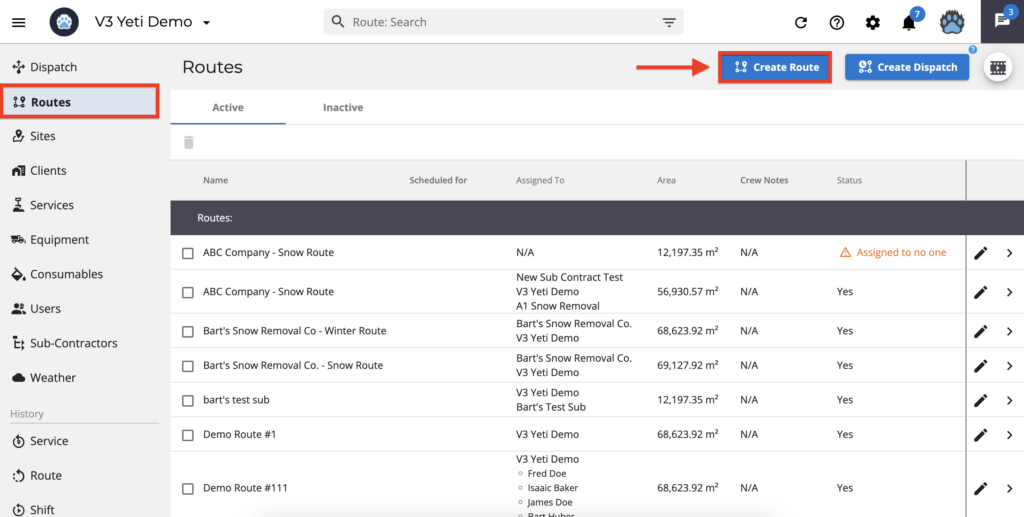
Routes
- On the Routes page, click on “Create Route”.
- Inform the Route’s name
- If you have set up seasons for your company, it will show to your crew.
- You can assign the Route for your company or your Sub-Contractor. If you assign for your company, you can also select the operator that will perform this Route. Otherwise, this Route will show to your entire company.
- Select the Sites related to this Route.
- Select the Service for this Route

For more information about Routes, click here.