August 22, 2024
August 22, 2024
How to create a Services?
This document will guide you on how to set up services in Yeti.
- Create a Service
- Name your Service
- Edit your Service
- Description Tab
- Default Rates Tab
- Inspection-Form-Tab
- Integration Tab
- Add service to multiple sites
- How to select multiple sites at once
Create a Service
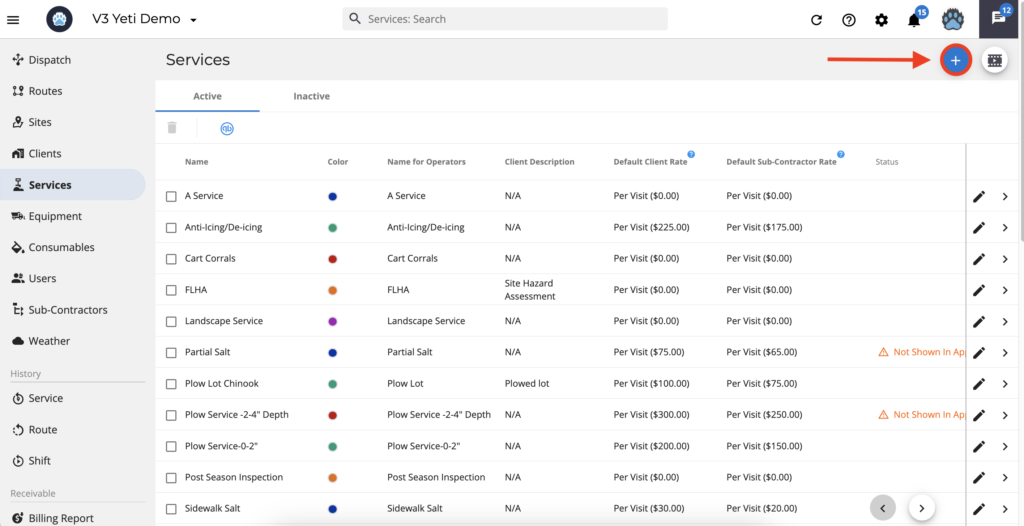
Click on Services in the left side navigation bar to be brought to the services page. Click the blue + button to add a new service.
Name your Service
Give your service a title. You have the option to list how you want this service to appear for operators on the mobile app as well as for your clients. You also have the option to create multiple services at once by selecting the + Add Service button. Click Save once you are ready. You have now created a service(s) that is available for selection on the Site level.

Edit your Service
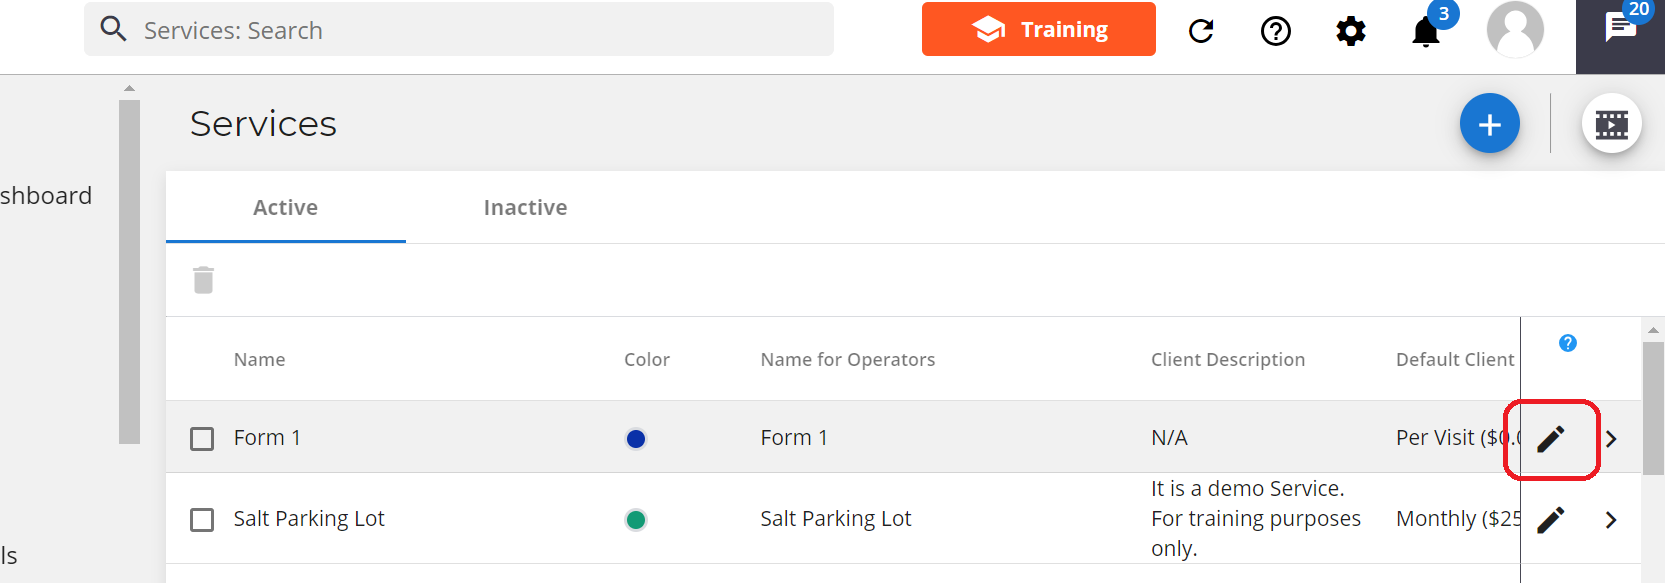
Now that you’ve set the name of your service you can update it with information. Click the pencil icon beside the service you just created. This will bring you to the update service page, which will contain four tabs.
Description Tab
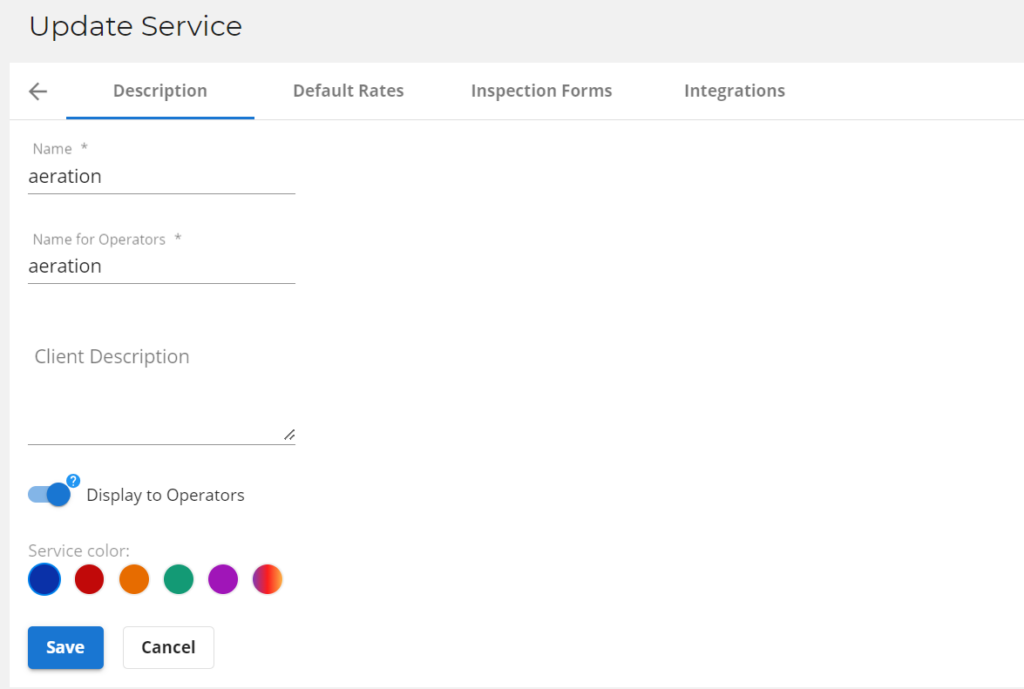
In this tab, you can set the following:
- Name: Ability to edit or update the name for a service you created
- Name for operator: Ability to edit or update the service name which will appear on the mobile app for the operator to select
- Client Description: Ability to edit or update how the service name will appear to the client
- Display to operator: turn the toggle on to make this service appear in the mobile app.
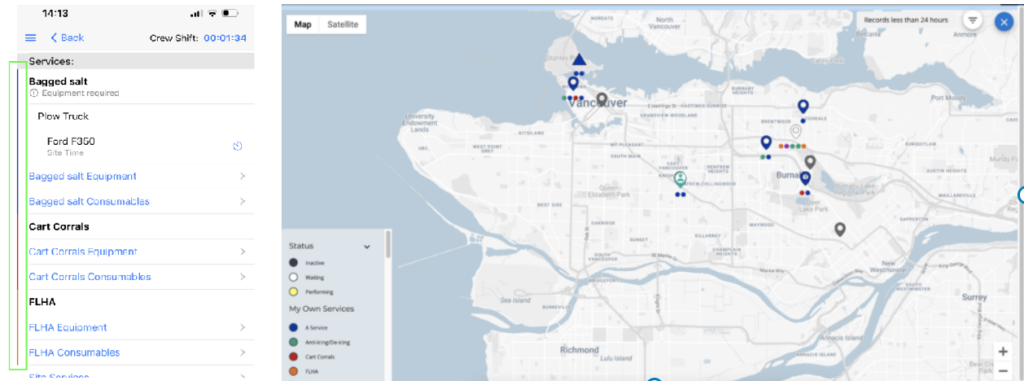
- Color: Set a color for this service. Color can be used to help visually identify services in records, reports, and on the global map.
Here are examples of how color is used to help visually find services on the map.
Default Rates Tab
When setting a rate for a service you can:
- Set ‘custom’ charge type, minimums and rates at the site level or use the Massive Change function.
- Set ‘defaults’ via the Default Rate tab.
When creating a new site, the default rates will automatically populate, allowing you to review, confirm, and modify them if necessary.
If you do not have default rates you can leave these fields empty.
Example: You’d like to see a Pre-Season Inspection Service on every site at $0
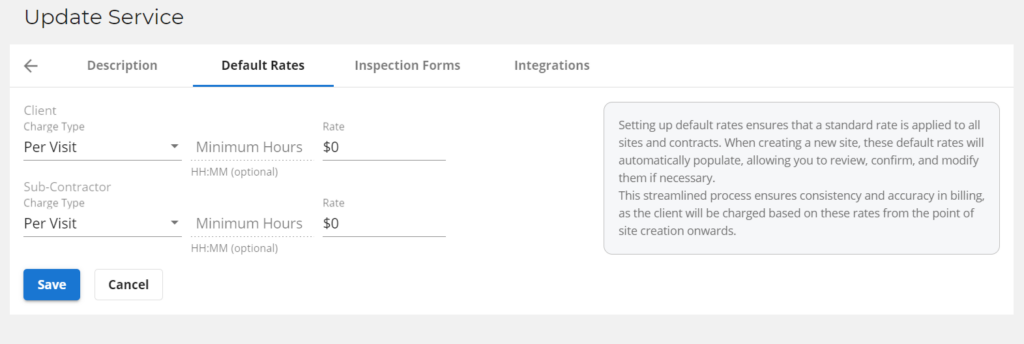
You can set the following in the Default Rate Tab:
- Charge type: There is an option of Per Visit, Service (Hourly), Equipment (Hourly), and Monthly
- Minimum Hours: Specify the minimum time required for the service.
- Rates: Set how much you want to charge for this service.
Important Note: A charge type and rate must be set for the service. If not, the service will not appear on the mobile app for selection. If you want the Service to be available, but do not want to set a charge, you can set the rate to zero ($0).
Inspection Form Tab
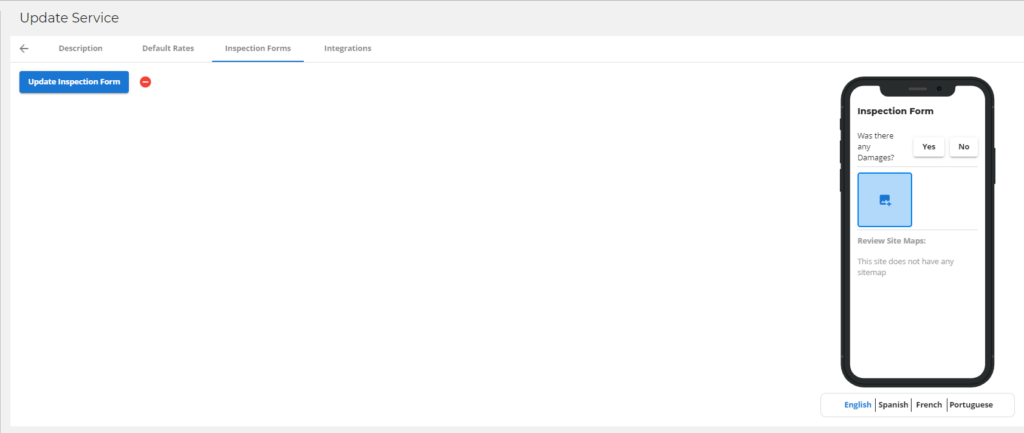
In this tab, you can set the following:
- Turn your service into an inspection form.
Integration Tab
In this tab, you can set the following:
- Connect your Yeti to Xero.
- Connect your Yeti to QuickBooks online.

*Please note there is a separate save button on each tab. Please make sure that any tab with new information has been saved before leaving the page.
Add service to multiple sites
You can use the massive change feature to add, edit or remove a service for multiple sites. To make a change to all sites, select the massive change button.

Select Services on the pop-up.
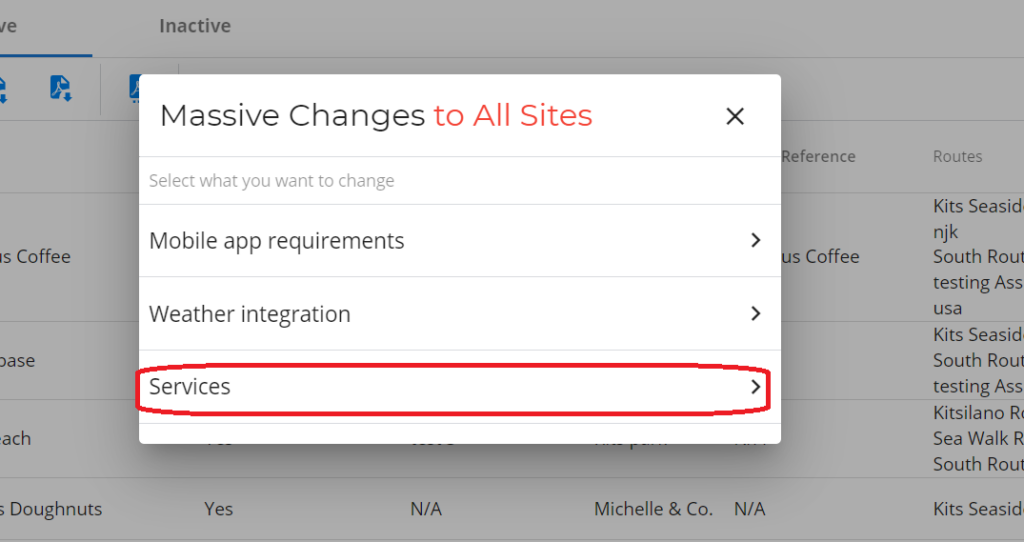
You’ll be given the following options:
- Add Service and Change Rate
- Change Consumable Requirement
- Remove Service

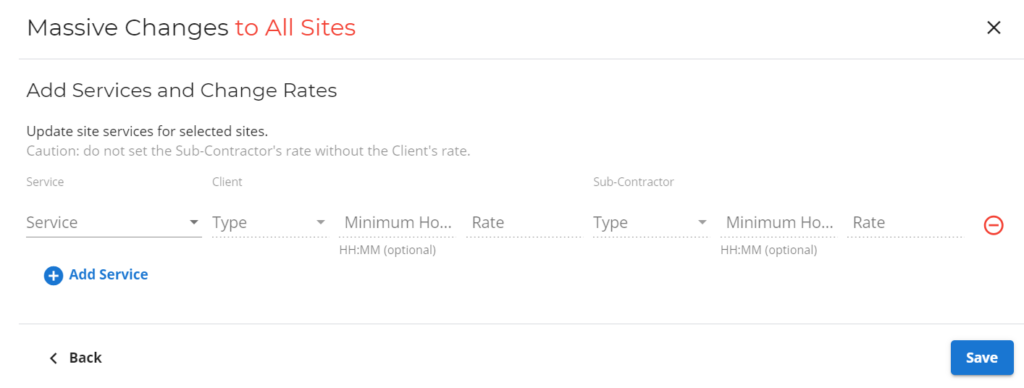
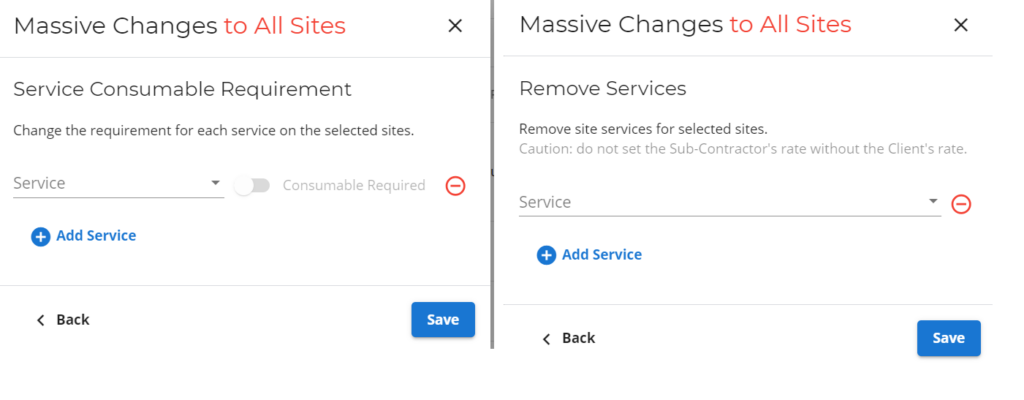
Once you have made your change, click the save button.
How to select multiple sites at once
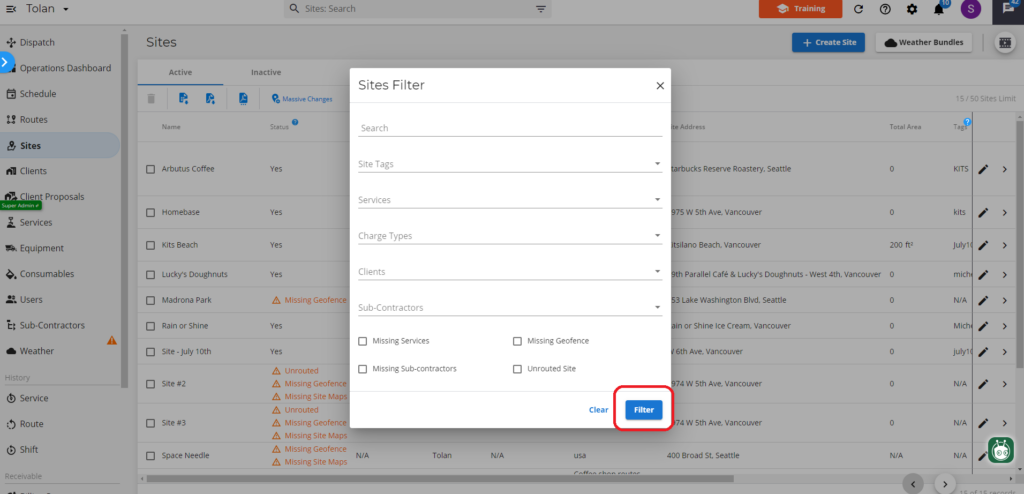
To make changes to selected sites you can either select sites, one by one or use the search filter on the top of the page.

By utilizing the search filter, you can group sites based on various pieces of information.
Once you have finished, click the filter button.
