April 19, 2024
Back to Account Help
April 19, 2024
Schedule
This document will provide you with all the necessary information to understand and utilize the Schedule feature. The Schedule is a comprehensive scheduling tool that can assist you with the planning of servicing sites year-round. This visual tool allows you to easily schedule and manage your dispatches.
- Open up the Schedule
- Schedule a route
- Assigning Operators and sub-contractors
- Availability and Notifications
- Reminder for Services requested
- Notes and Tags
- Cancel or unscheduled a route
- Edit a Route
- Tools filter
- Change the view
- Dispatch screen
Open up the Schedule
Head over to the Schedule by opening up the left-side menu, and then click on the Schedule button.
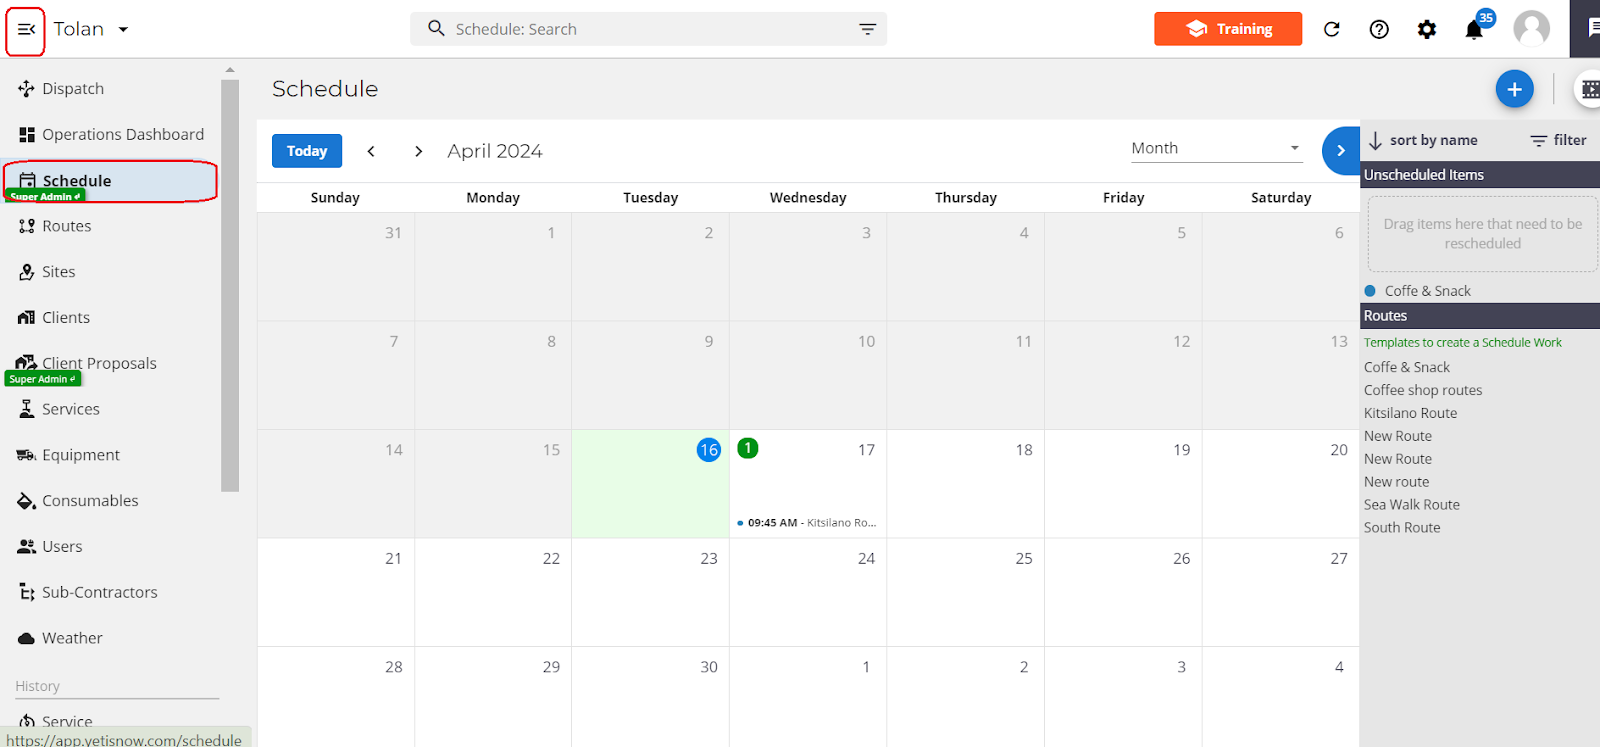
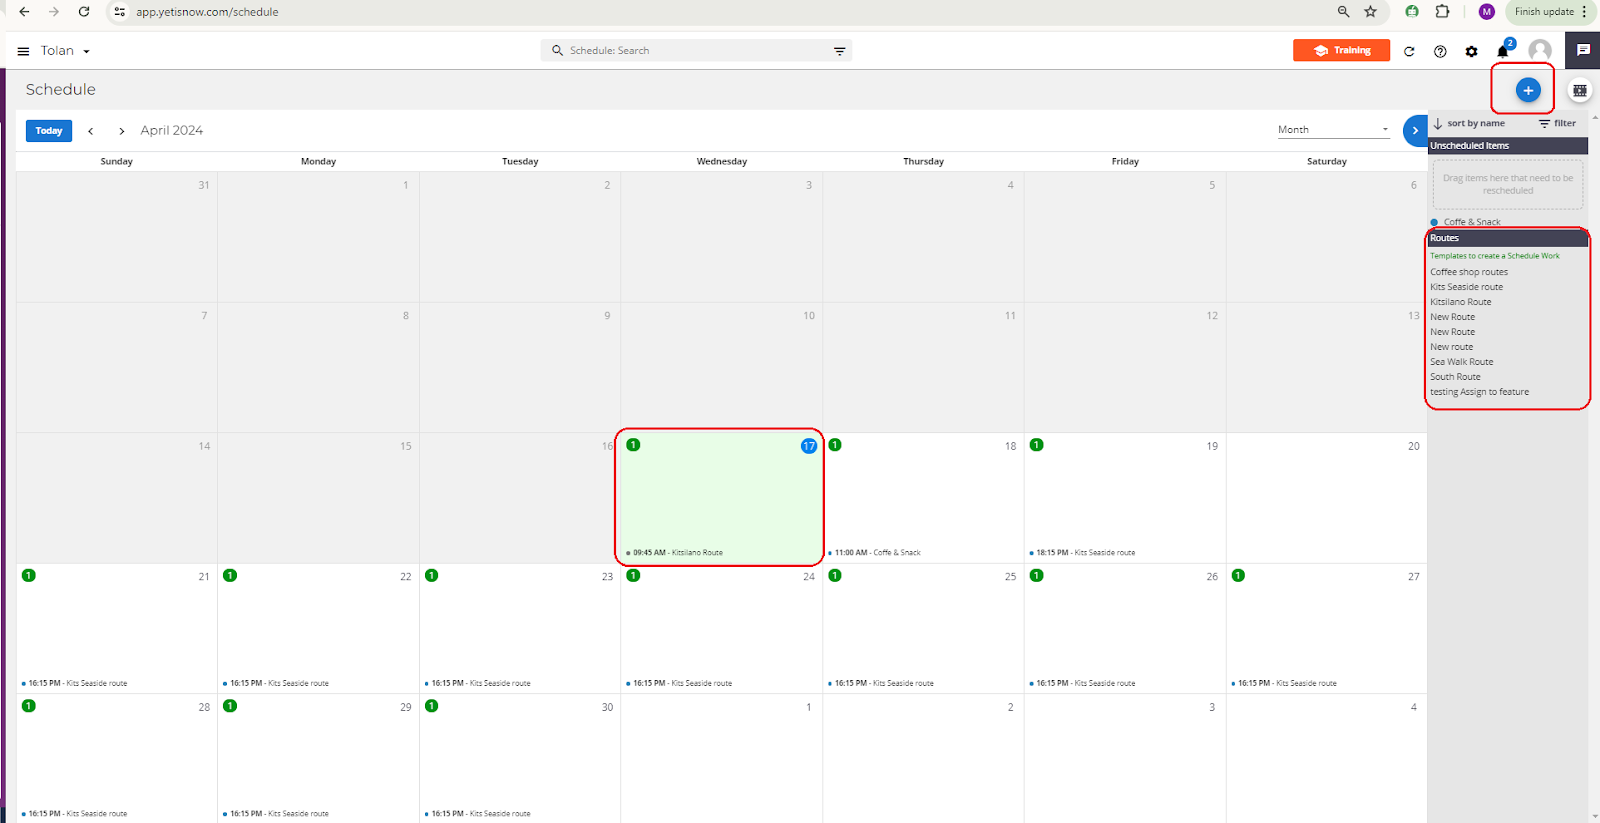
Open up the Schedule a Route pop-up by either:
- Clicking the blue plus button found in the right-hand corner
- Clicking on a date square on the Schedule
- Dragging one of the standard routes over to the schedule box.
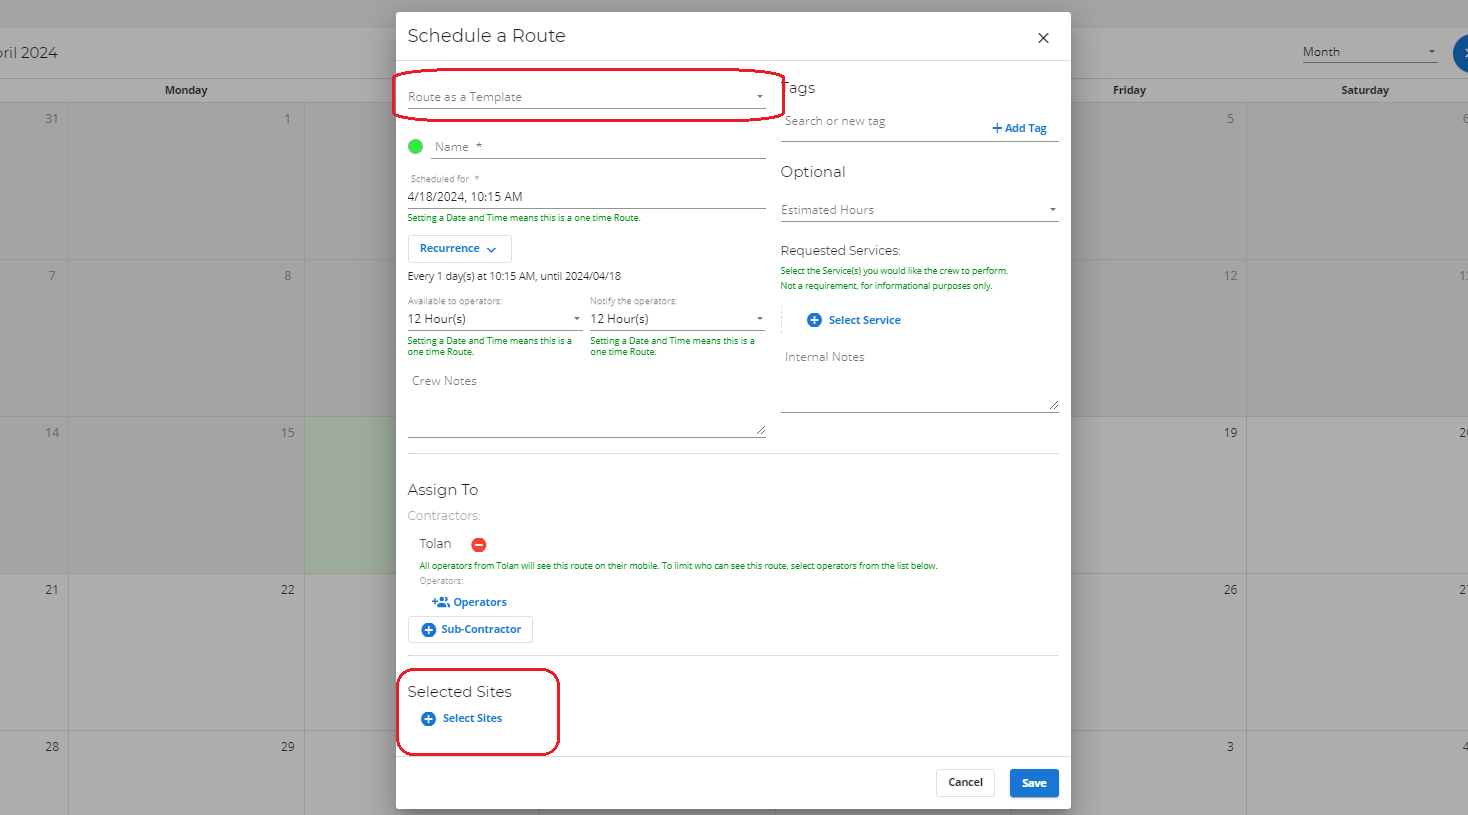
Schedule a route
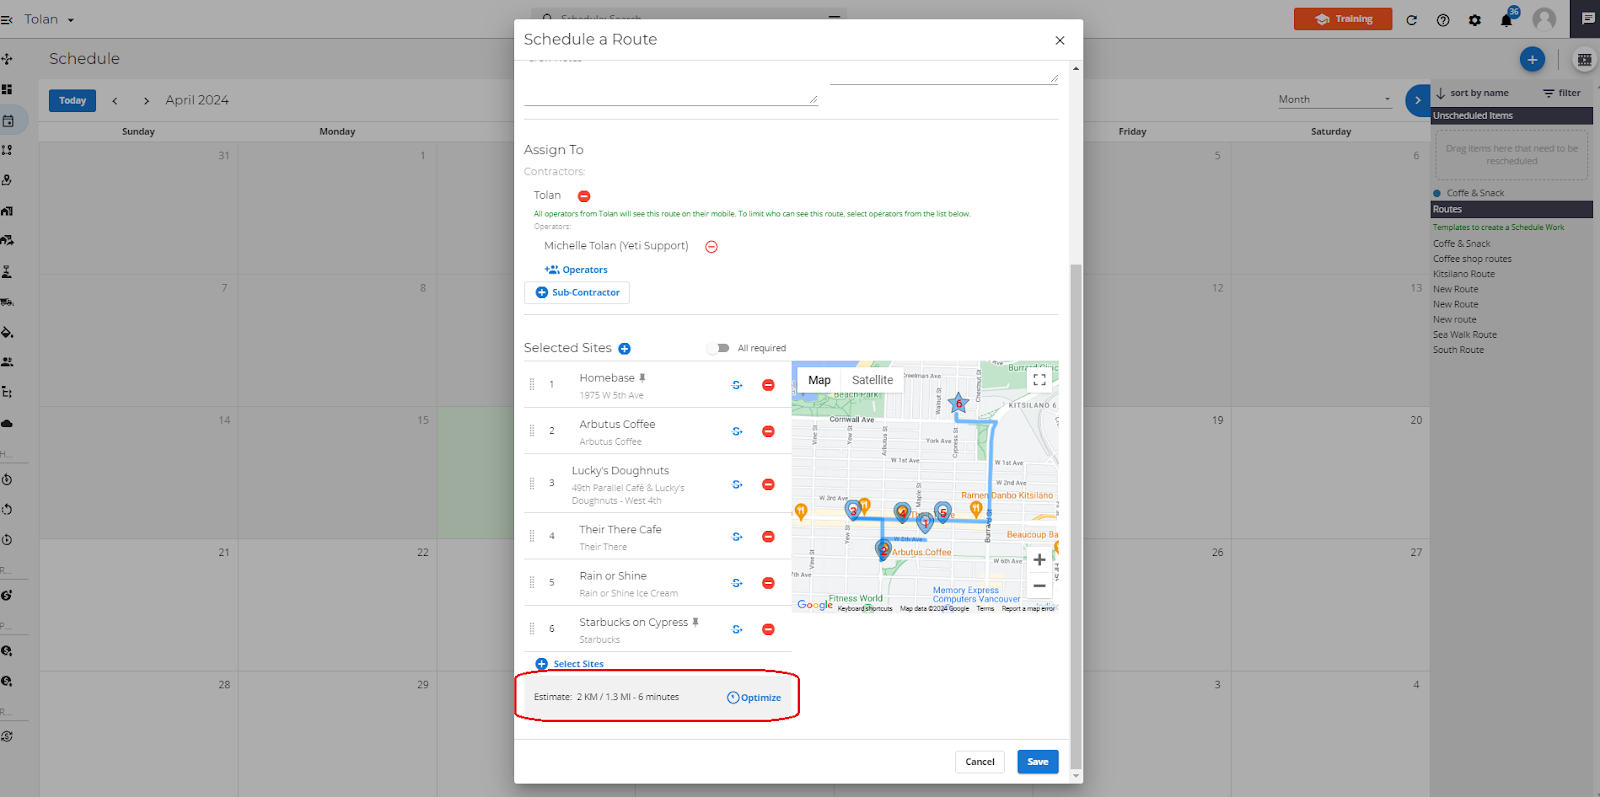
You can either choose to use an already existing route as a template, saving you time, or you can create a new route by heading to the bottom of the page, where you can choose what sites you would like to add in.
After you select your sites or route, you can optimize the route itself. Select the Optimize button found at the bottom of the pop-up. This will lay out the sites on the route in the most time-effective way as well as reduce the overall distance from start to finish.
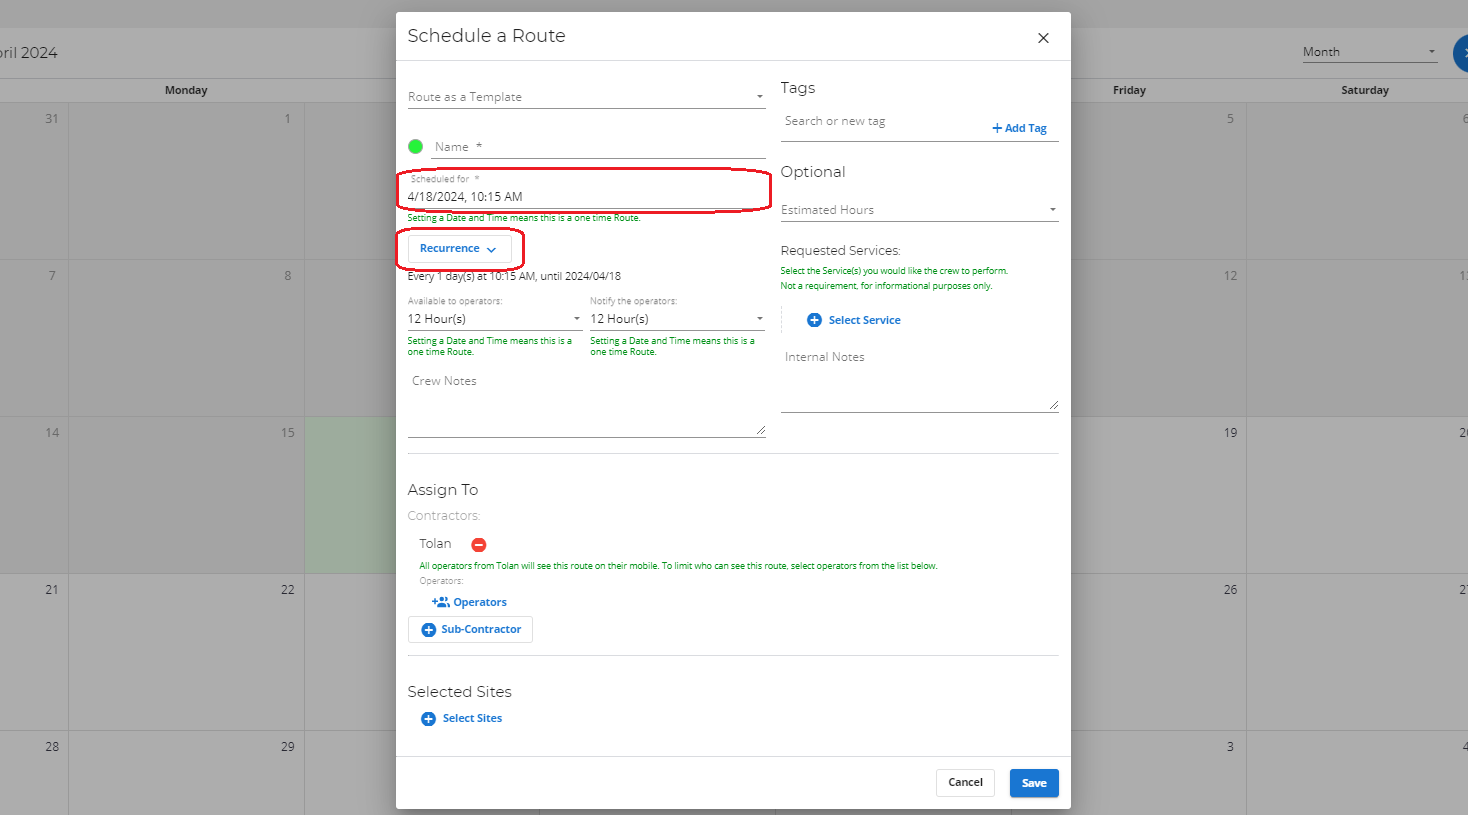
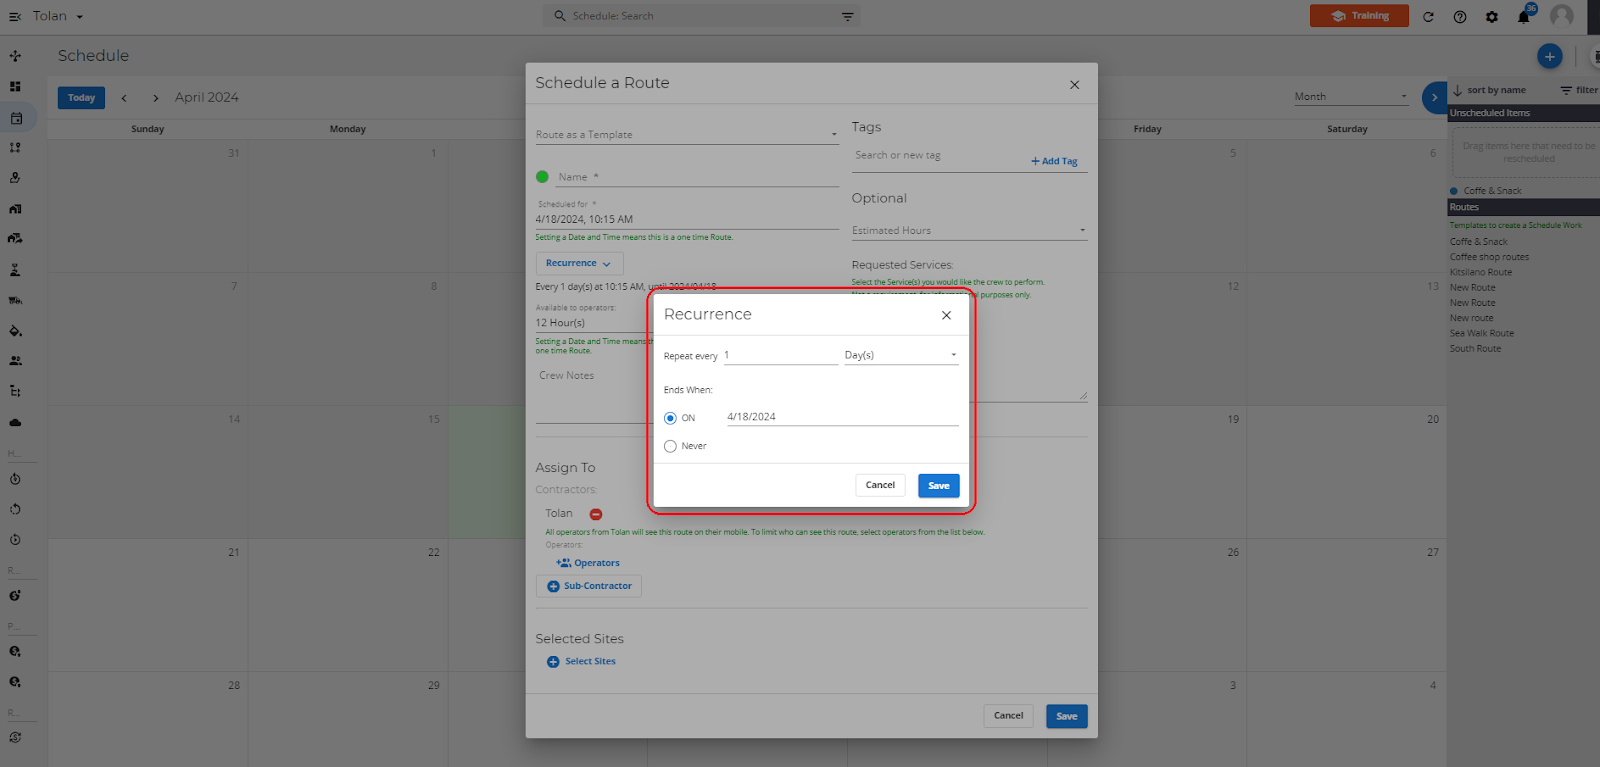
Choose a time and date for this route by selecting the field under Scheduled for. You can make this route recurring by selecting the recurrence button. Choose how often it repeats, whether it’s every few days, weeks or months. You can set a finished date or click never for it to be never-ending.
Assigning Operators and Sub-contractors
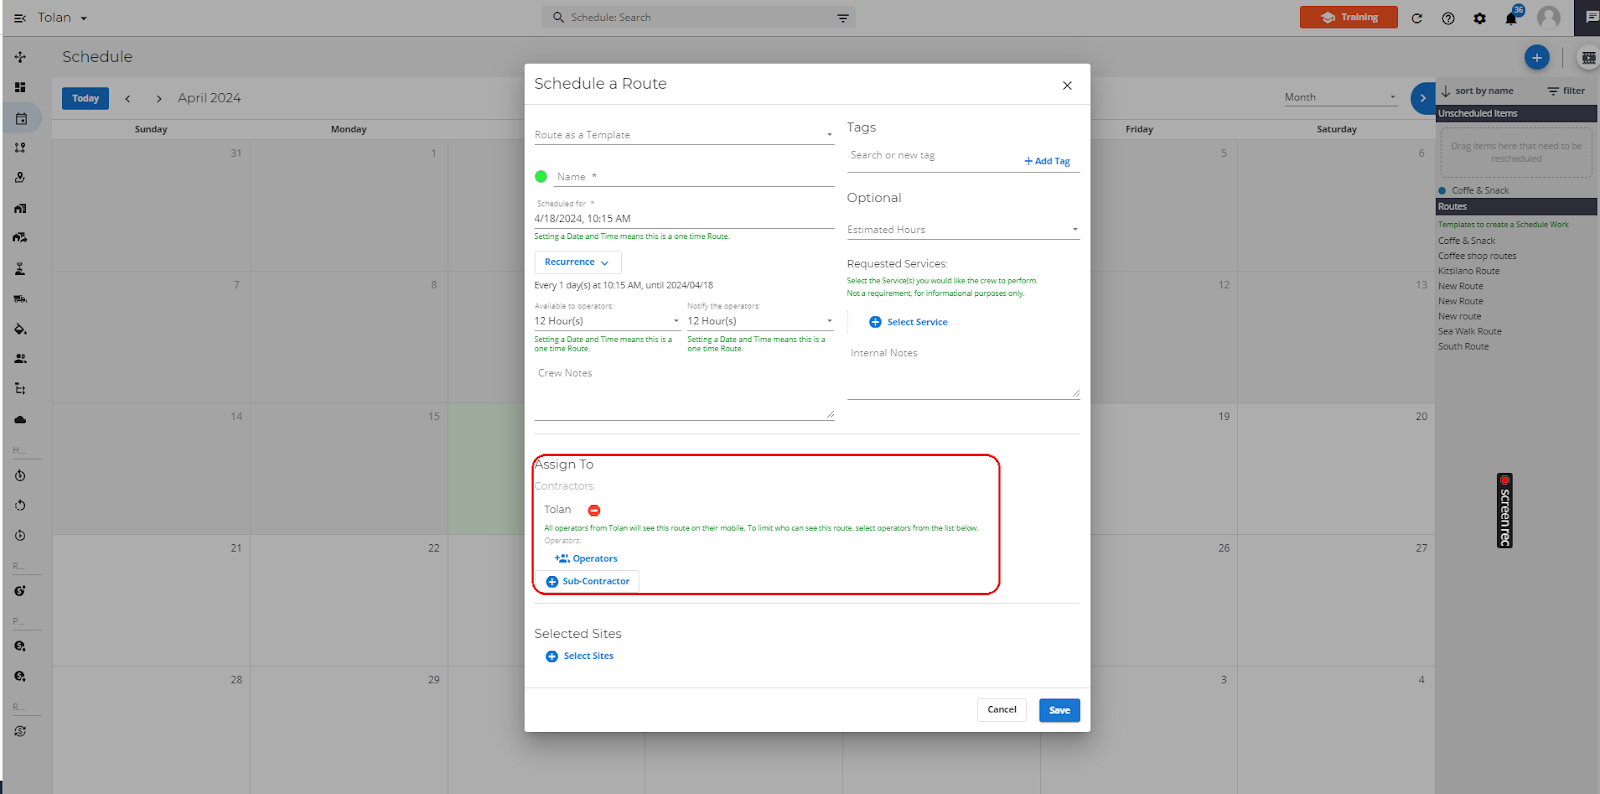
Head down to the Assign to section. You have the power to assign the route to a company. You can assign it to one of your subcontractors otherwise, the route will be assigned to your own company automatically. You can remove your company as the assigned company by clicking the red circle. When a route is assigned to your company, you also have the power to be specific about which operators have access to it. They will be notified about the route through the mobile app. If the route is assigned to a subcontractor, then you don’t have the power to select an operator. So all operators underneath the sub-contractor will be notified about the route.
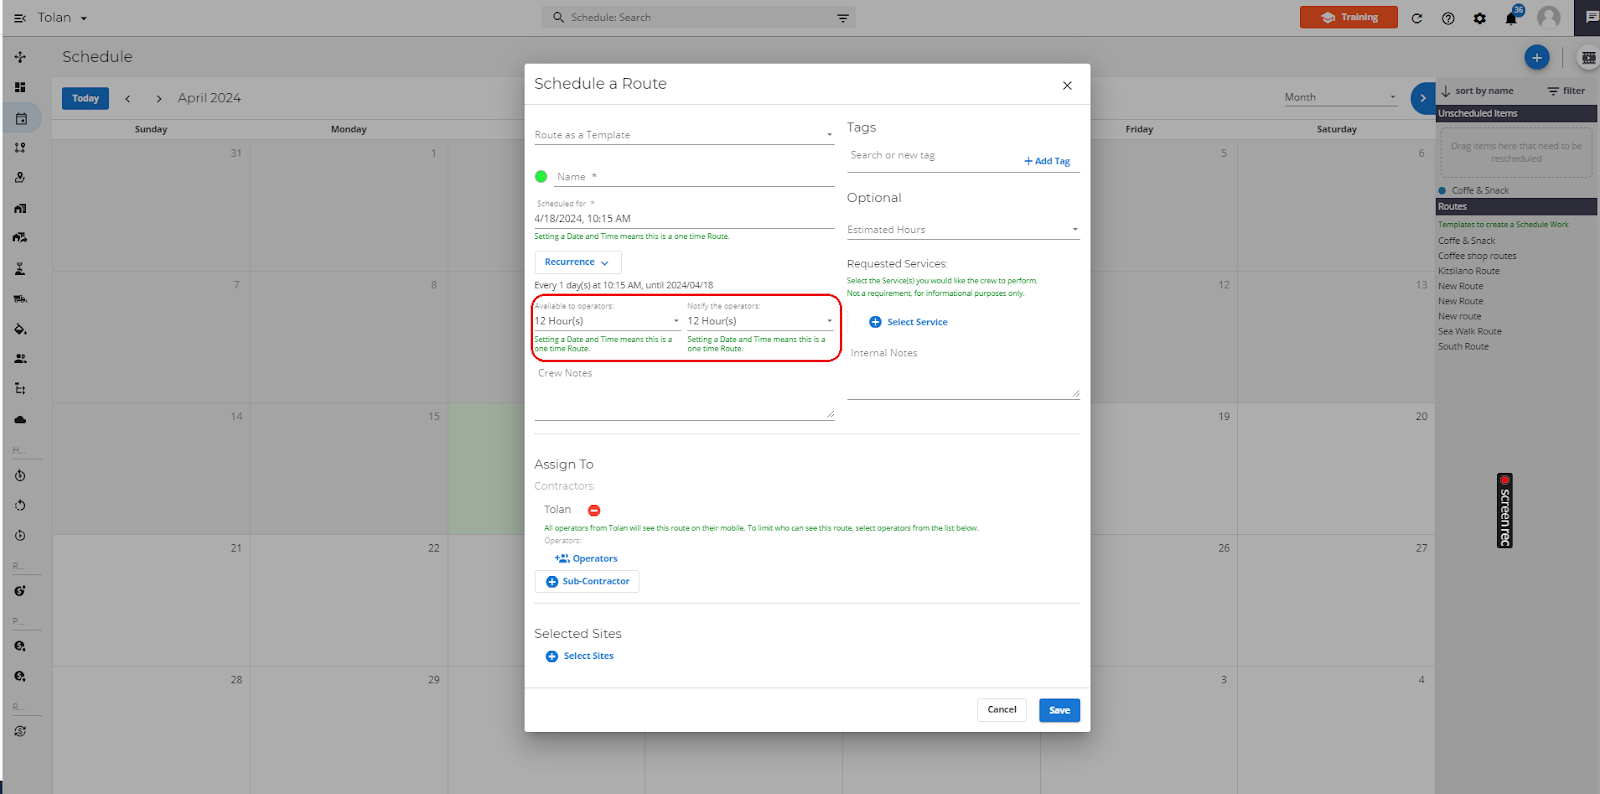
Availability and Notifications
Once you’ve set a time and date you can choose when this route becomes available to the operators and when they’ll be notified about it. The Available to Operator field allows you to select how many hours the route will appear online before its scheduled time. It will appear on both the dispatch page and the mobile app. The Notify the Operators field, allows you to set the hours before an operator gets notified that they’ve been added to the route.
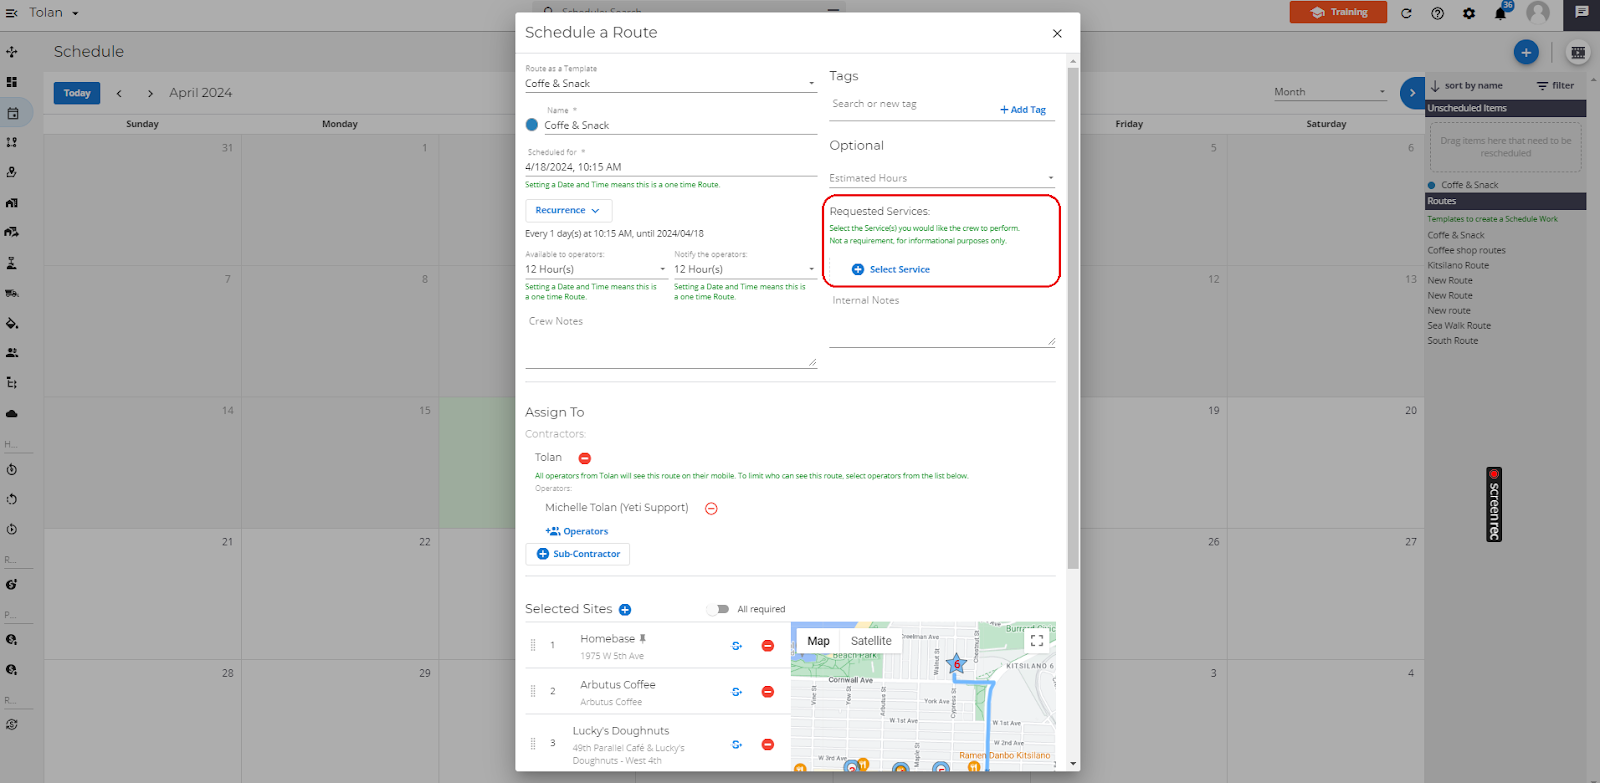
Reminder for Services Requested
Head down to the Requested Service field. Here you can select what services you want to remind your operator about when tackling sites on this route. The services you select are what will appear in a notice that is shown before entering the site on the mobile app.
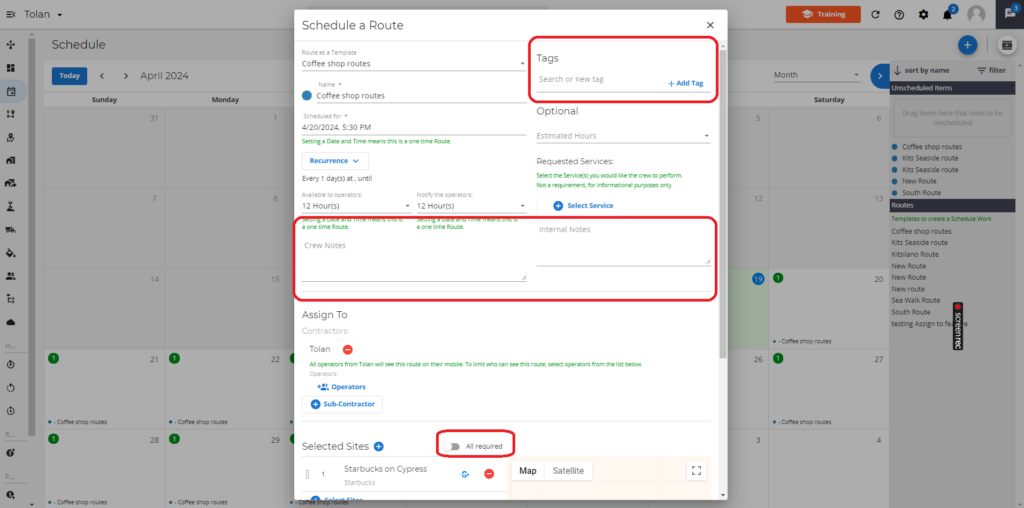
Notes and Tags
You can leave both Internal Notes and Crew Notes, assign tags as well as set the estimated hours that it will take to complete the job. Turn the required site toggle on to make every site on this route mandatory to visit.
Finally, give your route a name and color code it by selecting the colored circle. Hit the save button in the bottom right once you are ready.
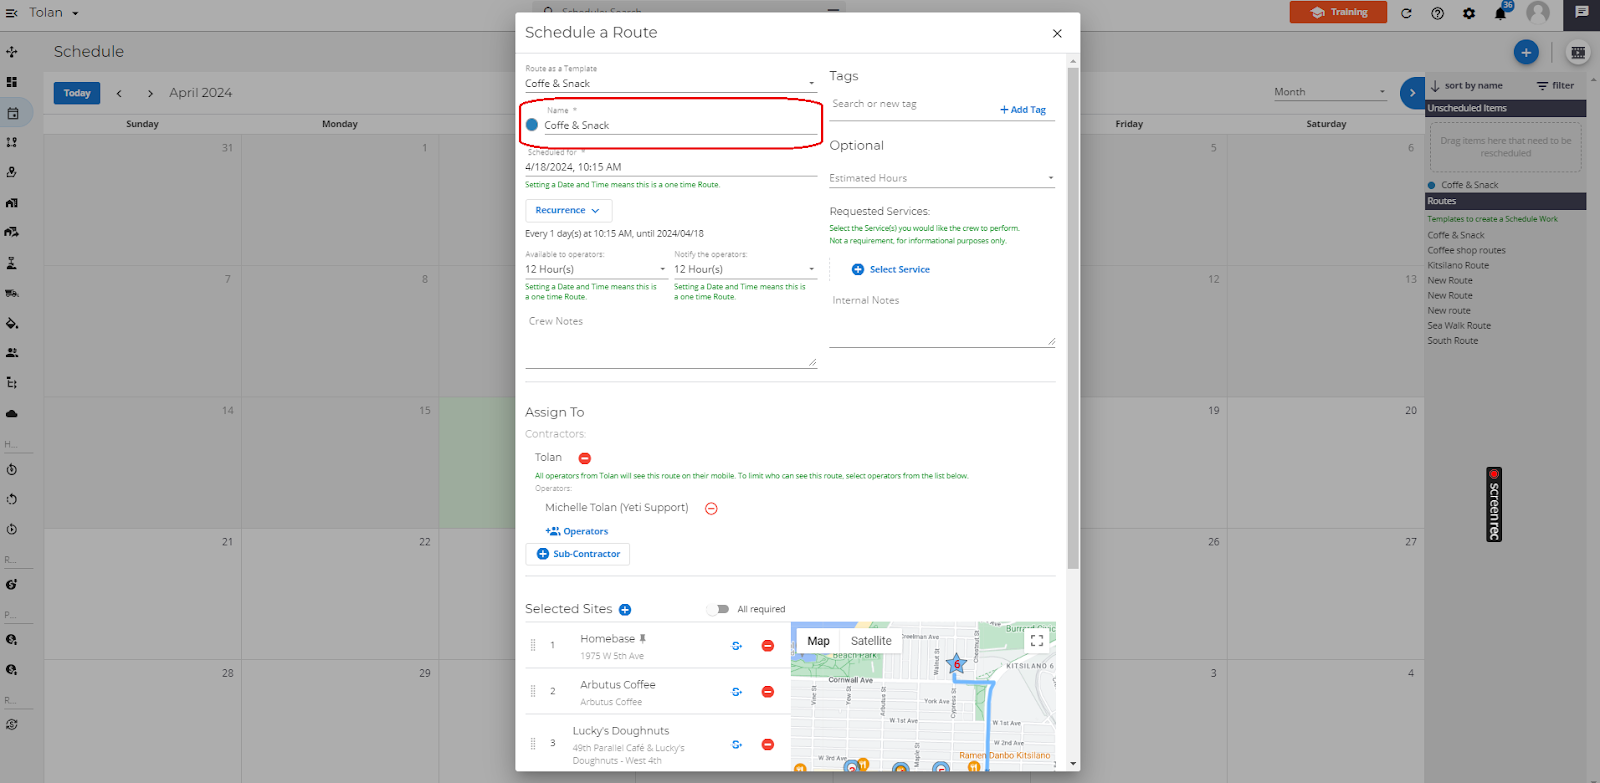
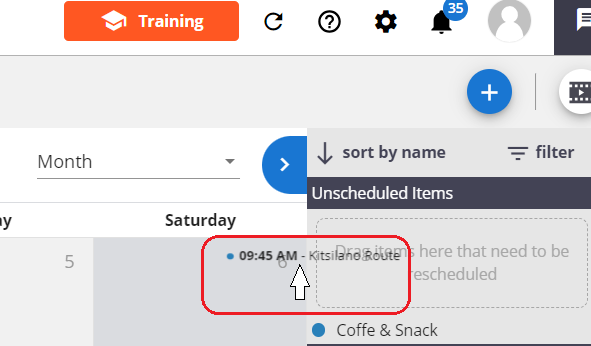
The route will appear in the Schedule for every day that it is scheduled for. The time that it is scheduled for will also appear beside the name of the route.
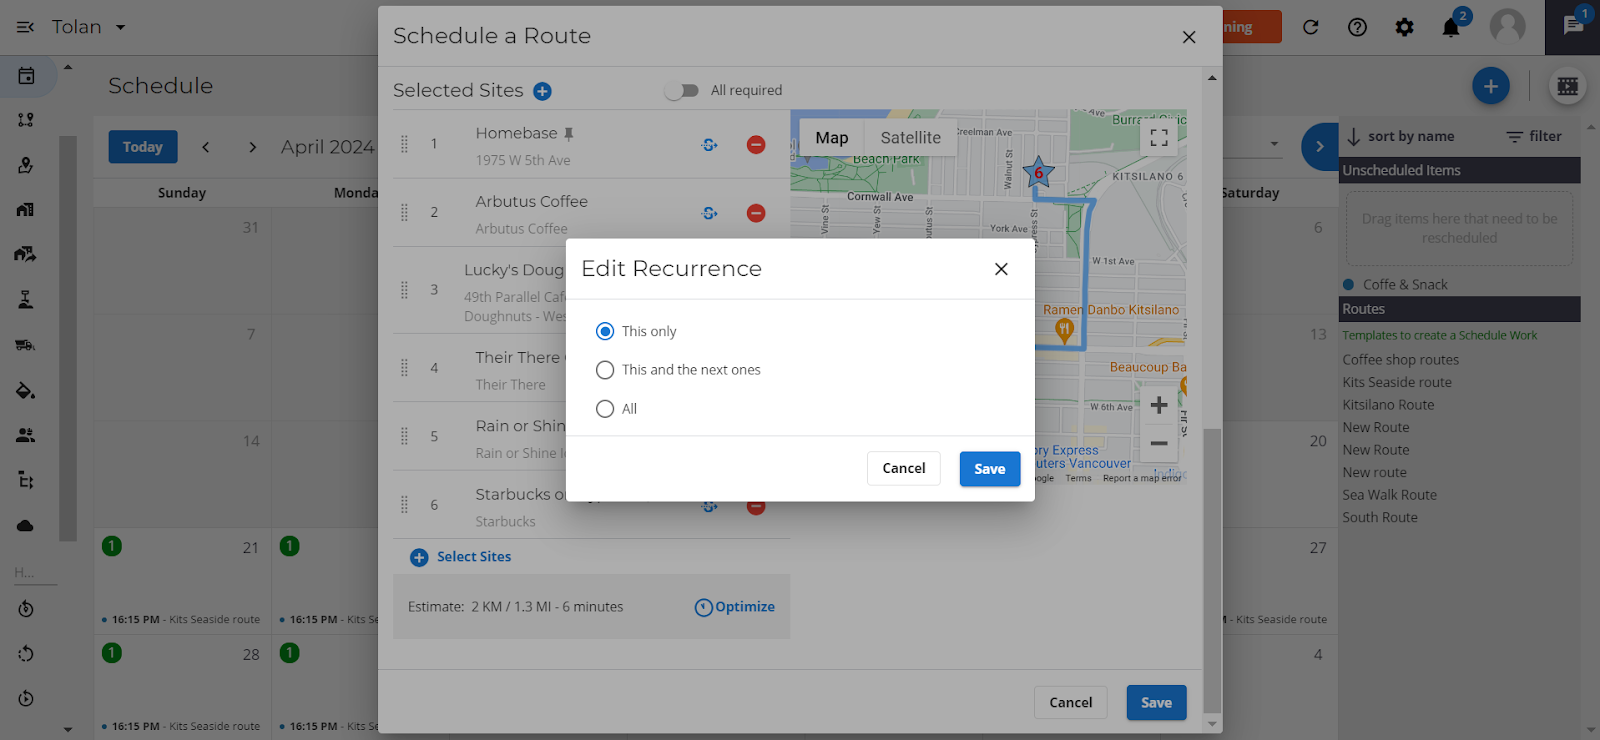
Edit a route
Click on any scheduled route on the scheduler to open it. Click on the pencil icon in the top right corner of the pop-up. Once you are finished making your edits, click save. If this is a recurring route, then you’ll be given the option to apply your edit to:
- This route – The route scheduled that day
- This and the next one. All route schedules from that day going forward.
- All – All routes that are scheduled from present-day onwards.
The option All will not appear when editing the start date of a route as the option This and the next ones will achieve the same result.
You can change the date for non-recurring routes by dragging it across the page and dropping it on a different date.
You may only edit a route from the past when updating its start date to a current or future date.

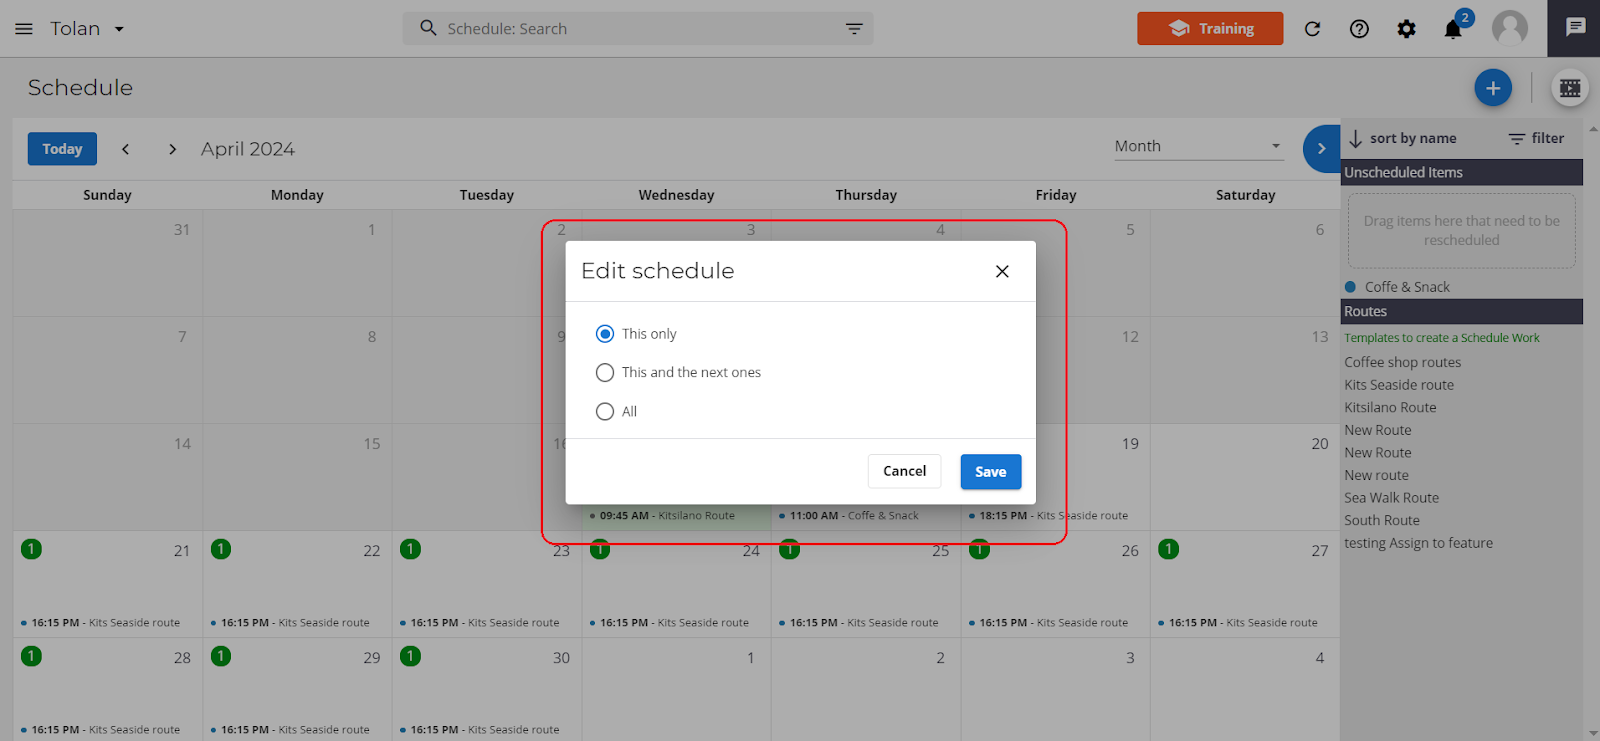
Cancel or unscheduled a route
If you need to unschedule a route, grab it off the Schedule and drag it over to the Unscheduled Items box.
A pop-up will appear asking you if you would like to unschedule only the selected route, the selected route & the next subsequent routes or all routes in the occurrence. Make your choice and hit save once you are ready. The route will be canceled and removed from the Schedule as selected. You can’t delete the unscheduled route from the Unscheduled Items area, or you can reschedule the route by dragging it to an alternate day on the calendar and editing it there accordingly.
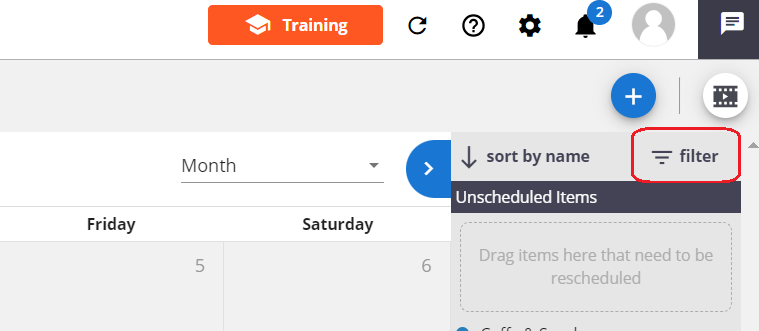
Tools filter
Choose what gets displayed on the Schedule by selecting the filter option. Filter through your schedule by using information such as routes, sites, users and Tags. You can also filter by “assigned to” to see if a route has not yet been assigned to anyone.
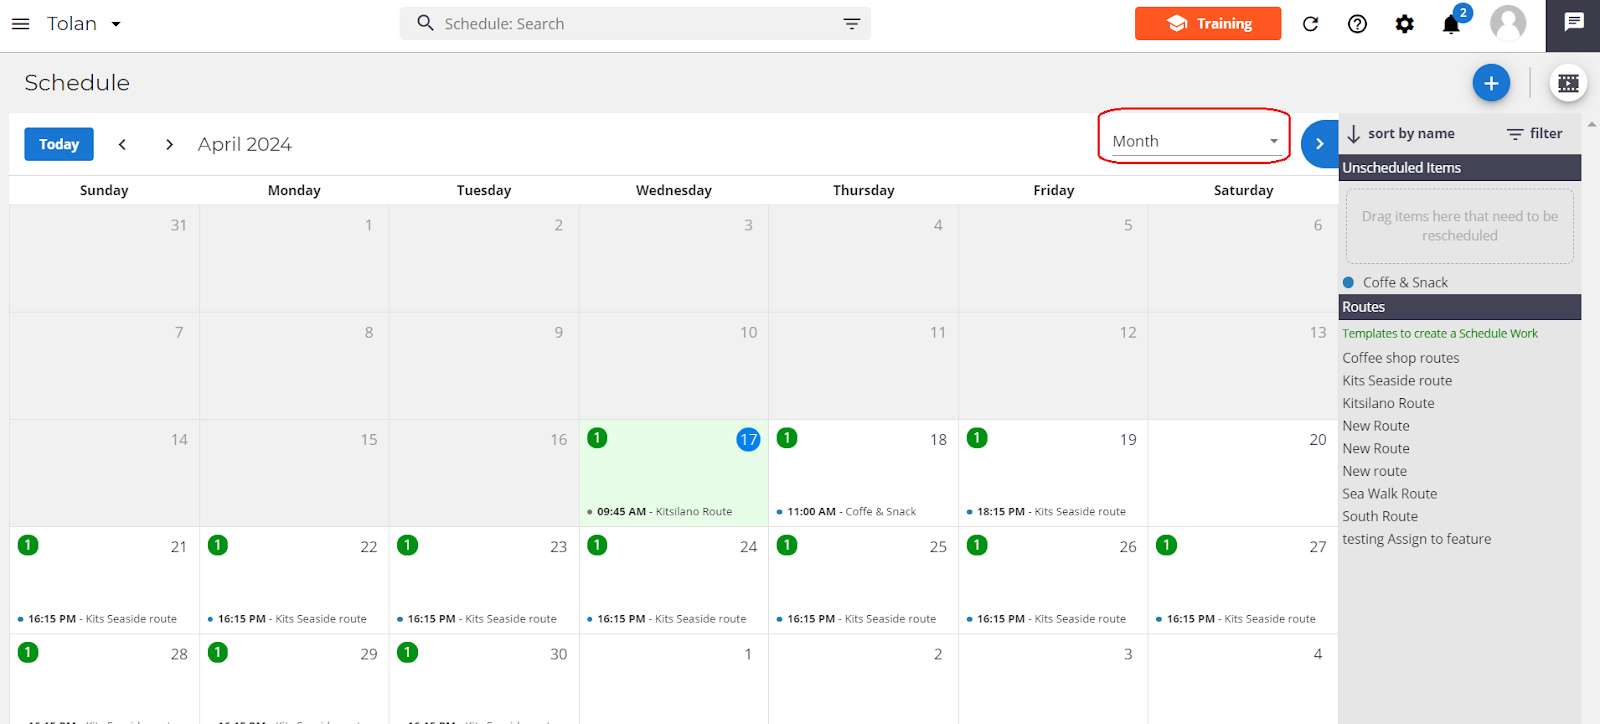
Change the view
The scheduler is available in monthly, weekly, and daily views. Select the dropdown month in the top right corner of the scheduler and select your preferred view. You also have the power to make the right-side menu disappear by clicking on the blue arrow button.
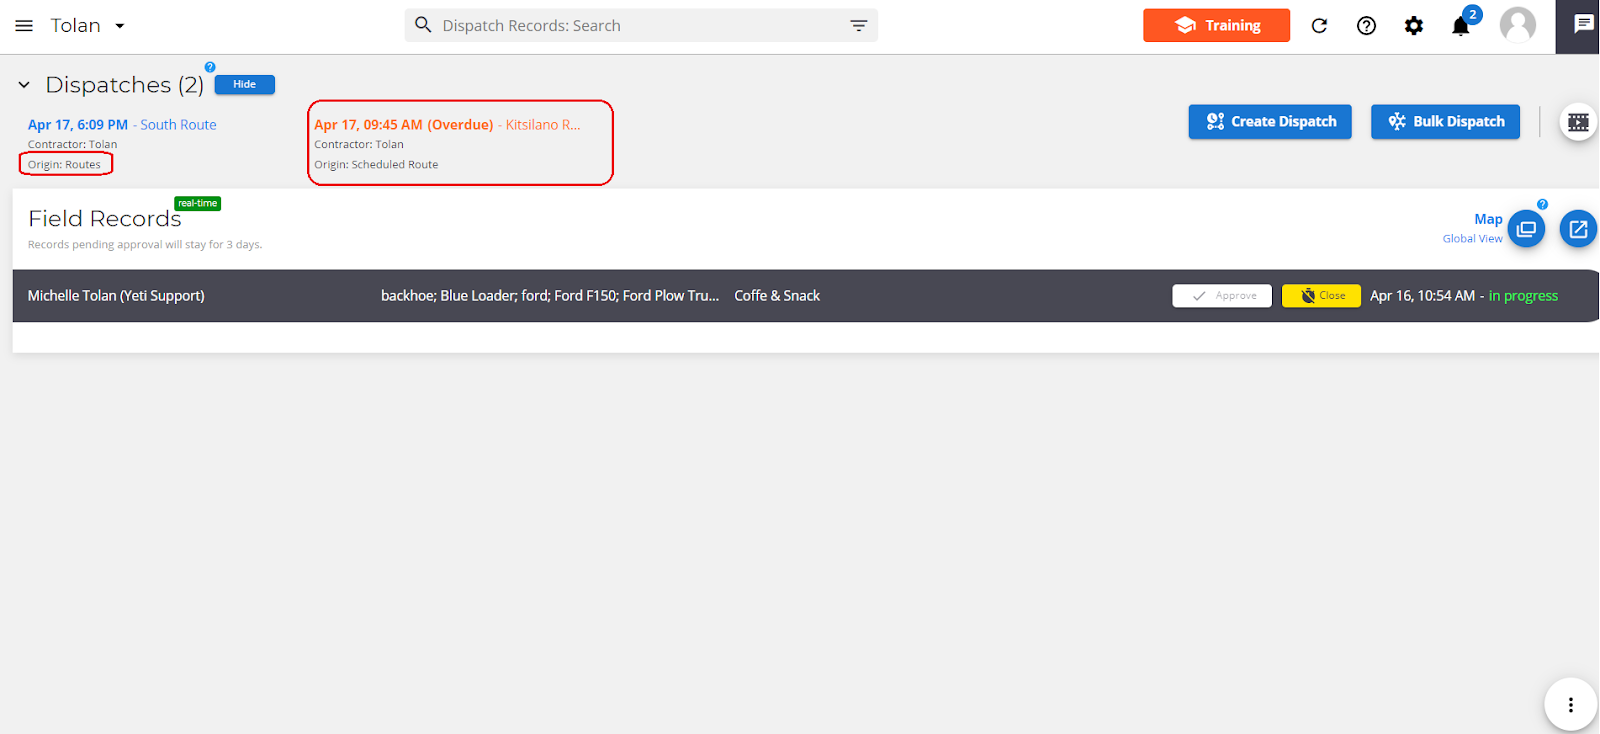
Dispatch screen
When you schedule a route, it will appear on dispatch for the time you’ve set its availability for. When you schedule a route to be recurring, only the next scheduled route for that sequence will be displayed. Unlike dispatch routes that come from the route page, you can not open up the route pop-up by clicking on it. This can only be done from the Schedule page. You can edit an overdue (unperformed route) via the Schedule by clicking on the overdue route and editing from the pop up, or you can drag the item into the Unschedule Items area. You can distinguish between regular dispatch routes and Scheduled routes by noting the origin, which is noted at the end.