February 22, 2024
Back to Account Help
February 22, 2024
Pushing records from the Billing Report to your Quickbooks online account
Here are some scenarios and rules when we push records from the Yeti Billing Report into Quickbooks Online.
- How to create an invoice in QuickBooks using Yeti
- Splitting a current invoice into more invoices
- Replacing all information in an invoice
- Adding Information to an existing invoice
- Change Invoice Number
- Splitting one invoice into Two or more invoices
- Merging invoices
- Important Information
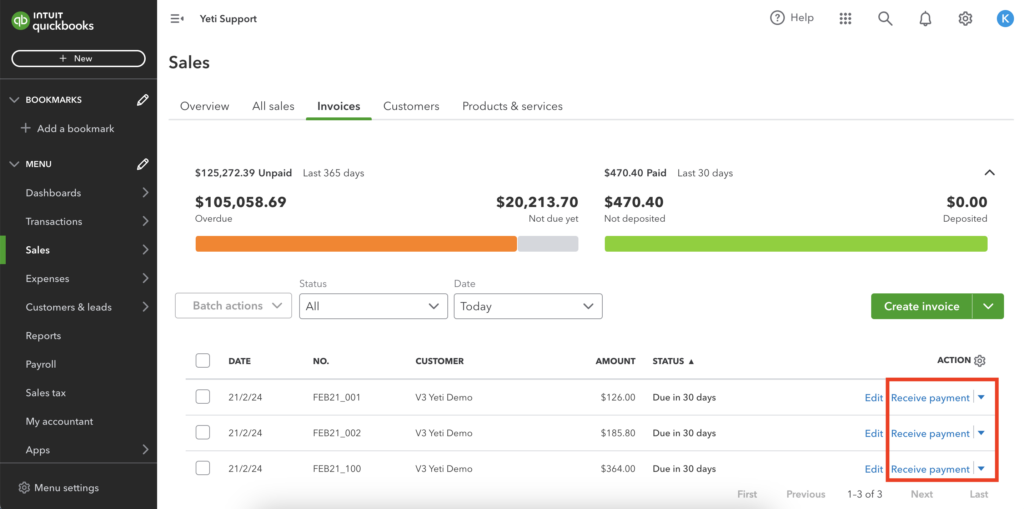
How to create an invoice in QuickBooks using Yeti
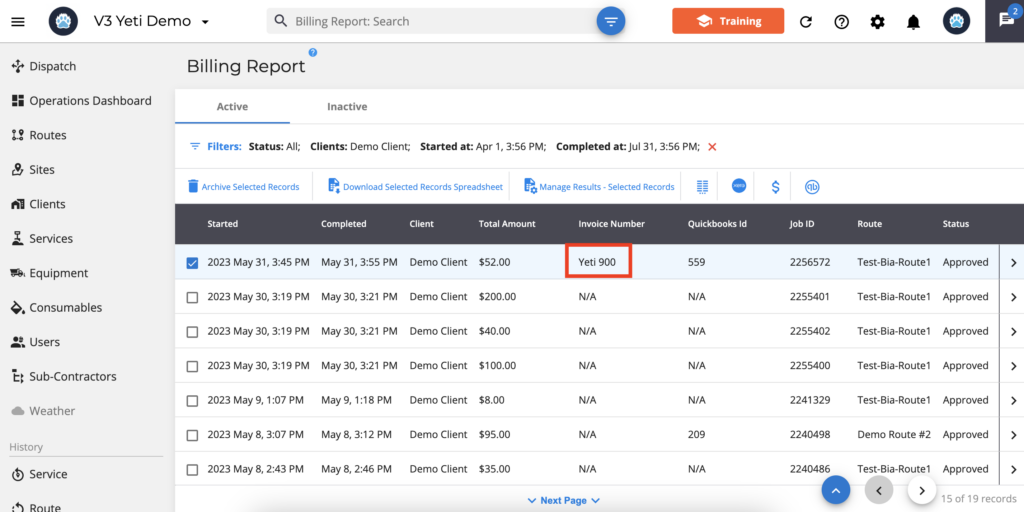
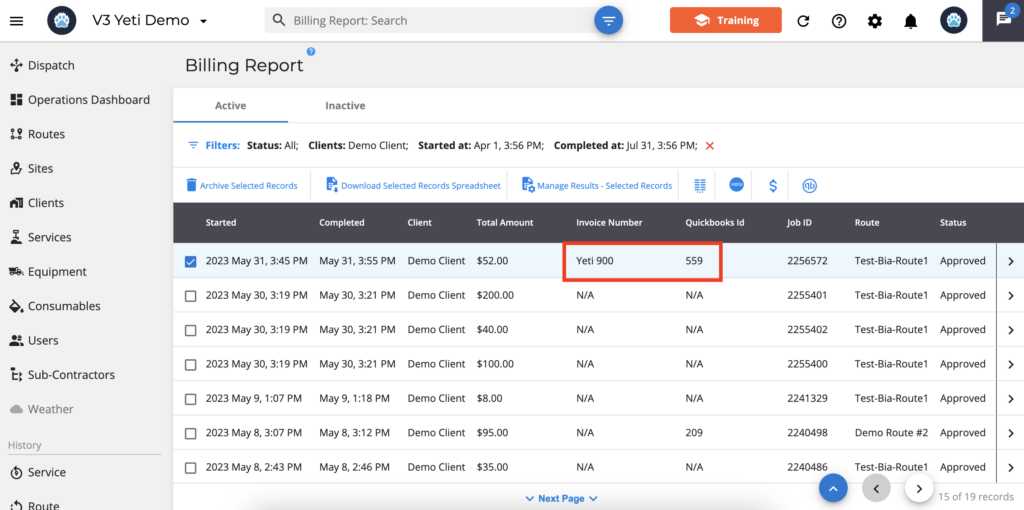
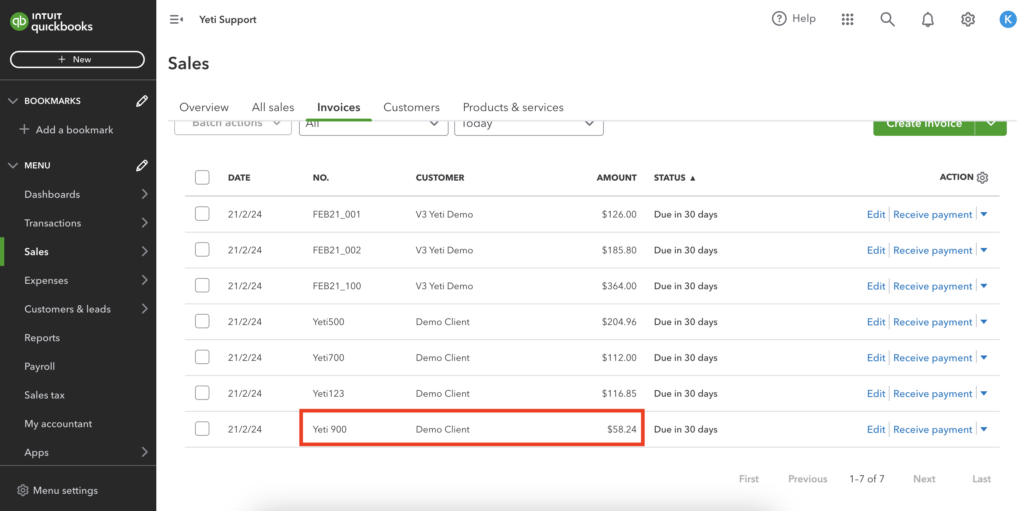
The first scenario involves sending records without an invoice number to Yeti and pushing them to Quickbooks online. Below is an example
Splitting a current invoice into more invoices
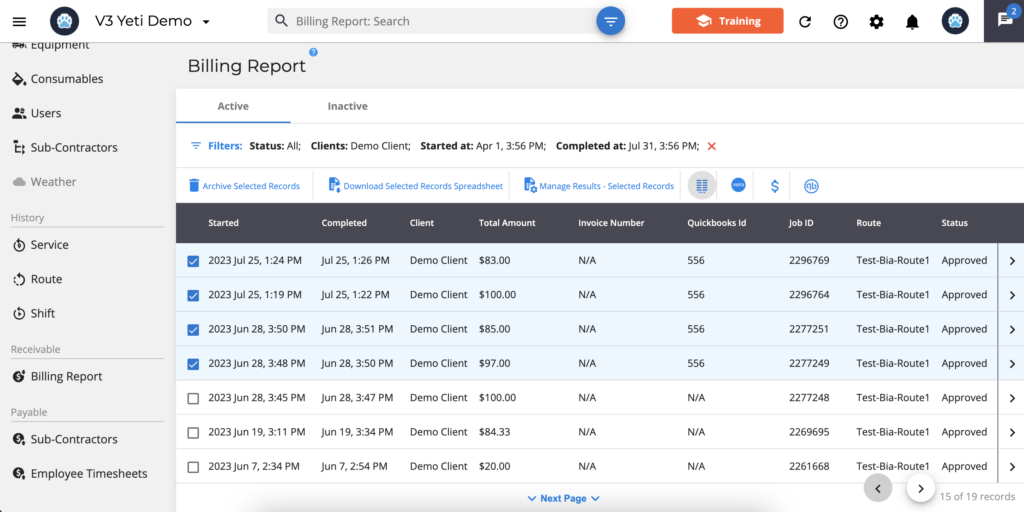
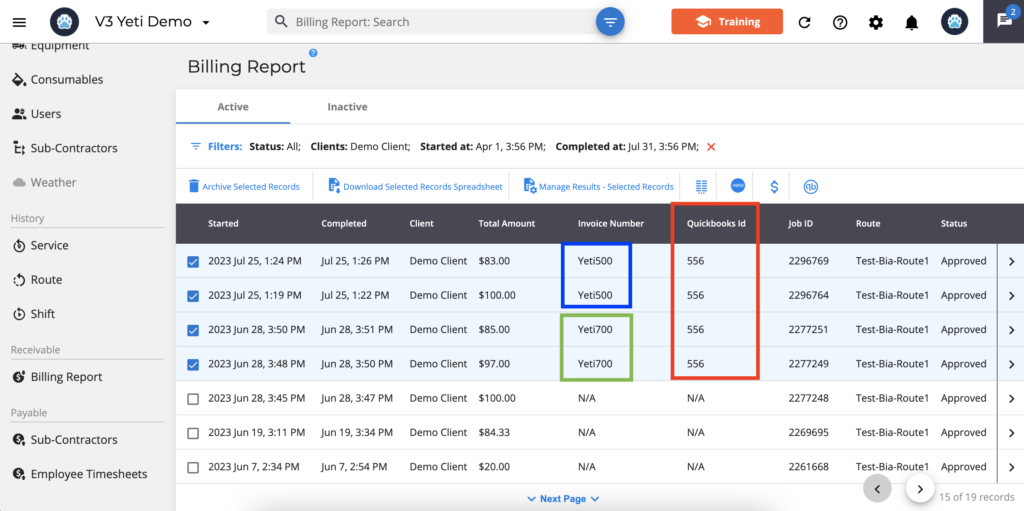
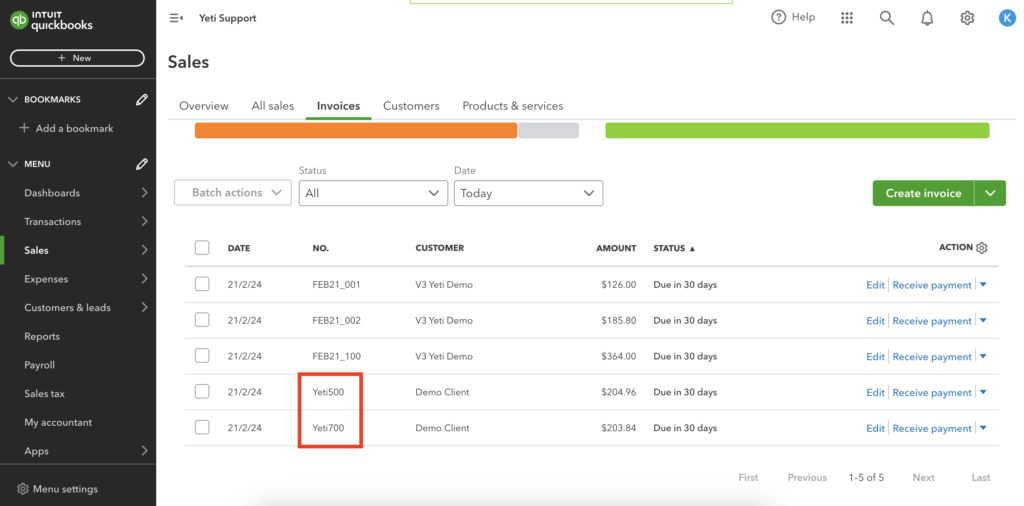
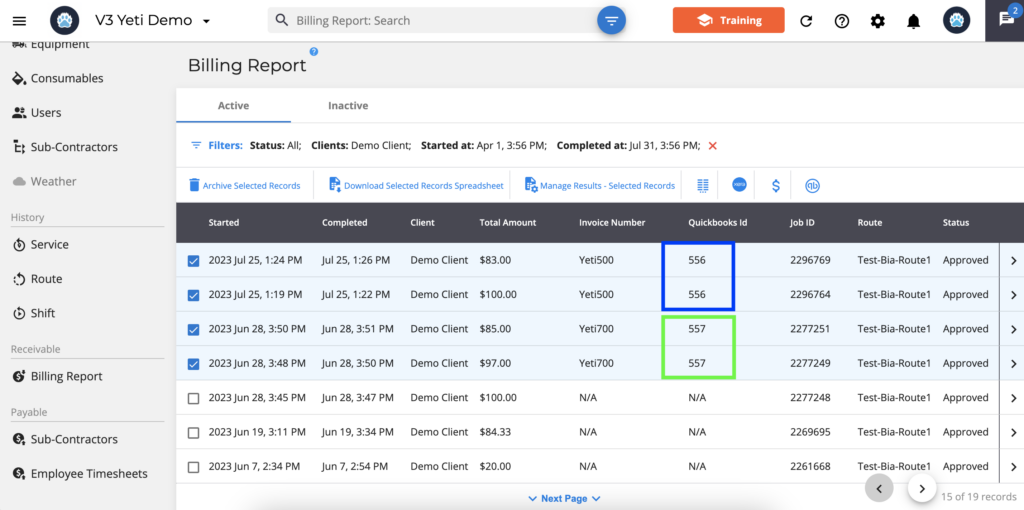
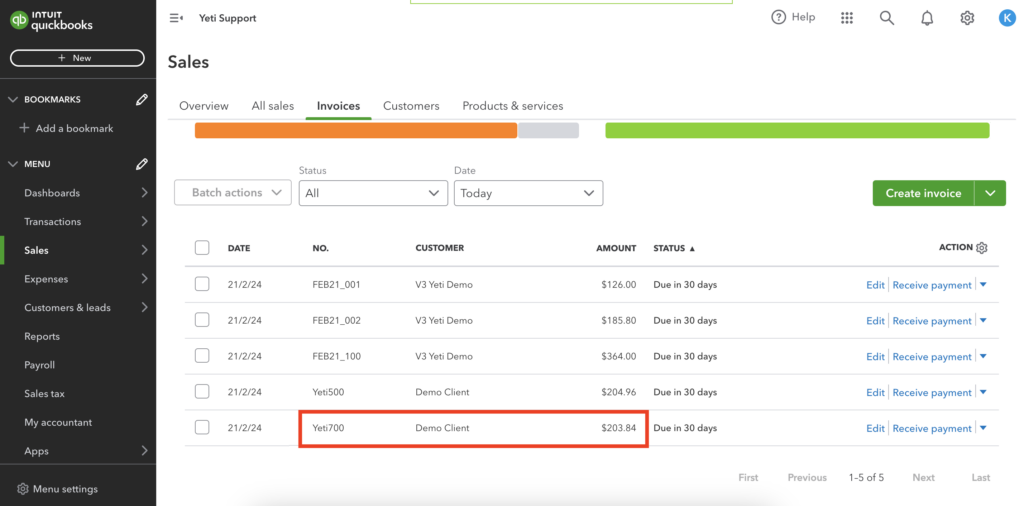
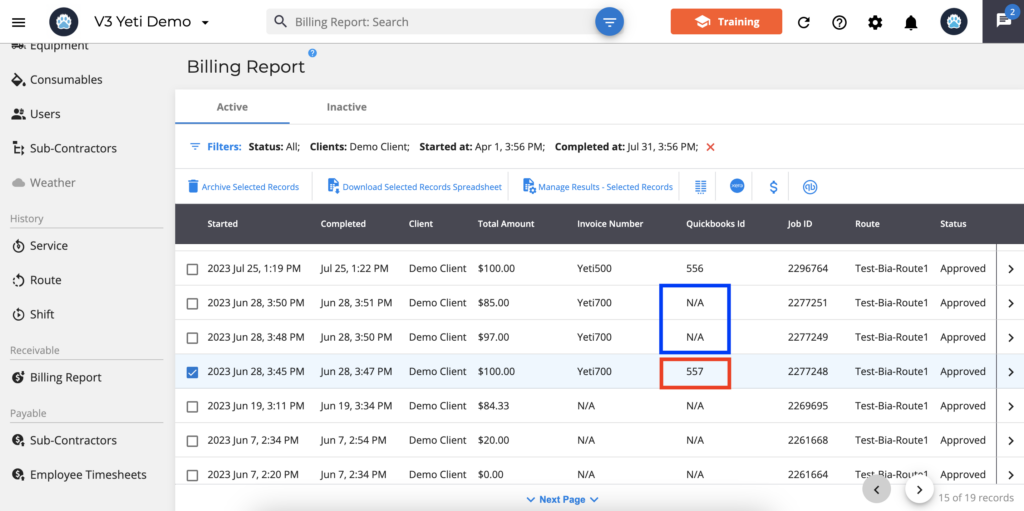
The second scenario involves resending records to your Quickbooks online account by adding different invoice numbers. In this case, choose the records you have already sent but with the same Quickbooks ID, and then enter the number of different invoices. When pushing records, the Quickbooks ID, which was previously unique to each record sent, will appear separately.
The example below shows four records with the same Quickbooks ID “556”, that means that they have already been pushed. Now, two records were set with the invoice “Yeti500” and the other two with “Yeti700”. The “Yeti500” invoice continues with the original Quickbooks ID, and the “Yeti700” invoice appears with a new Quickbooks ID when pushed.
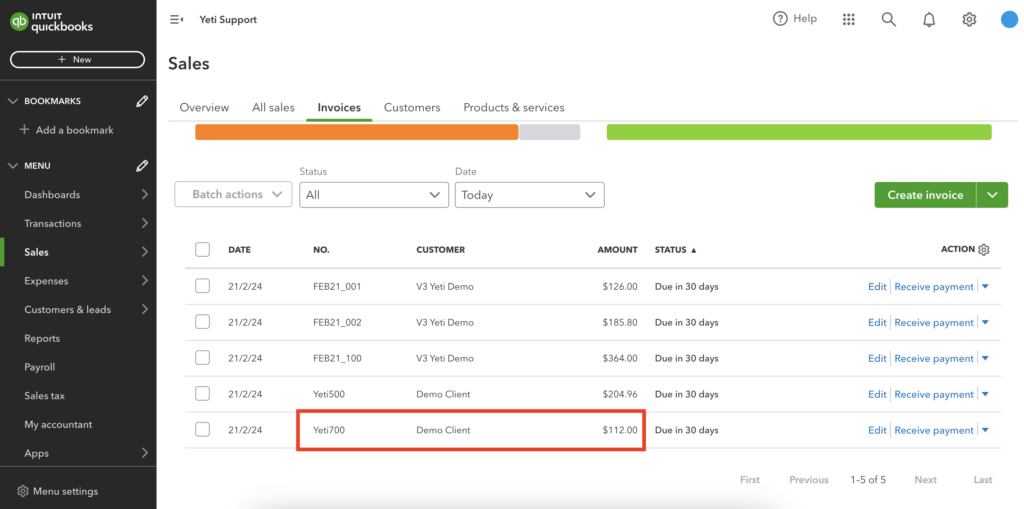
Quickbooks online after pushing the record:
Quickbooks ID after pushing the record:
Replacing all information in an invoice
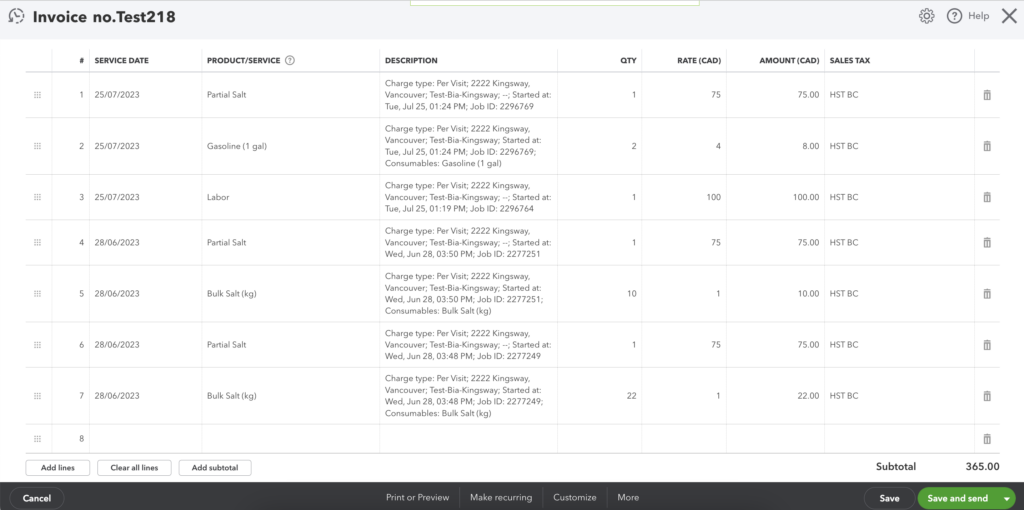
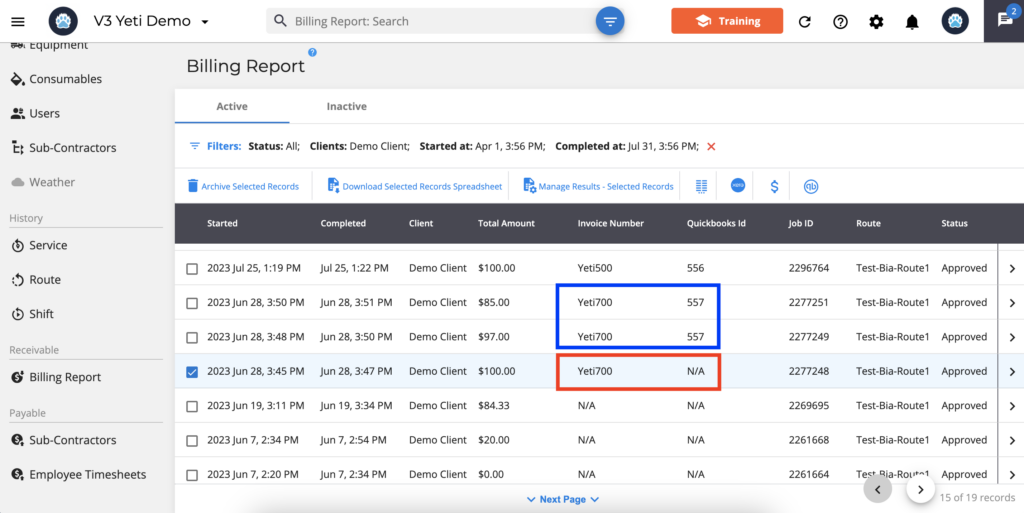
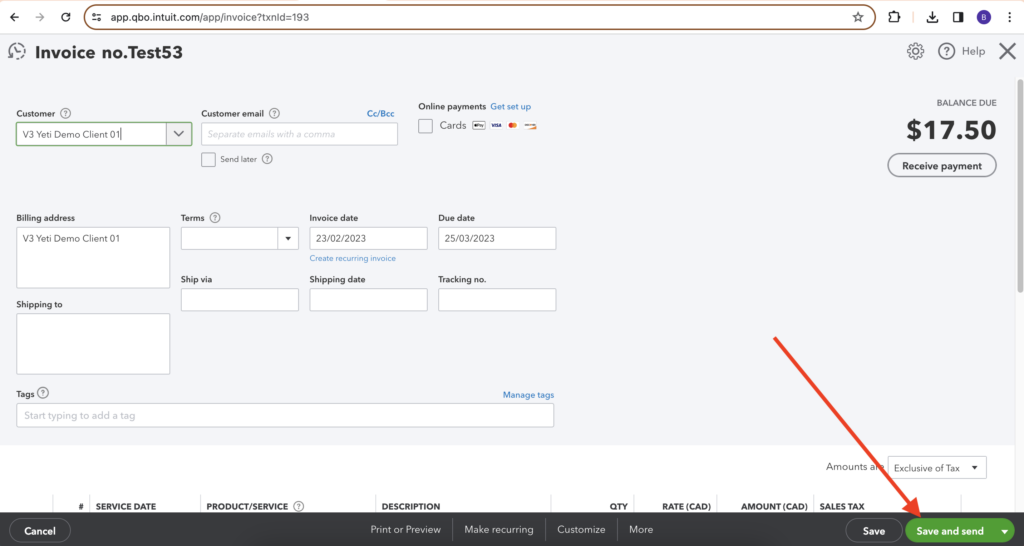
The third scenario involves replacing an invoice already sent to your Quickbooks account online. As an example, you have two records for the invoice “Yeti700” that shows Quickbooks ID “557”. If you place the same invoice number for another record that has not yet been sent to Quickbooks online, it will update the invoice with only that record.
Yeti screenshot before pushing the record
Quickbooks screenshot before pushing the record
Yeti screenshot after pushing the record
Quickbooks screenshot after pushing the record
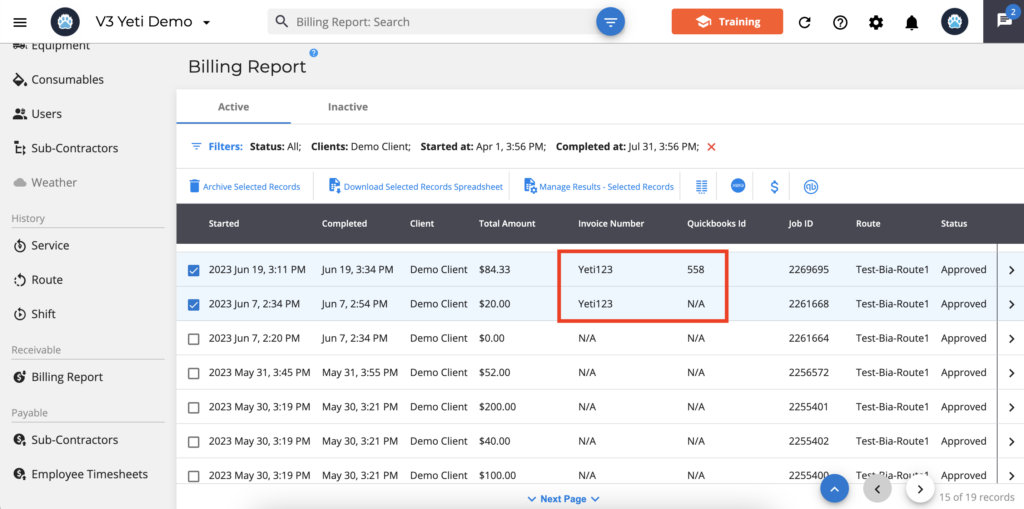
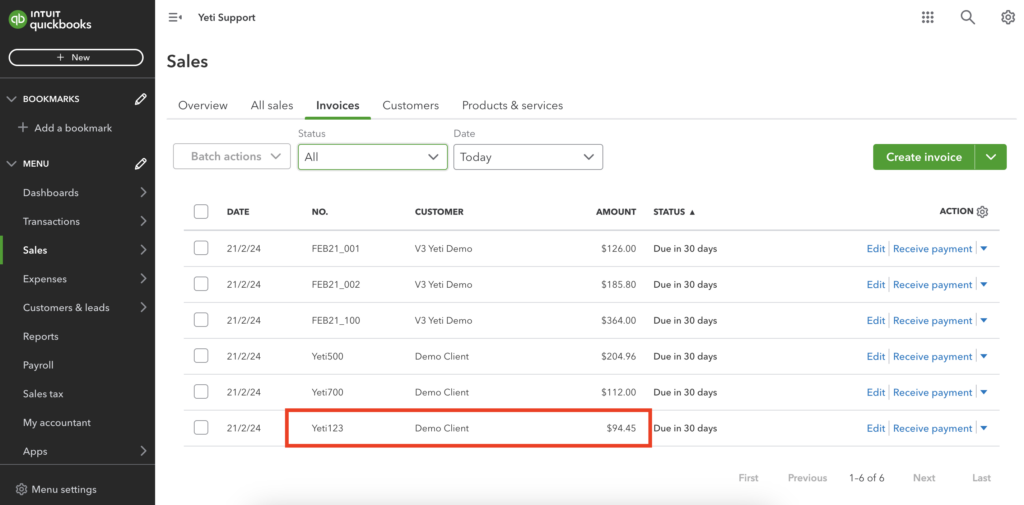
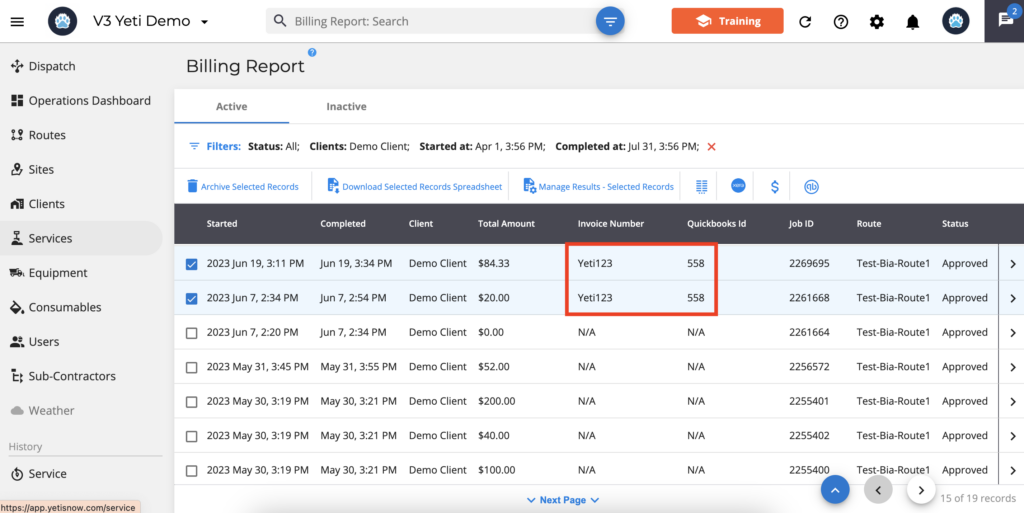
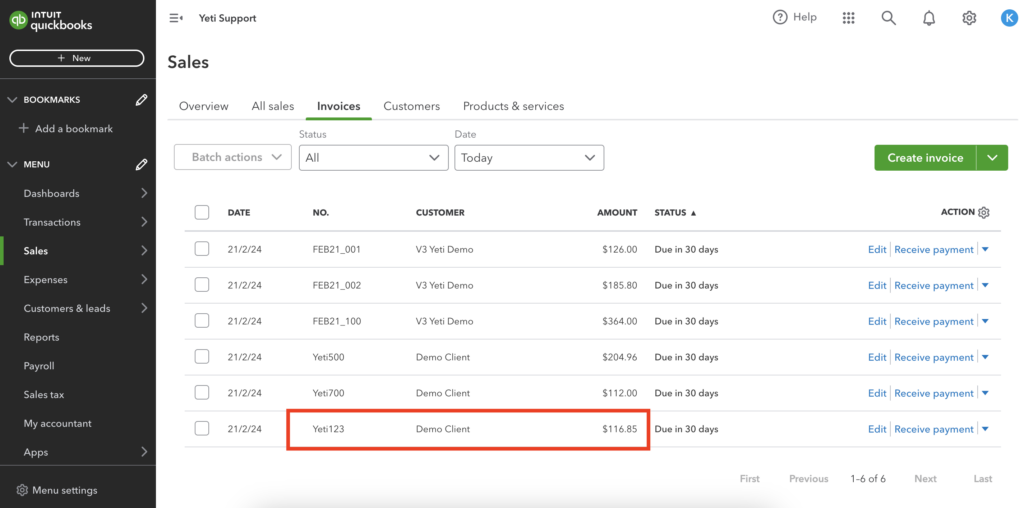
Adding Information to an existing invoice
The fourth scenario involves sending a record with the invoice “Yeti123”, but forgetting to insert another record. You can place the same invoice for the other record in this case. Select in Yeti the invoice record “Yeti123” that has already been sent to Quickbooks online and re-send it. These two records will appear with the invoice “Yeti123” in Quickbooks.
Yeti screenshot before pushing the record
Quickbooks screenshot before pushing the record
Yeti screenshot after pushing the record
Quickbooks screenshot after pushing the record
Change Invoice Number
The fifth scenario is that you may want to rename an invoice that you have already sent to Quickbooks online and push it back once the invoice number is updated. Here is an example
Yeti screenshot before pushing the record
Quickbooks screenshot before pushing the record
Yeti screenshot before pushing the record and renaming the invoice number
Yeti screenshot after pushing the record
Quickbooks screenshot after pushing the record
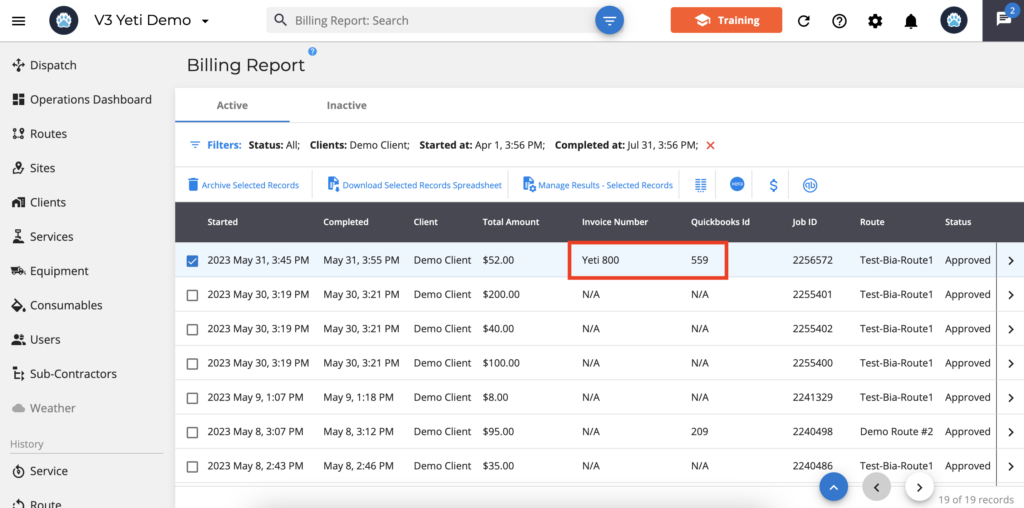
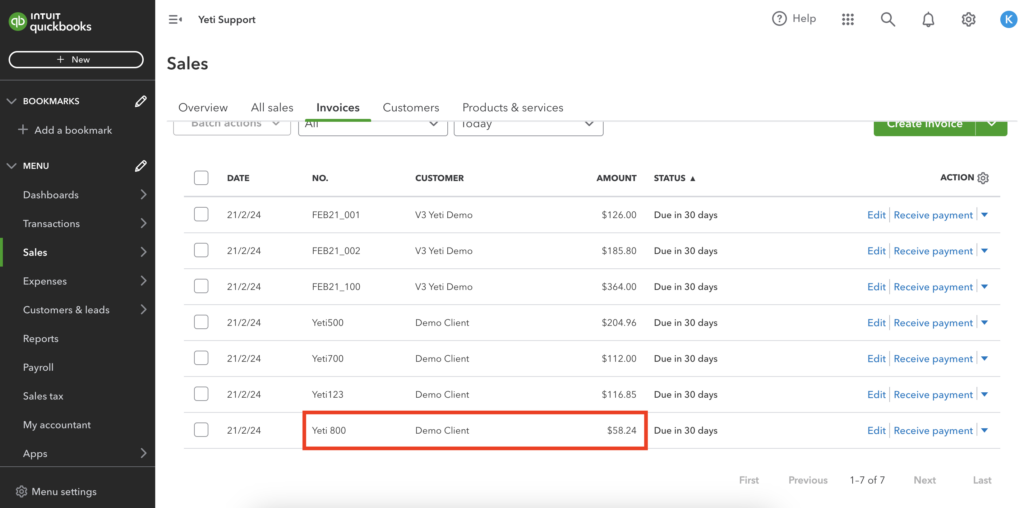
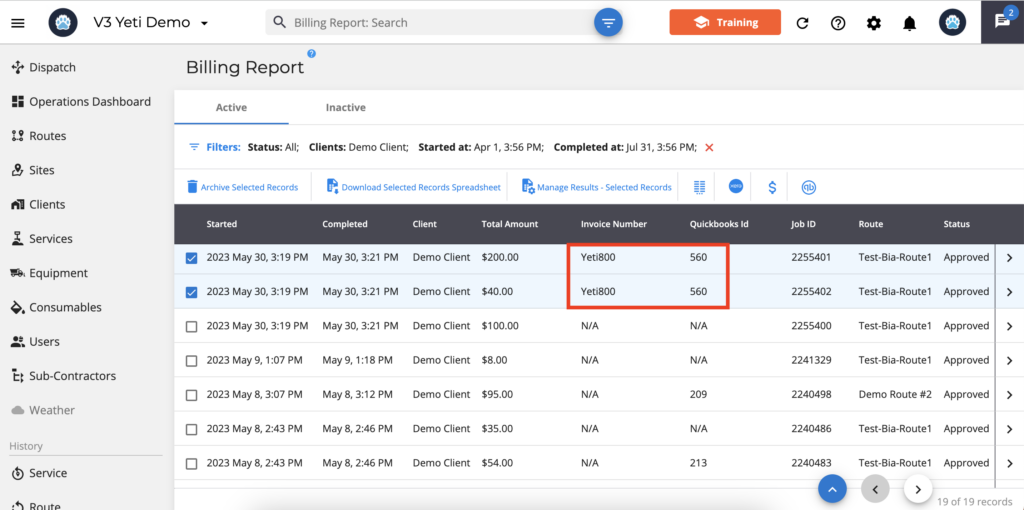
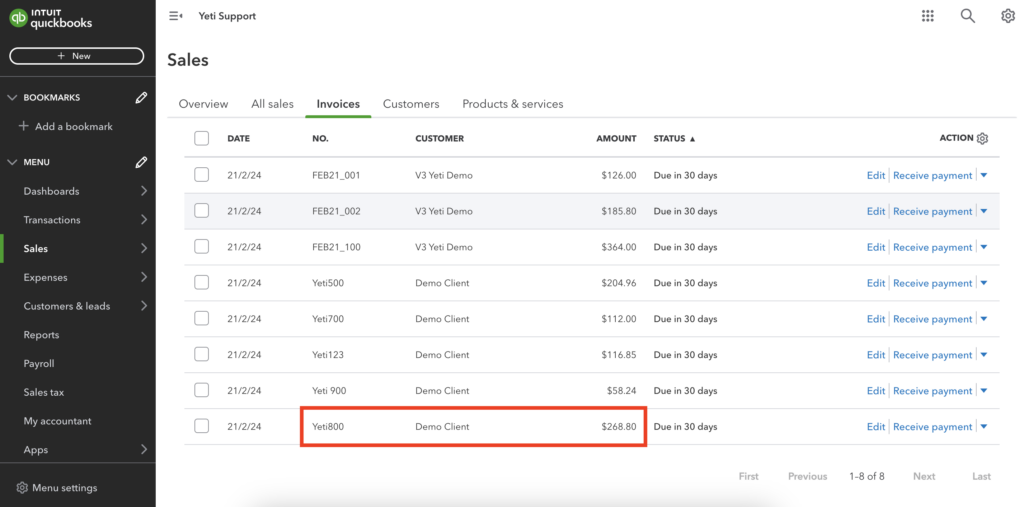
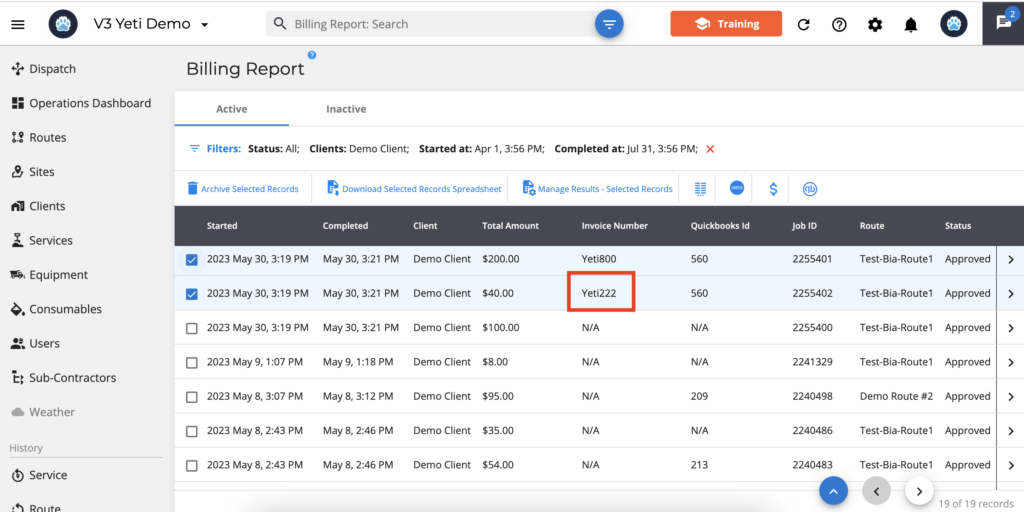
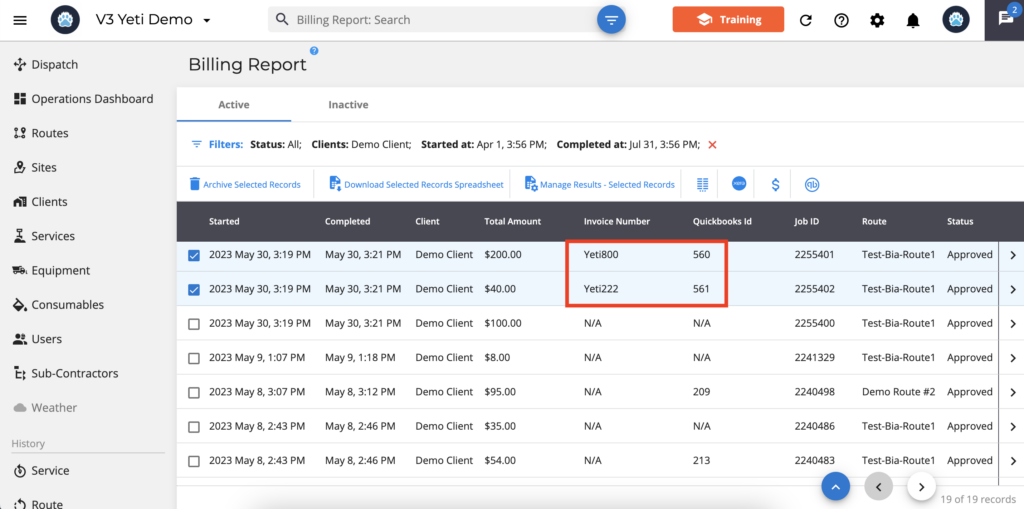
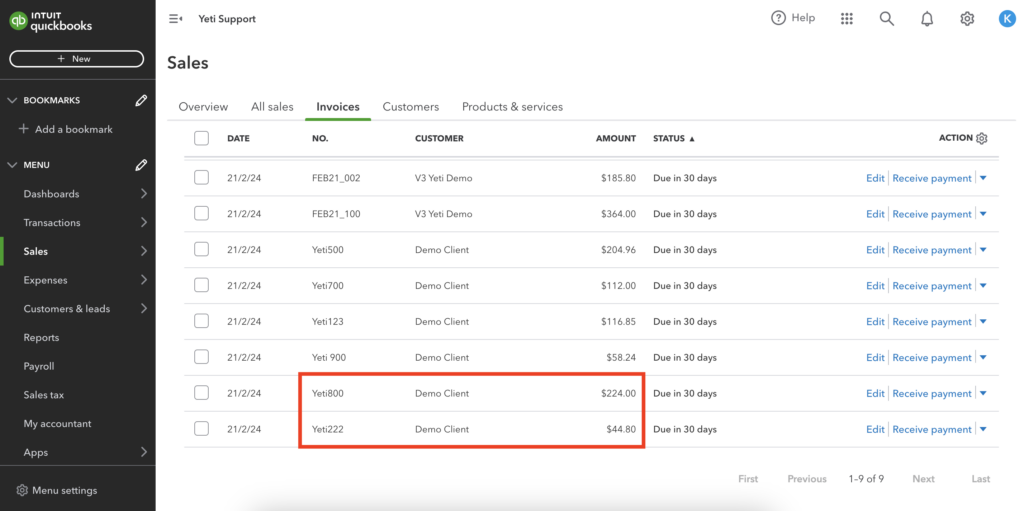
Splitting one invoice into Two or more invoices
In scenario six, if you sent one or more records to Quickbooks with the same invoice number, you can also separate them into more invoices so they appear separately in your Quickbooks account.
In the example below, the two records were sent with the invoice “Yeti800”, which meant that two different invoices would appear in Quickbooks when selecting the two records in Yeti and renaming one of the records to “Yeti222”.
Yeti screenshot before pushing the record
Quickbooks screenshot before pushing the record
Yeti screenshot before pushing the record and renaming the invoice number
Yeti screenshot after pushing the record
Quickbooks screenshot after pushing the record
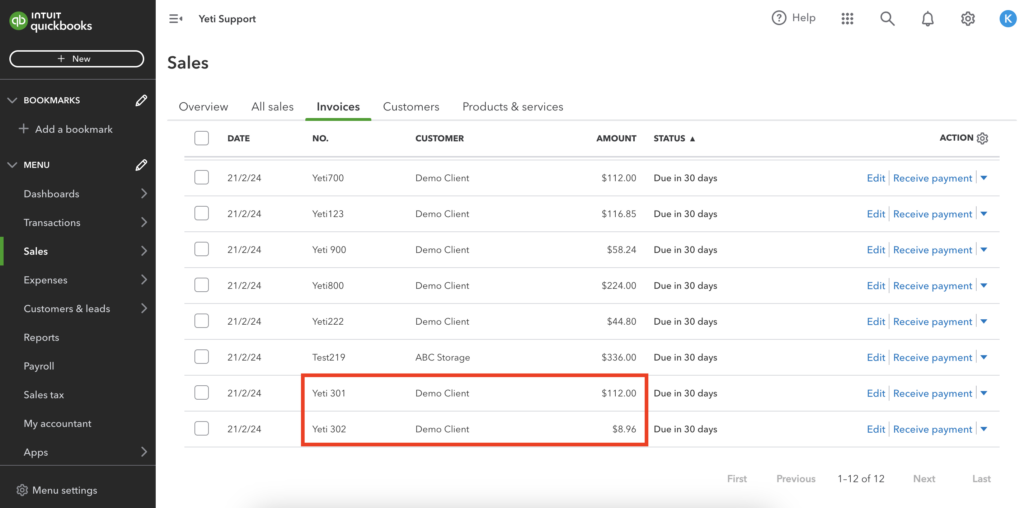
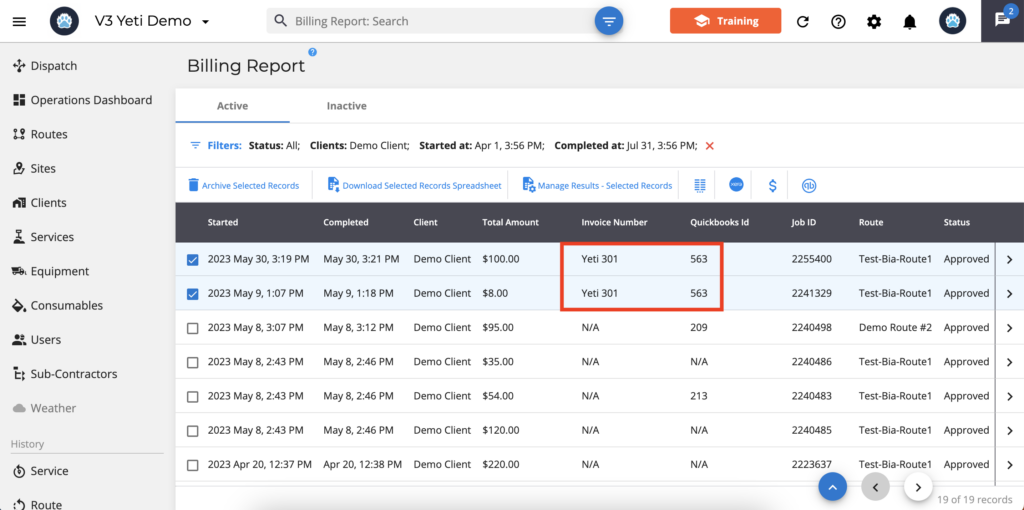
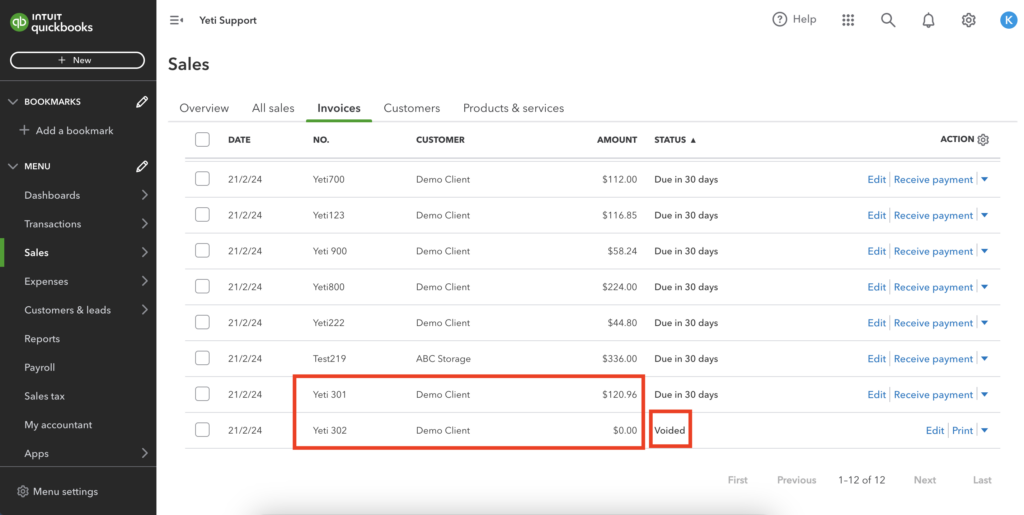
Merging invoices
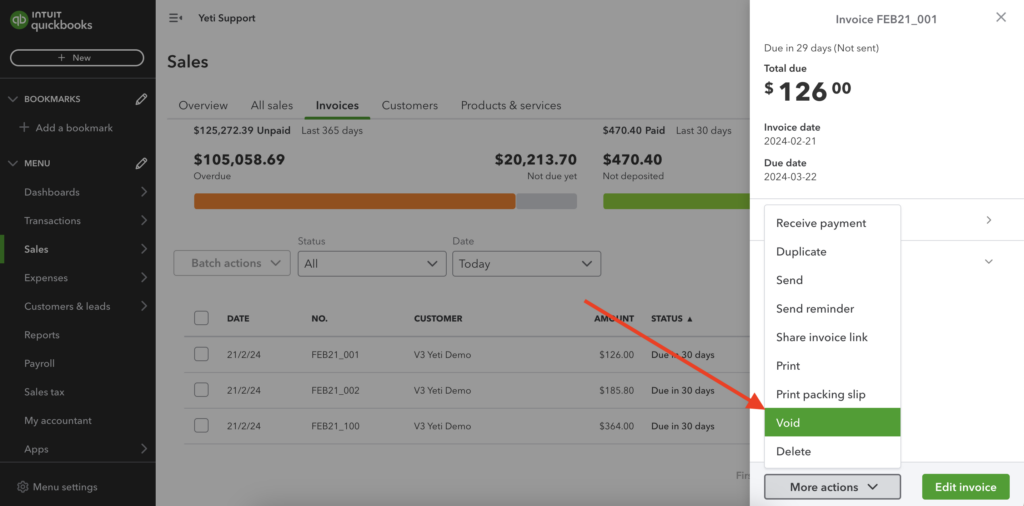
The seventh scenario is the exact opposite of scenario six. In this case, you sent Quickbooks two records with different invoice numbers, but you want them to be one. In this case, rename the invoice number on the Yeti and send it again. An old invoice will show up as “Voided” with a zero value.
Yeti screenshot before pushing the record

Quickbooks screenshot before pushing the record
Yeti screenshot before pushing the record and renaming the invoice number

Yeti screenshot after pushing the record
Quickbooks screenshot after pushing the record
*** Important Information ***
Pushes will be blocked in the following situations:
- If the invoice was updated in Quickbooks
- In case the payment was recorded in Quickbooks
- If the invoice was sent via email
- In the case of a voided invoice in Quickbooks